Hello Friends
Wishing you all a very
Happy and Prosperous New Year!!!
Welcome to Heartfelt Wednesday... I am back with another heartfelt inspiration for you all
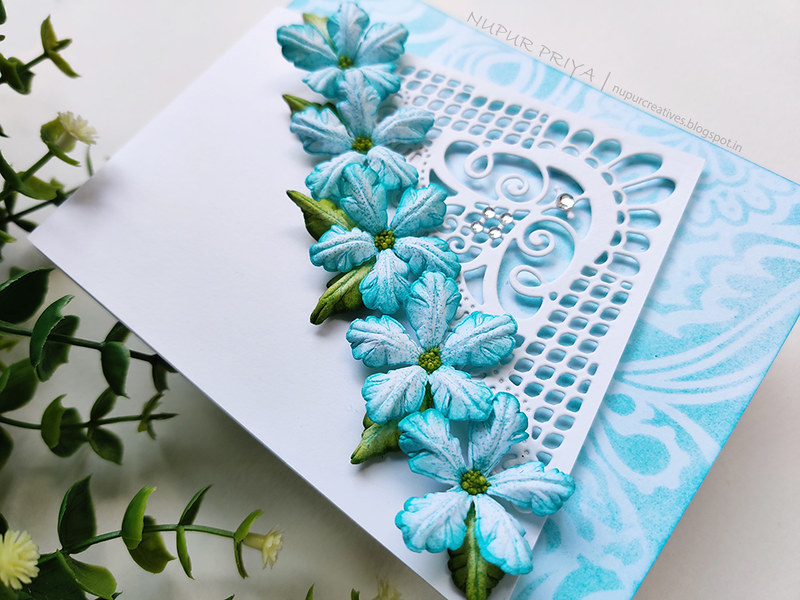
Today I have used Petunias for my card. It is one of the older flower set and it is very pretty.
Read till the end for full supply list and instructions for this card.


Heartfelt Creations:
HCPC-3785 Small Classic Petunia Cling Stamp Set
HCD1-7139 Small Classic Petunia Die
HCD1-7214 Ornate Pocket Accents Die
HCPP1-438-2 Paper Pack of 10 - White
HCPP1-475 Deluxe Flower Shaping Paper - Pack of 50
RACP992 Ranger Archival Ink Pad - Garden Patina
RACP436 Ranger Archival Ink Pad - Leaf Green
HCDA2-450 Stack and Store Daubers-Pack of 30
HCST1-401 Deluxe Flower Shaping Kit
359848 Spellbinders Tool N' One
411231 5pc. Acrylic Block Set
352854 Metal Tip for Adhesive Bottles
159723 Designer Dries Clear Adhesive
D120601 Darice Adhesive Foam Strips
ANC852 Bright Ideas Prills : Ribbit
Other Products: Memory Box Rhapsody Stencil and rhinestones.
Instructions:
Ink a 4 1/4" x 5 1/2" white card base with Garden Patina Ranger Archival Ink using Memory Box Rhapsody Stencil. Die cut a piece of white cardstock using the dies from Ornate Pocket Accents Die. Take a piece of 4 1/4" x 5 1/2" white cardstock and trace the longer scallop edge of the die cut with a pencil and fussy cut it. Adhere the die cut on the cardstock so that one corner of the cardstock is the lacy design. Adhere this piece on the cardbase at an angle using Darice Adhesive Foam Strips as shown. Cut off th excess cardstock that hangs off the edge of the cardbase.
Stamp the flowers and leaves from Small Classic Petunia Cling Stamp Set on Deluxe Flower Shaping Paper using Garden Patina Ranger Archival Ink. Color the flowers with the same ink and the leaves with Leaf Green Archival Ink Pad . Die cut them using the matching dies from Small Classic Petunia Die. Shape them using Deluxe Flower Shaping Kit. Adhere a small amount of Ribbit Prills to the flower centers using Designer Dries Clear Adhesive. Adhere them to the cardbase as shown. Add few rhinestones to the die cut to add finishing touch.
Hope you like it...
Thank you for visiting today... :)


No comments:
Post a Comment
Hi thanks for dropping by and having a look at my blog. Your comments are much appreciated. Hugs. Nupur...