Wednesday 29 April 2015

You're The Best

Hello friends...
I am back with Heartfelt Creations inspiration...
I am taking a few days off from the blog so all the posts that go live here will be scheduled & I will try to reply to the comments as and when possible...  :)

Now moving on to today's project...


Products Used:

Other Products:
Salty Ocean, Mowed Lawn, Picked Raspberry, Festive Berries, Spiced Marmalade, Wild Honey, Black Soot, Gathered Twigs & Vintage Photo Distress Inks, Black Archival Ink, Ebosser, Martha Stewart Scoreboard, Cuttlebug Acanthus Embossing Folder, White, Black & Watercolor Cardstock, Koi Waterbrush,Viva Decor Pearl Pen, Ribbon & Adhesive.

Project Instruction:
Take a 6" x 3" tag, distress the edges with scissors & ink with Picked Raspberry & Festive Berries Distress Inks. Take 5 3/4" x 2 3/4" tag, emboss it with Cuttlebug Acanthus Embossing Folder, distress the edges with scissors, ink with Picked Raspberry & Festive Berries Distress Inks & adhere to the larger tag.

Stamp the bicycle stamp from Balloon and Bicycle Cling Stamp Set on watercolor cardstock with Black Archival Ink, color with distress inks & trim to 2 3/4" x 3". Adhere this on  slightly larger black cardstock. Die cut white cardstock with Timeless Amour Die, ink with Picked Raspberry & Festive Berries Distress Inks & adhere it to the back of the colored piece as shown. Adhere this arrangement on the prepared tag with foam Adhesive.

Stamp the sentiments from Everyday Hero Cling Stamp Set, You Inspire Me Cling Stamp Set & Everyday Hero Newsprint Cling Stamp Set & cut them out with Everyday Heroes Die. Ink them with Picked Raspberry & Festive Berries Distress Inks, shape them & adhere them as shown. Add some ribbon to the tag to finish it off.


Wednesday 22 April 2015

Hydrangea Bird Bath

Hello friends & welcome to Heartfelt Creations Wednesday...
I have made a very lacy watercolored card for today's inspiration...


Products Used:
HCPC 3647 Hydrangea Bird bath Cling Stamp Set
HCPC 3645 Leafy Branch Cling Stamp Set
HCPC 3644 Birds & Blooms Cling Stamp Set
HCD1 757 Leafy Branch Die
HCST1-401 Deluxe Flower Shaping Kit

Other Products:
Victorian Velvet, Aged Mahogany, Salty Ocean, Crushed Olive, Forest Moss, Brushed Corduroy, Gathered Twigs & Walnut Stain Distress Inks, Coffee Archival Ink, Ebosser, Martha Stewart Scoreboard, Cuttlebug Poppy Embossing Folder, Spellbinders A2 Valiant Honor Die, Spellbinders A2 Scalloped Borders Two, Spellbinders Heirloom Oval Die, White, Brown & Watercolor Cardstock, Koi Waterbrudh,Viva Decor Pearl Pen, Pearls & Adhesive.

Project Instruction:
Take a 6" x 6" white card base, die cut the front edge with Spellbinders A2 Scalloped Borders Two die & ink with Brushed Corduroy Distress Ink. Take a pice of 5" x 5 3/4" white cardstock, cut the right edge with Spellbinders A2 Scalloped Borders Two die , emboss with Cuttlebug Poppy Embossing Folder & ink with Brushed Corduroy Distress Ink. Adhere this to the card base. Use the 2 largest die from Spellbinders Heirloom Oval Die to die cut a white cardstock, ink with Gathered Twigs Distress ink & adhere to the card base.

Die cut a piece of brown cardstock with Spellbinders A2 Valiant Honor Die & ink with Walnut Stain Distress Ink.  Stamp the Hydrangea Bird bath  Cling Stamp Set on watercolor cardstock with Coffee Archival ink & color with various distress inks. Cut it to mat on the die cut we just made. Adhere this to the card base with foam adhesive.

Stamp the flowers from Birds & Blooms Cling Stamp Set & leaves from Leafy Branch  Cling Stamp Set with Coffee Archival Ink on white cardstock & cut with Leafy Branch Die. Ink the flowers with Victorian Velvet & Aged Mahogany Distress Inks & the leaves with Crushed Olive & Forest Moss Distress Inks. Shape them using Deluxe Flower Shaping Kit. Arrange & adhere them on the card front. Add the flower centers with Viva Decor Pearl Pen. Add some  pearls to embellish.


Tuesday 21 April 2015

Butterfly Post-it-Notes

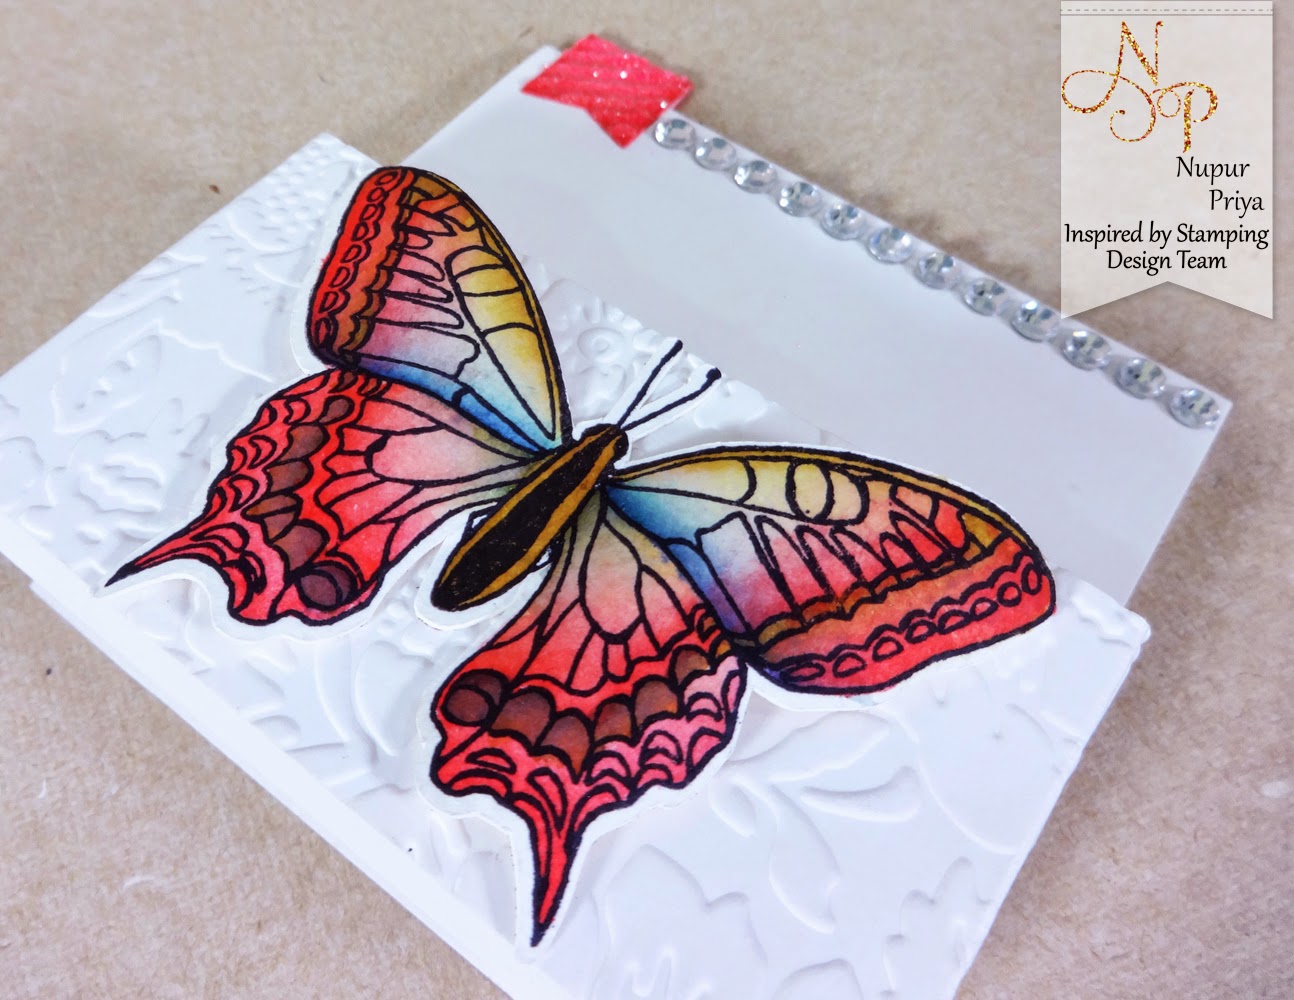
Hello friends... This week we are sharing our favorite IBS stamps... IBS has so many great stamp sets that it was a bit difficult to choose just one but I selected the Butterflies stamp set from the latest release. 
 I have made a Post-it-Notes holder using this stamp & the co-ordinating cut file from Butterflies Cut File. The little glittered banner tab on top is cut with  Fancy Labels 3 Die. I have folded it & adhered on both sides of the top fold which keeps the stand from opening up falling...  

I hope you like my project... thanks for visiting today...


Wednesday 15 April 2015

You Inspire Me

Hello friends...
Welcome to Heartfelt Creations Wednesday...
Today I have a masculine card for you... 
I struggle a lot with Masculine cards... Its difficult for me to make cards without flowers or ribbons & that too in masculine colors... Whenever I think of masculine cards browns & navy colors automatically come to my mind...
But this time I thought of using a different color combination... so I have used Cracked Pistachio & Black Soot Distress Inks with gold embossing on my card...   & I love how it turned out...


As you can see in the above pic that I couldn't resist adding a little bit of  glitter & sparkle on my card... LOL....


Products Used:
HCPC-3667 You Inspire Me Cling Stamp Set
HCPC 3598 World Map Cling Stamp Set
HCD1-761 Everyday Heros Die

Other Products:
Cracked Pistachio & Black Soot Distress Inks, Black Archival Ink, Versamark Ink, Ebosser, Martha Stewart Scoreboard, White Cardstock, Memory Box Diamond Stencil, Holographic glitter, Ranger Gold Embossing Powder, Ranger Heat-it tool, Ranger Transparent Texture Paste, Rhinestones & Adhesive.

Project Instruction:

Take a 5 1/2" x 4 1/4" card base & ink the edges with Cracked Pistachio Distress Ink. Stamp World Map Cling Stamp Set on a white cardstock, trim to 4" x 5 1/4" Black Soot Distress Ink. Mix some Ranger Transparent Texture Paste with a little Black Soot Distress Ink & apply it to the stamped panel using Memory Box Diamond Stencil. Sprinkle a little Holographic glitter on the wet texture paste & let it dry completely & then adhere it to the card front with foam adhesive.

Stamp the sentiment from You Inspire Me Cling Stamp Set on white cardstock with Versamark Ink & heat emboss it with Ranger Gold Embossing Powder. Trim it & mat it on a slightly larger cardstock whose edges are embossed with Ranger Gold Embossing Powder.

Die cut white cardstock with the decorative die from Everyday Heros Die & cut it in half. Ink it with Cracked Pistachio Distress Ink & adhere to the sentiment panel. Adhere this to the card front with foam adhesive. Add some  rhinestones to embellish.


Sunday 12 April 2015

Butterflies

Hello friends...

Welcome to some IBS inspiration...
For today's card I have used the gorgeous Butterflies stamp set & Butterflies Cut File.

I cut 3 pieces of watercolor cardstock from Butterflies Cut File with my cameo & stamped the butterflies from Butterflies stamp set. Next I colored them using some distress inks & added black pearls to their bodies.
Then I adhered them to my card base also made with cameo...

Don't you just love the bright & colorful butterflies...  :)


Thursday 9 April 2015

Bouquets of Wishes

Hello Friends...

I have a very pretty cards today made with a stamp from one of  our new release  Tulip Bouquet stamp set... I love the tulip bouquet stamp set... it is so beautiful with some amazing sentiments...  :)

I have watercolored the image with distress inks... The sentiment is also from the same stamp set..


Hope you like my card... Thank you for visiting today  :)


Wednesday 8 April 2015

You make the world a better place...

Hello friends...
Today is the new release day at Heartfelt Creations
Everyday Heroes Collection
Do you have an unsung hero in your life? Your champion may never have a medal pinned to his or her chest, but you can demonstrate your gratitude with the Everyday Heroes Collection from Heartfelt Creations. These epic stamps, dies and papers salute the extraordinary "ordinary people" who inspire us as they live their daily lives with honor and integrity. Greys, teals, khakis, creams and browns have been blended with distressed newsprint, vintage maps, globes, sailing ships, timepieces, combat boots, stripes, dots and flourishes to create a rugged, paper collection that is timeless in its appeal. Six deeply etched cling stamp sets featuring detailed collages, inspiring sentiments and unique circular elements mesh perfectly with the paper collection and matching set of dies. Let's sing the praises of the unsung heroes in our lives with the Everyday Heroes Collection from Heartfelt Creations!


Products Used:

Other Products:
 Vintage Photo, Brushed Corduroy, Walnut Stain, Chipped Sapphire, Broken China & Black Soot Distress Inks, Black Archival Ink, Ebosser, Martha Stewart Scoreboard, White Cardstock, Tim Holtz Harlequin Stencil, Rhinestones, Twine & Adhesive.

Project Instruction:

Take a 6" x 6" card base & ink the edges lightly with Brushed Corduroy Distress Ink. Take a 5 3/4" x 5 3/4" White Cardstock & stamp Everyday Hero Newsprint Cling Stamp Set with Black Archival Ink several times. Ink it with Chipped Sapphire, Broken China, Brushed Corduroy & Black Soot Distress Inks. Now place Tim Holtz Harlequin Stencil &on the inked panel & ink it with Chipped Sapphire Distress ink. Adhere it on the card base.

Stamp My World Cling Stamp Set with Walnut Stain Distress ink on a piece of white cardstock & trim it. Ink it with Vintage Photo, Brushed Corduroy & Walnut Stain Distress Inks. Mount it on another pices of white card stock 1/4" larger & inked lightly with Brushed Corduroy Distress ink. Adhere it on the card base with foam adhesive as shown.

Stamp the sentiment from Everyday Hero Cling Stamp Set on a piece of white cardstock, cut it with Everyday Heros Die & ink lightly with Brushed Corduroy Distress ink. Make a small panel similar to the base of the card & cut it with Everyday Heros Die which will fit inside the largest decorative die & adhere it to the base die cut inside the sentiment circle. Stamp the globe from the My World Cling Stamp Set on white cardstock, color with distress inks & Fantastix Blending Tool, cut it with the globe die from Everyday Heros Die & adhere it to the die cutwith sentiment. Adhere the prepared die cut panel on the card base with foam adhesive. Add some twine & rhinestones to embellish.


Wednesday 1 April 2015

Time with You

Hello Friends & welcome to Heartfelt Creations Wednesday....
Today's card used lots of dies & stamps from HFC that work together beautifully :)
I love that the background also works as my sentiment ...
I hope you like it too...


Products Used:
HCPC 3653 Botanical Rose Bouquet Cling Stamp Set
HCPC-3656 Delightful Daisies Cling Stamp Set
HCPC 3589 Brick and Clock Collage Cling Stamp Set
HCD1 728 Timeless Amour Die
HCD1 758 Botanical Wings Die
HCD1-760 Delightful Daisy Die
HCST1-401 Deluxe Flower Shaping Kit

Other Products:
Mowed Lawn, Forest Moss, Picked Raspberry, Vintage Photo, Brushed Corduroy & Walnut Stain Distress Inks, Ebosser, Martha Stewart Scoreboard, White Cardstock, Pearls, Prima Gold Rush Glass Glitter & Adhesive.

Project Instruction:
Take a 4 1/4" x 5 1/2" card base & ink the edges lightly with Brushed Corduroy  Distress Ink. Stamp Brick and Clock Collage Cling Stamp Set with Walnut Stain Distress Ink on a piece of 4" x 5 1/4" white cardstock. Ink it with Vintage Photo, Brushed Corduroy & Walnut Stain Distress Inks & Adhere to the card base with foam adhesive.


Stamp the floral image from Botanical Rose Cling Stamp Set with Picked Raspberry Distress Ink, cut with Botanical Wings Die & ink with same ink. Stamp the leaves from Delightful Daisies Cling Stamp Set with Forest Moss Distress Ink, cut with Delightful Daisy Die & ink with Mowed Lawn Distress Ink. Shape the flowers & leaves with Deluxe Flower Shaping Kit. Add Prima Gold Rush Glass Glitter to the flower center.

Die cut a piece of white cardstock with Timeless Amour Die & ink it lightly with Brushed Corduroy  Distress Ink. Adhere this to the card base. Arrange the flowers & leaves on the heart die cut & add some pearls on the die cut & card base to add the finishing touches.