Wednesday 27 September 2017

It's A Shower

Hello friends & welcome to Heartfelt Wednesday...

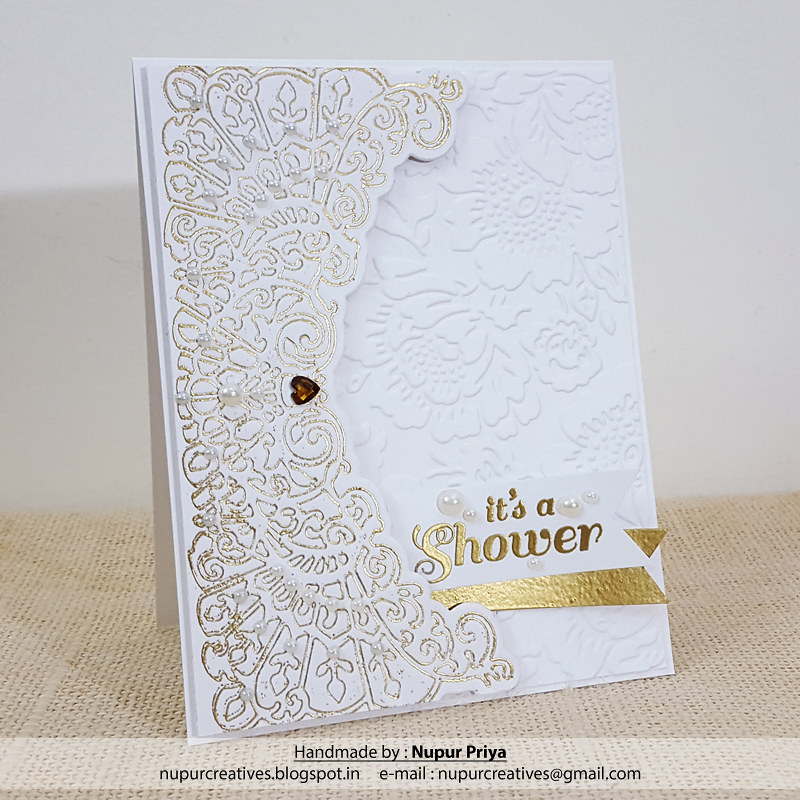
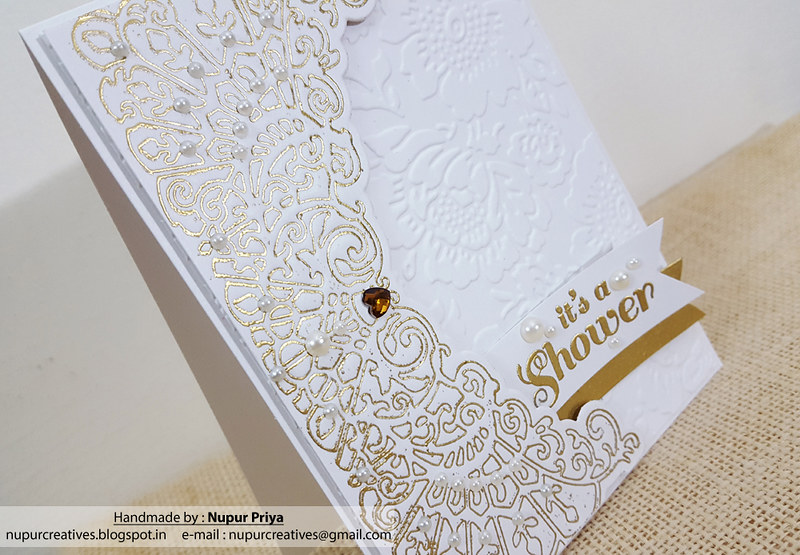
I have tried a new to me technique  using the Decorative Medallion Die & Gold Embossing Powder.
I saw this technique here demonstrated by Jennifer McGuire
The  end results look stunning somewhat like gold foiling
I didn't want to hide the beautiful background so I have kept the card very simple!
Read till the end for supply list & instructions for this card...
20170920_224604

20170920_224639

20170920_224653

Heartfelt Creations Products: 


DDOTS Double Dots 100pc. -3D Foam Circles

Other Products:
Versamark Ink, Ebosser, Joy craft embossing pad, Cuttlebug Anna Griffin Poppy Embossing Folder, Pick me Up, pearls & rhinestone heart.

Project Instruction:
Take a piece of white cardstock measuring 4" x 5 1/4" & emboss if using Cuttlebug Anna Griffin Poppy Embossing Folder. Adhere to a 4 1/4" x 5 1/2" white cardbase.

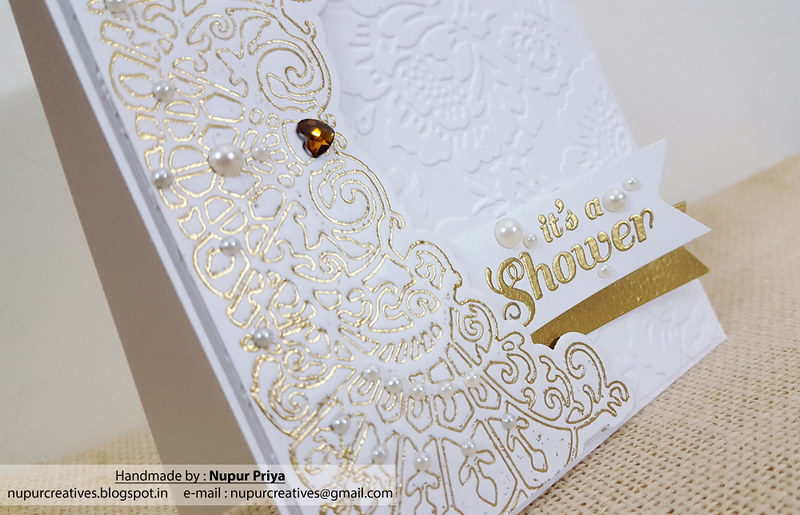
Stamp the sentiment from All Glammed Up Sentiments Cling Stamp Set using Versamark ink on a piece of white cardstock & heat emboss it using Ranger Gold Embossing Powder & Ranger Heat-it Craft Tool. Heat emboss another strip of white cardstock using Versamark ink, Ranger Gold Embossing Powder & Ranger Heat-it Craft Tool. Cut both into banner shape & Adhere as shown on the card front. 

Take Versamark ink & lightly tap the blade side of the die from Decorative Medallion Die so that only the edges of the blade are inked. Put it blade side down on a piece of 3 1/4" x 5 1/2" white cardstock. Emboss in using Ebosser & Joy craft embossing pad. Take out the embossed cardstock & heat emboss it using Ranger Gold Embossing Powder & Ranger Heat-it Craft Tool. Now die cut the embossed design using the matching outline die from the same die set. Adhere it to the left side of the card front with foam adhesive. Add the rhinestone heart & pearls to the heat embossed background using Pick me Up for finishing touch.


 Hope you like this card...

Thank you for visiting today... :)
Nupur
Disclosure : Compensated affiliate links used when possible  at NO additional cost to you.. Thank you! 

Wednesday 20 September 2017

Double Stencilled Fun

Hello friends & welcome to Heartfelt Wednesday...
Have you seen the new launch  Beary Fun Retreat Collection? The bears are so cute!
I have made a card using one of the bears with the guitar image from Beary Fun Retreat Stamp Set
Read till the end for supply list & instructions for this card...

20170906_161718

20170906_161723

Heartfelt Creations Products: 
HCPC-3797 Beary Fun Retreat Stamp Set
HCD1-754 Eyelet Circle and Basics Small Dies
368771 Scor-Tool
173842 Scor-Pal Measuring & Scoring Board
D110305 Stamp Mat Pad
368771 Scor-Tool
411231 5pc. Acrylic Block Set
159723 Designer Dries Clear Adhesive
D120601 Darice Adhesive Foam Strips
DDOTS Double Dots 100pc. -3D Foam Circles
HCPP2-451 8.5 x 11 Cardstock Pack of 25 - White

Other Products:
Peacock feathers & Seedless Preserve Distress inks, Black Archival ink,  Gansai Tambi Watercolors & Koi Waterbrush, Art Antrology Kaleidoscope stencil, Memorybox Heartwood stencil, Ebosser, watercolor cardstock, Clarity Stencil BrushesPick me Up, rhinestones, pearls & adhesive.

Project Instruction:
Stamp the bear with guitar image from  Beary Fun Retreat Stamp Set on a piece of watercolor cardstock using Black Archival ink. Color it using Gansai Tambi Watercolors & Koi Waterbrush. Adhere it on on the left side of a 4 1/4" x 5 1/2" white cardbase.

Take a piece of white cardstock & ink it using Art Antrology Kaleidoscope stencil, Seedless Preserve Distress ink & Clarity Stencil Brush. Remove the stencil & align the  Memorybox Heartwood stencil to the center of the inked design & ink with Peacock feathers Distress ink & Clarity Stencil Brush. Die cut this piece using Eyelet Circle and Basics Small Dies. Adhere it to the card front with foam adhesive so that the cut out circle frames the Bear image. Add some rhinestones to the stenciled background & embossed background using Pick me Up for finishing touch.


 Hope you like this card...
Thank you for visiting today... :)


Nupur
Disclosure : Compensated affiliate links used when possible  at NO additional cost to you.. Thank you! 

Wednesday 13 September 2017

Beary Fun Retreat Collection

Hello friends & welcome to Heartfelt Wednesday...
Today is the release day of


Long days filled with sunshine begin to fade and the crisp evening breezes begin to call for cozy wool knit sweaters as the fall season slowly ushers out the lazy days of summer! Along with the falling leaves and a last surge of floral blossoms, autumn brings with it a more relaxed and reflective way of life and a reminder that winter will soon be around the corner. Autumn also brings with it a fun that only autumn can bring…playing in crisp piles of fallen leaves, picnics with warm beverages, cozy evenings spent around the campfire and exploring fields filled with rows and rows of sunflowers bowing their heads giving way to the season! Even the animals of the forest recognize and celebrate the subtle arrival of autumn, spending their last few days before hibernation playing and making preparations for the arrival of the upcoming winter season. Come along with us and join in our fall festivities as we go on one final fun filled retreat with the Beary Fun Retreat Collection by Heartfelt Creations! Filled with delightful and captivating illustrations of adorable bears, this autumn themed collection is sure to appeal to all ages! Perfect for celebrating an array of occasions, this fun loving assembling of stamps, dies and decorative papers will bring a whimsical and lighthearted touch to all of your paper crafting creations. The dynamic paper collection boasts a color palette filled with beautiful tones of burnt oranges, rusty reds, midnight blues, along with leaf like greens and golden yellows all mixed with checkered plaids, decorative stripes and gorgeous imagery of blooming sunflowers and falling leaves. Three sets of detailed cling stamps with coordinating dies allow you to join in the fall themed fun of a charismatic bear family enjoying their last retreat before winter sets in. Whether sitting around the campfire roasting marshmallows near an adorable treehouse, enjoying songs strummed out quietly on guitar, or filling up on delightful meals of honey, these cute images are ideal for embellishing all of your fall themed cards and scrapbook layouts! So throw on a cozy sweater, grab a cup of hot cocoa and join in the fun as we enjoy one last “beary” fun filled autumn retreat!

I have made a card for today using the cute bear stamp from Happy Time Treehouse Stamp Set & the leaves & sunflowers from Sunflower Accents Stamp Set... Read till the end for supply list & instructions for this card.

20170906_161542

20170906_161626

20170906_161609

20170906_161618

Heartfelt Creations Products: 
HCD1-7153 Sunflower Accents Die

Other Products:
Vintage Photo Distress ink, Black Archival Ink, Ebosser, Martha Stewart scoreboard, Gansai Tambi Watercolors, Koi Water Brush, white & watercolor cardstock, Pick me Up, pearls & adhesive.

Project Instruction:
Stamp the leaves image from Sunflower Accents Stamp Set several times on a 4" x 5 1/2" piece of watercolor cardstock using Black Archival ink. Color it using Gansai Tambi Watercolors & Koi Waterbrush. Adhere it on a 4 1/4" x 5 1/2" white cardbase.

Take a 4 1/2" x 5 1/2" piece of white cardstock & die cut it in the middle using the dies from Fleur Border Basics Die as shown. Score these panels every 1/8" using Martha Stewart scoreboard. Trim the extra and adhere them on the cardbase as shown using foam adhesive.

Stamp the bear image from Happy Time Treehouse Stamp Set using Black Archival ink & color it using Gansai Tambi Watercolors & Koi Water Brush. Die cut it & a piece of white cardstock using dies from Eyelet Circle and Basics Small Dies & Circle Basics Large Dies. Ink the bigger piece using Vintage Photo Distress ink. Adhere them to the card base using foam adhesive.

Stamp the sunflower images from Sunflower Accents Stamp Set on watercolor cardstock using Black Archival ink. Color them using Gansai Tambi Watercolors & Koi Water Brush. Ahere them on the card front as shown. Add some pearls to the die cuts using Pick me Up for finishing touch.


 Hope you like this card...
Thank you for visiting today... :)
Nupur
Disclosure : Compensated affiliate links used when possible  at NO additional cost to you.. Thank you!