Hello friends & welcome to Heartfelt inspiration post 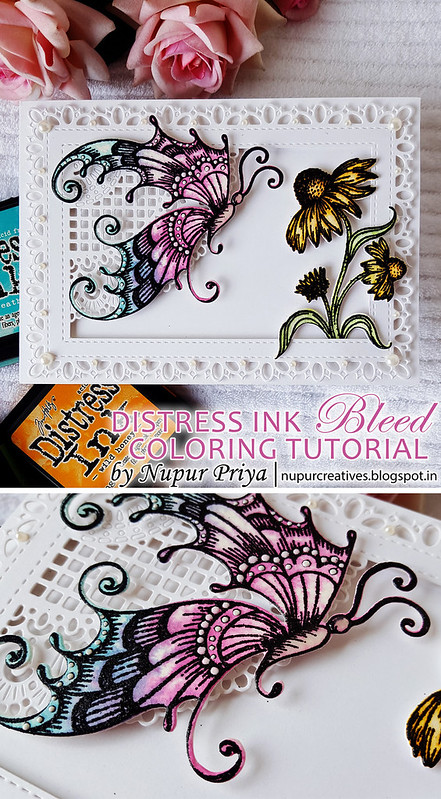
I have made a card with Distress ink bleed technique for today's inspiration...
I love watercoloring but sometimes I don't have the time or I want a little different look for my images so I use this technique. Distress inks are water reactive inks and they do fun things when they react with water.
I love this technique because it is fun, quick and easy!
This technique is particularly easy if you use MISTI or any other stamp positioning tool but if you don't have one then you can use an acrylic block also but then it will be difficult to use rubber stamp for this technique. However if you are using a photopolymer / clear stamp then it can be done.
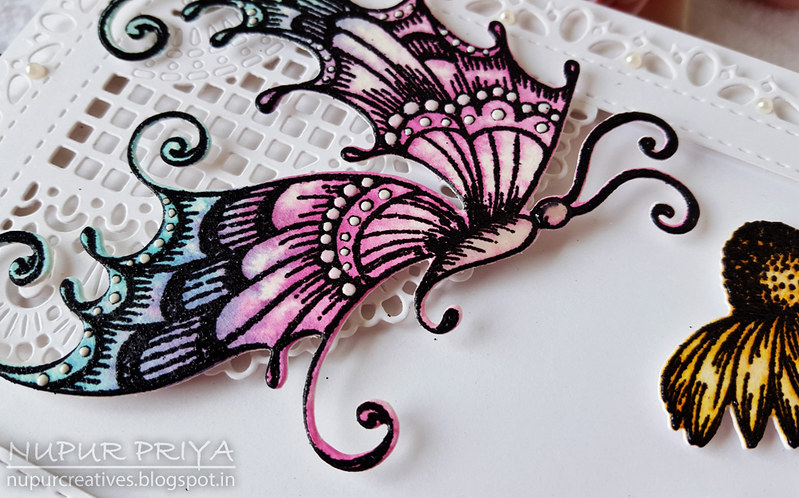
In short you stamp the image with any distress ink or you can also use few different colors like I have used Picked Raspberry, Seedless Preserves and Peacock Feathers Distress Inks and stamp on watercolor cardstock. I have used my MISTI to stamp my images. Now spray it with water which will spread the ink creating beautiful patterns... If you think the results are lighter then simply repeat the above step again. The more water you spray the more the colors will move and the colors will be lighter and vice-versa. Now the image will be blurred so we have to stamp the image again to get a defined image. At this point you can either use black ink or the same colored inks used earlier depending on the end result that you want. You can also heat emboss it after stamping which also looks very beautiful. For this image I have used WOW Black Glint Embossing Powder so my image glitters and looks very pretty which is hard to capture in pictures.
Scroll down for the supply list & instructions on how to make this card....
But before we move on have you checked out the LIMITED EDITION section of Heartfelt Creations store??? They are retiring a lot of stamps, dies, papers and other products and the deals are very good... Dies are available for $14.99 instead of $29.99!
Journal Binder and Pages are also on 50% discount till 7/31/18 !
Heartfelt Creations Products:
HCPC-3824 Fluttering Butterfly Cling Stamp Set
HCPC-3826 Blossoming Coneflower Cling Stamp Set
HCD1-7178 Fluttering Butterfly Die
HCD1-7180 Blossoming Coneflower Die
HCD2-7189 Eyelet Rectangle & Basics Die
HCD2-7190 Frame a Card Leafy Borders Die
HCD2-7191 Intricate Swirl Frames Die
HCPP3-452 12 x 12 Cardstock Pack of 25 - White
RACP468 Ranger Archival Ink Pad - Jet Black
NU651 Nuvo Crystal Drops - Gloss White
RAHT Heat It Craft Tool
173842 Scor-Pal Measuring & Scoring Board
532423-KIT Sizzix Vagabond 2 With Solo Wafer-Thin Die Adapter
352854 Metal Tip for Adhesive Bottles
159723 Designer Dries Clear Adhesive
3D1844 3-D Crystal Lacquer
D120601 Darice Adhesive Foam Strips
Other Products:
Picked Raspberry, Seedless Preserves, Peacock Feathers, Mowed Lawn, Wild Honey and Vintage Photo Distress Inks, MISTI, Versamark Ink, WOW Black Glint Embossing Powder, xacto knife, Canson watercolor cardstock and pearls.
Instructions:
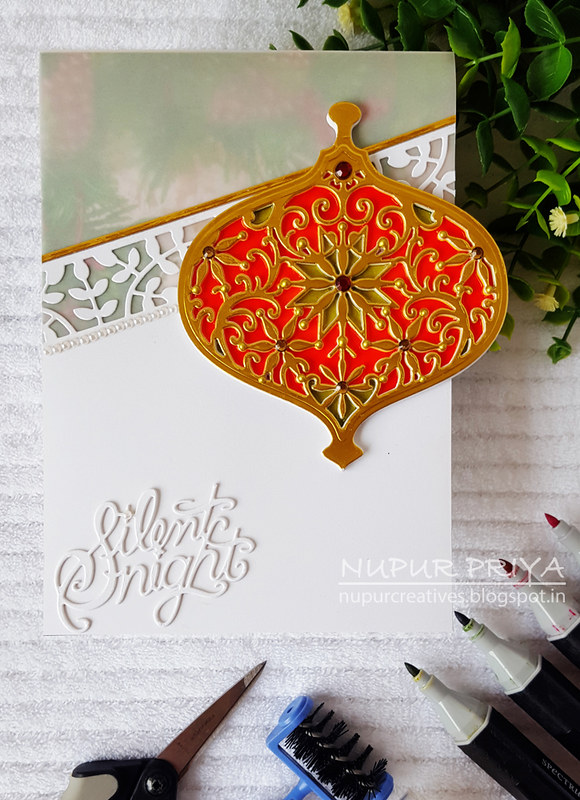
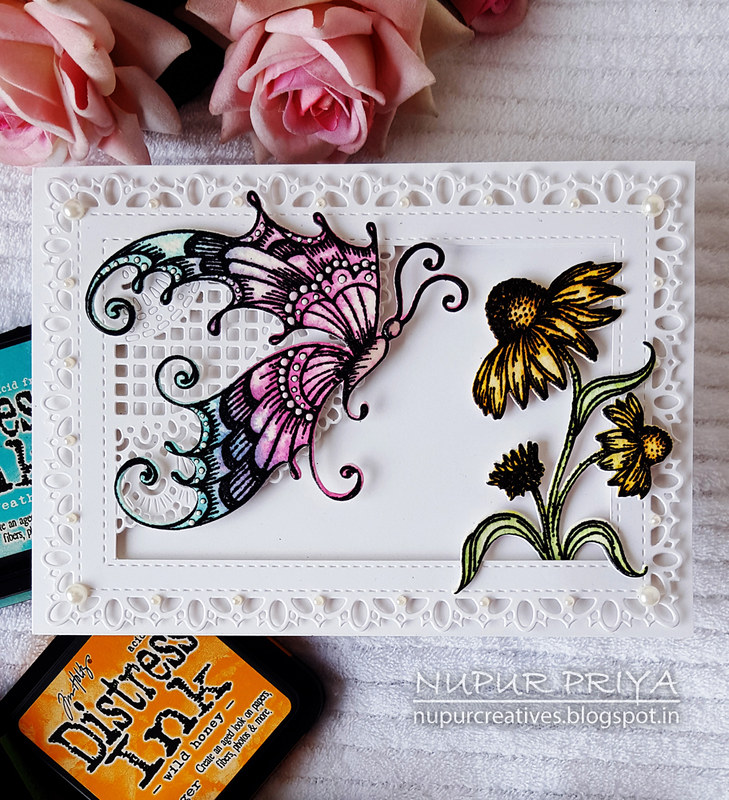
Die cut a piece of white cardstock using Intricate Swirl Frames Die and Frame a Card Leafy Borders Die so that the corner doily die is flush with one of the inside corners of the frame die. Once the die is cut use a xacto knife to cut the fame using the doily die cut & the stitched border as a guide. Die cut a white cardbase using Eyelet Rectangle & Basics Die and adhere the die cut frame on it using Darice Adhesive Foam Strips.
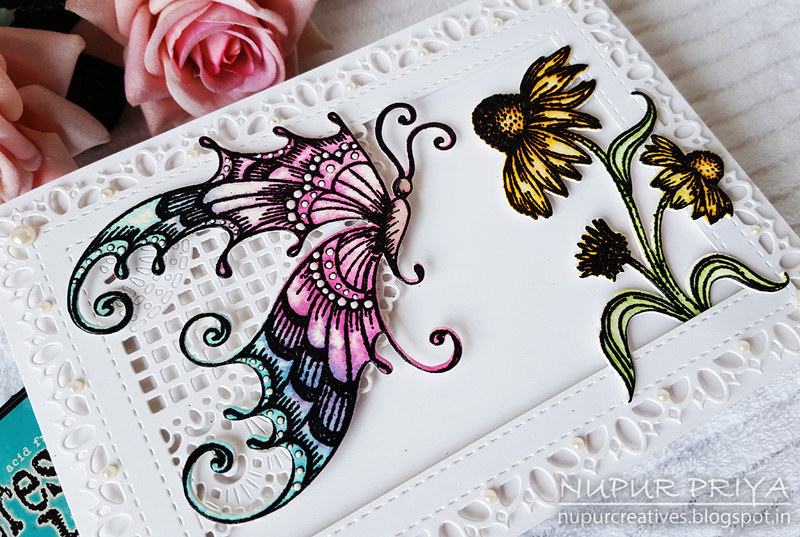
Stamp the butterfly image from Fluttering Butterfly Cling Stamp Set on a piece of watercolor cardstock using MISTI, Picked Raspberry, Seedless Preserves and Peacock Feathers Distress Inks and spray it with water to spread the ink. Let it dry or use Heat It Craft Tool to speed up the drying. Stamp again using Jet Black Archival Ink and again with Versamark Ink. Heat emboss using WOW Black Glint Embossing Powder and Heat It Craft Tool. Die cut this butterfly using matching die from Fluttering Butterfly Die. Adhere it to the card front as shown using Darice Adhesive Foam Strips. Add drops of Gloss White Nuvo Crystal Drops to the butterfly wings and cover its body with 3-D Crystal Lacquer.
Repeat the previous steps to stamp the coneflower image from Blossoming Coneflower Cling Stamp Set but use Mowed Lawn, Wild Honey and Vintage Photo Distress Inks this time. Die cut this image using matching die from Blossoming Coneflower Die. Adhere it to the card front as shown using Darice Adhesive Foam Strips. Add few pearls to add finishing touches to the card.

I have made a card with Distress ink bleed technique for today's inspiration...
I love watercoloring but sometimes I don't have the time or I want a little different look for my images so I use this technique. Distress inks are water reactive inks and they do fun things when they react with water.
I love this technique because it is fun, quick and easy!
This technique is particularly easy if you use MISTI or any other stamp positioning tool but if you don't have one then you can use an acrylic block also but then it will be difficult to use rubber stamp for this technique. However if you are using a photopolymer / clear stamp then it can be done.
In short you stamp the image with any distress ink or you can also use few different colors like I have used Picked Raspberry, Seedless Preserves and Peacock Feathers Distress Inks and stamp on watercolor cardstock. I have used my MISTI to stamp my images. Now spray it with water which will spread the ink creating beautiful patterns... If you think the results are lighter then simply repeat the above step again. The more water you spray the more the colors will move and the colors will be lighter and vice-versa. Now the image will be blurred so we have to stamp the image again to get a defined image. At this point you can either use black ink or the same colored inks used earlier depending on the end result that you want. You can also heat emboss it after stamping which also looks very beautiful. For this image I have used WOW Black Glint Embossing Powder so my image glitters and looks very pretty which is hard to capture in pictures.
Scroll down for the supply list & instructions on how to make this card....
But before we move on have you checked out the LIMITED EDITION section of Heartfelt Creations store??? They are retiring a lot of stamps, dies, papers and other products and the deals are very good... Dies are available for $14.99 instead of $29.99!
Journal Binder and Pages are also on 50% discount till 7/31/18 !
Don't fail to avail these awesome discount ....
Now moving on to my card...
Heartfelt Creations Products:
HCPC-3824 Fluttering Butterfly Cling Stamp Set
HCPC-3826 Blossoming Coneflower Cling Stamp Set
HCD1-7178 Fluttering Butterfly Die
HCD1-7180 Blossoming Coneflower Die
HCD2-7189 Eyelet Rectangle & Basics Die
HCD2-7190 Frame a Card Leafy Borders Die
HCD2-7191 Intricate Swirl Frames Die
HCPP3-452 12 x 12 Cardstock Pack of 25 - White
RACP468 Ranger Archival Ink Pad - Jet Black
NU651 Nuvo Crystal Drops - Gloss White
RAHT Heat It Craft Tool
173842 Scor-Pal Measuring & Scoring Board
532423-KIT Sizzix Vagabond 2 With Solo Wafer-Thin Die Adapter
352854 Metal Tip for Adhesive Bottles
159723 Designer Dries Clear Adhesive
3D1844 3-D Crystal Lacquer
D120601 Darice Adhesive Foam Strips
Other Products:
Picked Raspberry, Seedless Preserves, Peacock Feathers, Mowed Lawn, Wild Honey and Vintage Photo Distress Inks, MISTI, Versamark Ink, WOW Black Glint Embossing Powder, xacto knife, Canson watercolor cardstock and pearls.
Instructions:
Die cut a piece of white cardstock using Intricate Swirl Frames Die and Frame a Card Leafy Borders Die so that the corner doily die is flush with one of the inside corners of the frame die. Once the die is cut use a xacto knife to cut the fame using the doily die cut & the stitched border as a guide. Die cut a white cardbase using Eyelet Rectangle & Basics Die and adhere the die cut frame on it using Darice Adhesive Foam Strips.
Stamp the butterfly image from Fluttering Butterfly Cling Stamp Set on a piece of watercolor cardstock using MISTI, Picked Raspberry, Seedless Preserves and Peacock Feathers Distress Inks and spray it with water to spread the ink. Let it dry or use Heat It Craft Tool to speed up the drying. Stamp again using Jet Black Archival Ink and again with Versamark Ink. Heat emboss using WOW Black Glint Embossing Powder and Heat It Craft Tool. Die cut this butterfly using matching die from Fluttering Butterfly Die. Adhere it to the card front as shown using Darice Adhesive Foam Strips. Add drops of Gloss White Nuvo Crystal Drops to the butterfly wings and cover its body with 3-D Crystal Lacquer.
Repeat the previous steps to stamp the coneflower image from Blossoming Coneflower Cling Stamp Set but use Mowed Lawn, Wild Honey and Vintage Photo Distress Inks this time. Die cut this image using matching die from Blossoming Coneflower Die. Adhere it to the card front as shown using Darice Adhesive Foam Strips. Add few pearls to add finishing touches to the card.
Hope you like it...
Thank you for visiting today... :)