Hello Friends and welcome to Black Friday inspiration for Heartfelt Creations
We have 4 types of 6" x 6" special fold cards and very beautiful dies and a new paper collection that goes so well with them and also Luxe Gold cardstock.
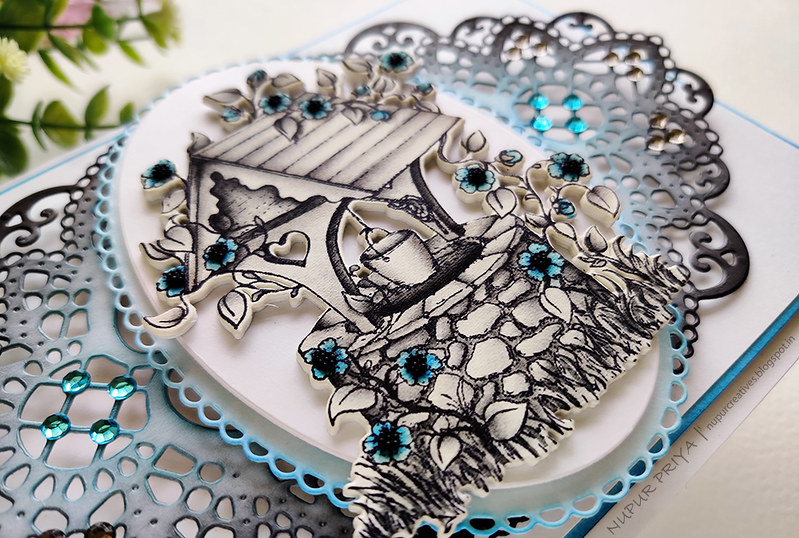
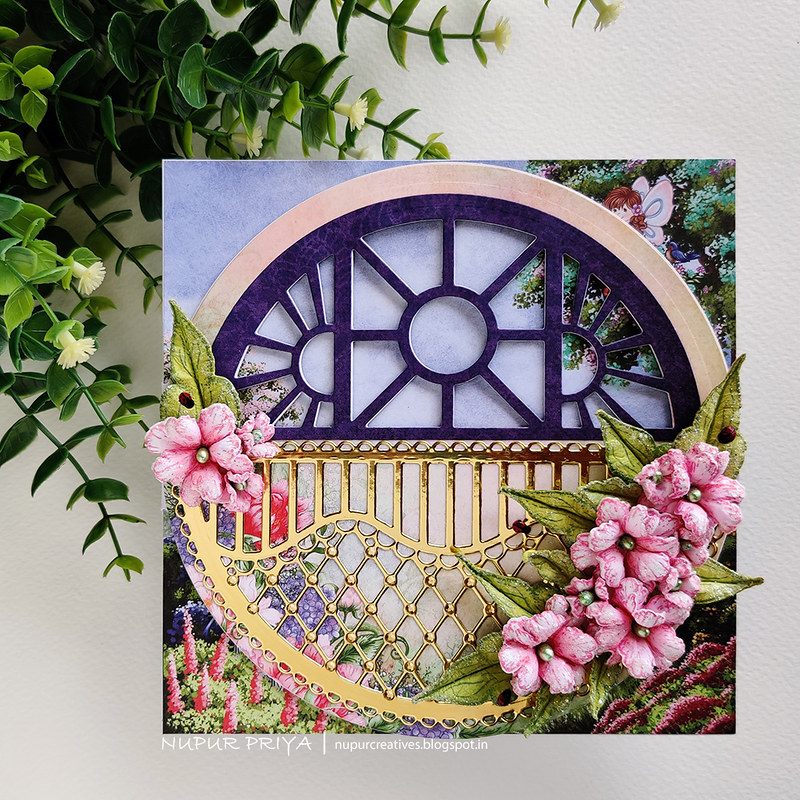
I have used one of the card bases with the new dies, Luxe gold cardstock and Window Scenes Paper Collection for today's inspiration.
Hurry to the Heartfelt store to avail the special Black Friday offers
Read till the end for full instructions and supply list for this card


Heartfelt Creations Products :
HCPC-3819 Small Sweet Peony Cling Stamp Set
HCPC-3820 Large Sweet Peony Cling Stamp Set
HCD1-7173 Small Sweet Peony Die
HCD1-7174 Large Sweet Peony Die
HCD1-7272 Rounded Sunlight Window Die
HCD1-7274 Rounded Lattice Window Die
HCCB1-482 6" x 6" Swing Fold Card - White
HCDP1-2109 Window Scenes Paper Collection
HCGP1-488 Luxe Gold Cardstock
HCPP1-475 Deluxe Flower Shaping Paper - Pack of 50
RACP524 Ranger Archival Ink Pad - Vibrant Fuchsia
RACP482 Ranger Archival Ink Pad - Olive
RACP436 Ranger Archival Ink Pad - Leaf Green
HCDA2-450 Stack and Store Daubers-Pack of 30
HCST1-401 Deluxe Flower Shaping Kit
DMCT4185 Groove Golf Tool Set
352854 Metal Tip for Adhesive Bottles
159723 Designer Dries Clear Adhesive
HCS1-457-2 Pastel Pearl Stamens-Medium
NU650 Nuvo Crystal Drops - Ebony Black
NU667 Nuvo Crystal Drops - Red Berry
Other Products :
Gold rhinestones and transparent glitter.
Instructions :
Cut two pieces of 6" x 6" scenes from Window Scenes Paper Collection and adhere to the same sized panels on the 6" x 6" Swing Fold Card. Use the largest circle die from Rounded Sunlight Window Die to cut 2 pieces of 6"x 6" circles from the same paper collection. Adhere these on both sides of the 6"x 6" circle panel of the card base. Die cut the top portion of the circle panel using the 3 dies from the same die set. Die cut 2 pieces of pattern paper from the same paper collection using the previous 3 dies along with the semicircle die. Aligh and adhere these on both sides of the window that we created earlier. Die cut a piece of Luxe Gold Cardstock using the dies from Rounded Lattice Window Die and adhere it below the previous window as shown.
Stamp the flowers from Small Sweet Peony Cling Stamp Set on Deluxe Flower Shaping Paper using Vibrant Fuchsia Archival Ink and ink it with the same ink using Stack and Store Daubers. Die cut the flowers using the matching dies from Small Sweet Peony Die. Stamp the leaves from Small Sweet Peony Cling Stamp Set and Large Sweet Peony Cling Stamp Set using Olive Ranger Archival Ink and ink them using Leaf Green Ranger Archival Ink. Die cut the leaves using matching dies from Small Sweet Peony Die and Large Sweet Peony Die. Shape all the flowers and leaves using Deluxe Flower Shaping Kit and Groove Golf Tool Set. Add a green stamen from Pastel Pearl Stamens to the flowers centers. Add transparent glitter to the flowers and leaves using Designer Dries Clear Adhesive. Arrange and adhere all the flowers and leaves as shown.
Add few ladybugs made with Ebony Black and Red Berry Nuvo Crystal Drops to the flower arrangement. Add gold rhinestones to the die cut to add finishing touch.
Hope you like it...
We have 4 types of 6" x 6" special fold cards and very beautiful dies and a new paper collection that goes so well with them and also Luxe Gold cardstock.
I have used one of the card bases with the new dies, Luxe gold cardstock and Window Scenes Paper Collection for today's inspiration.
Hurry to the Heartfelt store to avail the special Black Friday offers
Read till the end for full instructions and supply list for this card
Heartfelt Creations Products :
HCPC-3819 Small Sweet Peony Cling Stamp Set
HCPC-3820 Large Sweet Peony Cling Stamp Set
HCD1-7173 Small Sweet Peony Die
HCD1-7174 Large Sweet Peony Die
HCD1-7272 Rounded Sunlight Window Die
HCD1-7274 Rounded Lattice Window Die
HCCB1-482 6" x 6" Swing Fold Card - White
HCDP1-2109 Window Scenes Paper Collection
HCGP1-488 Luxe Gold Cardstock
HCPP1-475 Deluxe Flower Shaping Paper - Pack of 50
RACP524 Ranger Archival Ink Pad - Vibrant Fuchsia
RACP482 Ranger Archival Ink Pad - Olive
RACP436 Ranger Archival Ink Pad - Leaf Green
HCDA2-450 Stack and Store Daubers-Pack of 30
HCST1-401 Deluxe Flower Shaping Kit
DMCT4185 Groove Golf Tool Set
352854 Metal Tip for Adhesive Bottles
159723 Designer Dries Clear Adhesive
HCS1-457-2 Pastel Pearl Stamens-Medium
NU650 Nuvo Crystal Drops - Ebony Black
NU667 Nuvo Crystal Drops - Red Berry
Other Products :
Gold rhinestones and transparent glitter.
Instructions :
Cut two pieces of 6" x 6" scenes from Window Scenes Paper Collection and adhere to the same sized panels on the 6" x 6" Swing Fold Card. Use the largest circle die from Rounded Sunlight Window Die to cut 2 pieces of 6"x 6" circles from the same paper collection. Adhere these on both sides of the 6"x 6" circle panel of the card base. Die cut the top portion of the circle panel using the 3 dies from the same die set. Die cut 2 pieces of pattern paper from the same paper collection using the previous 3 dies along with the semicircle die. Aligh and adhere these on both sides of the window that we created earlier. Die cut a piece of Luxe Gold Cardstock using the dies from Rounded Lattice Window Die and adhere it below the previous window as shown.
Stamp the flowers from Small Sweet Peony Cling Stamp Set on Deluxe Flower Shaping Paper using Vibrant Fuchsia Archival Ink and ink it with the same ink using Stack and Store Daubers. Die cut the flowers using the matching dies from Small Sweet Peony Die. Stamp the leaves from Small Sweet Peony Cling Stamp Set and Large Sweet Peony Cling Stamp Set using Olive Ranger Archival Ink and ink them using Leaf Green Ranger Archival Ink. Die cut the leaves using matching dies from Small Sweet Peony Die and Large Sweet Peony Die. Shape all the flowers and leaves using Deluxe Flower Shaping Kit and Groove Golf Tool Set. Add a green stamen from Pastel Pearl Stamens to the flowers centers. Add transparent glitter to the flowers and leaves using Designer Dries Clear Adhesive. Arrange and adhere all the flowers and leaves as shown.
Add few ladybugs made with Ebony Black and Red Berry Nuvo Crystal Drops to the flower arrangement. Add gold rhinestones to the die cut to add finishing touch.
Hope you like it...
Thank you for visiting today... :)