Saturday 28 April 2018

Wartercolor Floral Card

Hello friends & welcome to Heartfelt Inspiration...
As promised I am here to share a watercolor floral card today that I was supposed to share earlier...
But couldn't due to mom life... lol...
But before we move on to my card here is an exciting offer for my lovely readers..


Click HERE to avail this offer 

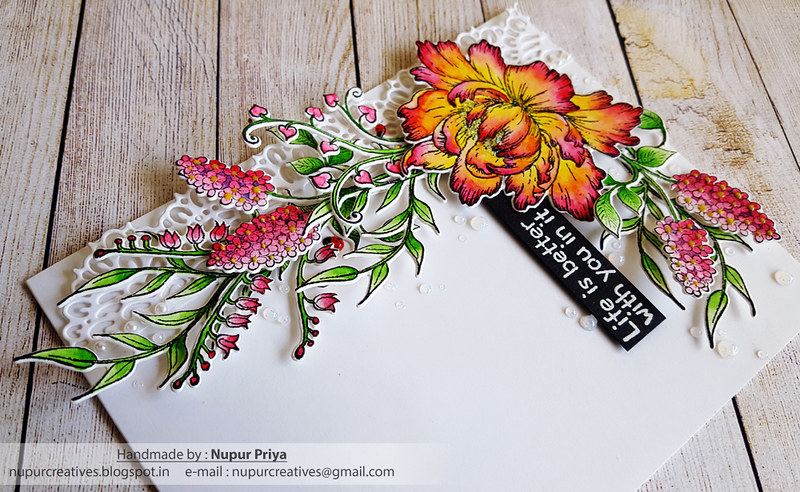
Now moving on to my card for today... I have made a watercolored floral card for today's inspiration..
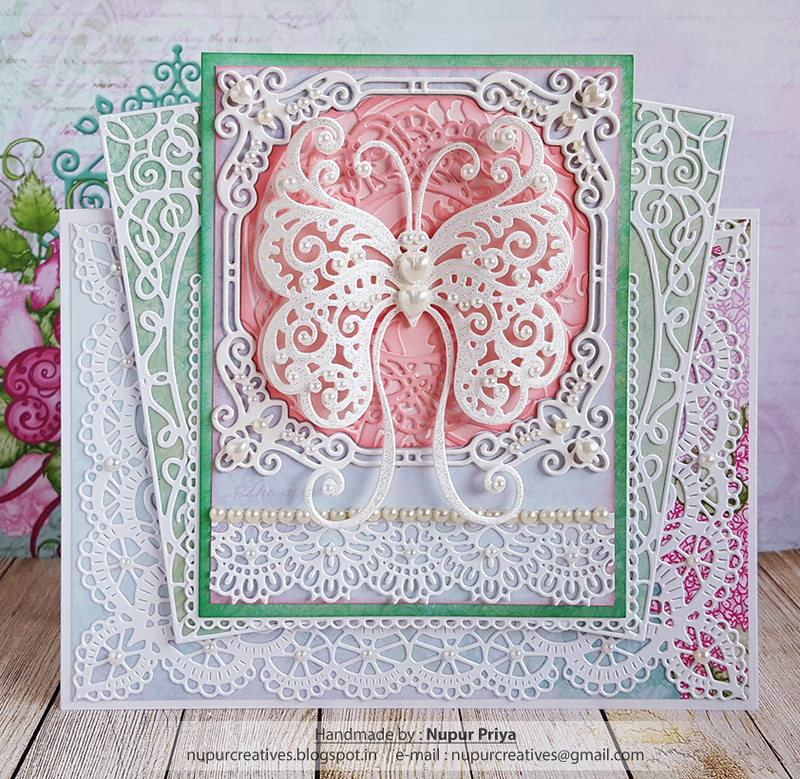
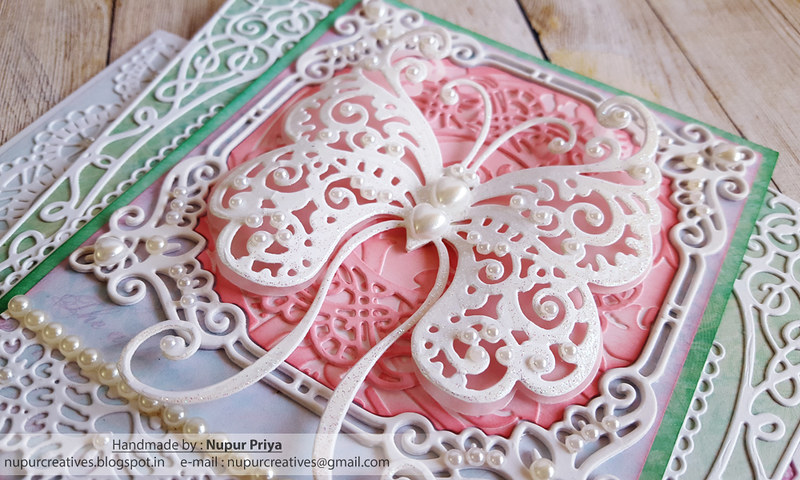
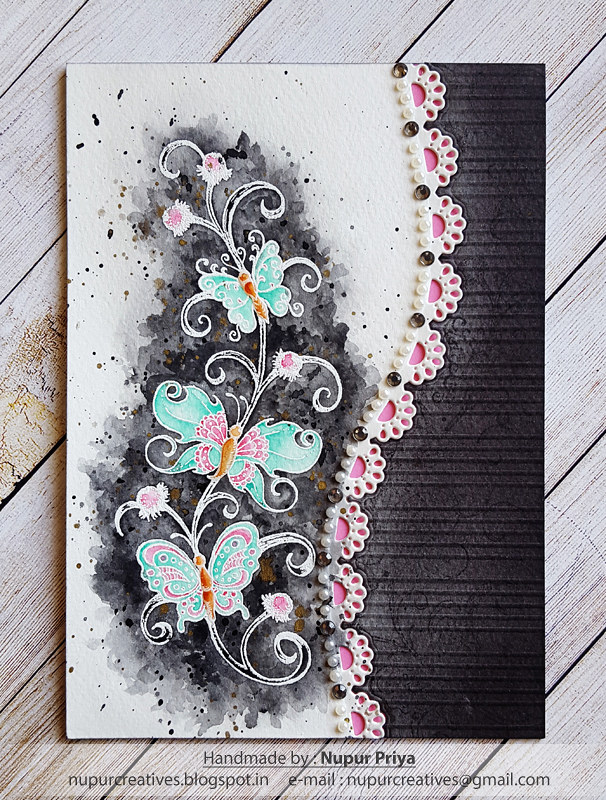
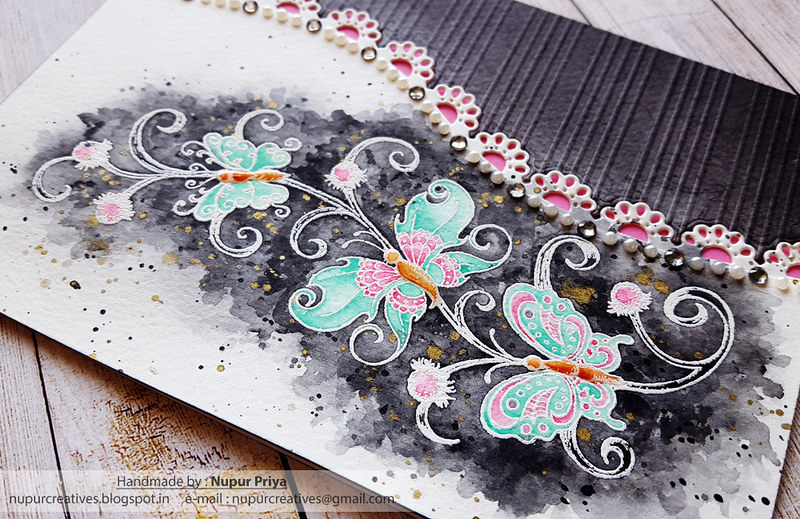
Rain Boots and Blossoms Cling Stamp Set has some amazing filler flowers and leaves that can be used to make floral clusters. These also have coordinating dies which make the work easier and a lot faster. I have paired these flowers with the peony from Peony Bud and Blossom Cling Stamp Set for today's card. 

I have also added a white border die cut from Sweetheart Borders Die below the flower arrangement. Adding same colored die cut behind a busy focal point adds a little texture and interest without being distracting. The White Blizzard Nuvo Glitter Drops serve the same purpose of adding interest without being obtrusive...

Scroll down for full instructions and supply list for this card...
20180210_154658

20180210_155153

20180210_154937


Heartfelt Creations Products: 
HCPC-3821 Peony Bud and Blossom Cling Stamp Set
HCD1-7175 Peony Bud and Blossom Die

Other Products:
White Blizzard Nuvo Glitter DropsVersamark InkGansai Tambi WatercolorsCanson watercolor cardstock & Koi Watrbrush.

Instructions:
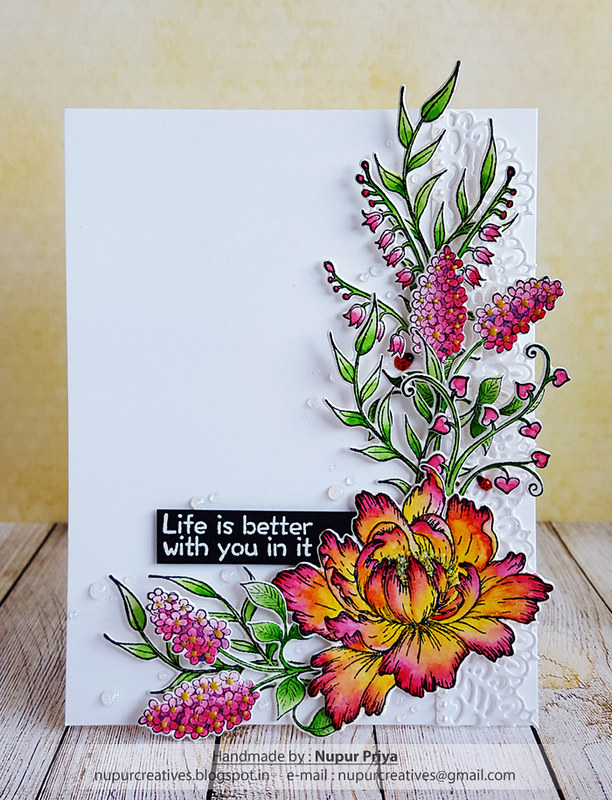
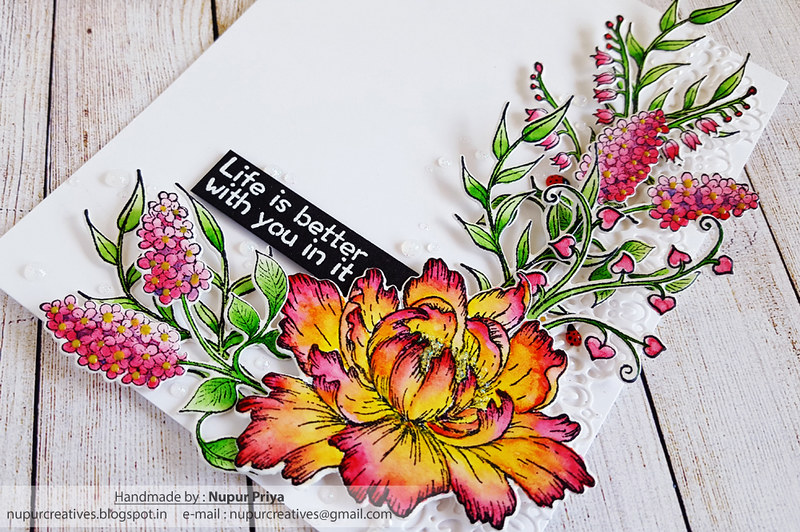
Die cut a piece of white cardstock using the border die from Sweetheart Borders Die & adhere it to the right side of a 4 1/4" x 5 1/2" white cardbase.

Stamp the images from Rain Boots and Blossoms Cling Stamp Set & Peony Bud and Blossom Cling Stamp Set on watercolor cardstock using Jet Black Archival Ink & color them using Gansai Tambi Watercolors & Koi Watrbrush. Die cut them using matching dies from Rain Boots and Blossoms Die & Peony Bud and Blossom Die. Add tiny drops of Dandelion Yellow Nuvo Crystal Drops to the hydrangeas flower centers & add drops of  White Blizzard Nuvo Glitter Drops to peony flower center. Arrange & adhere them as shown on the card base.

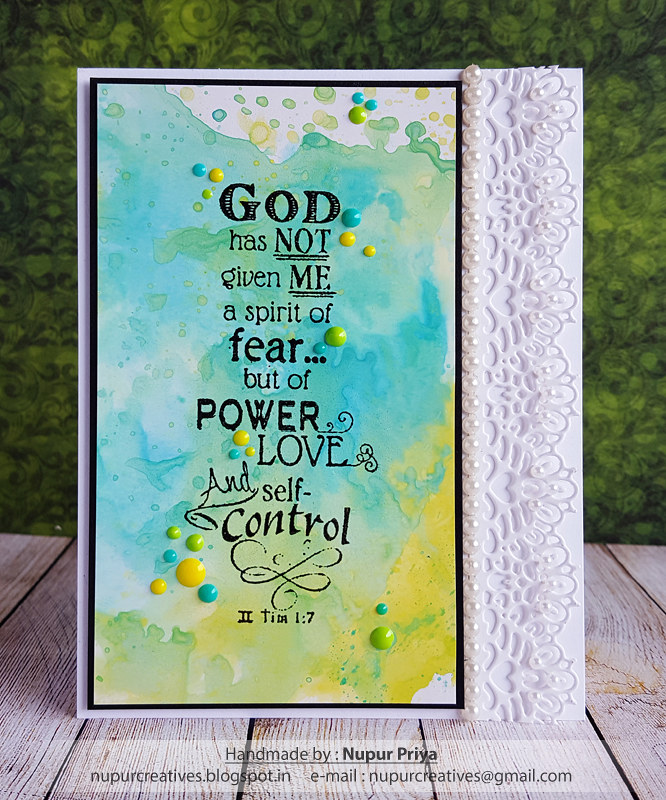
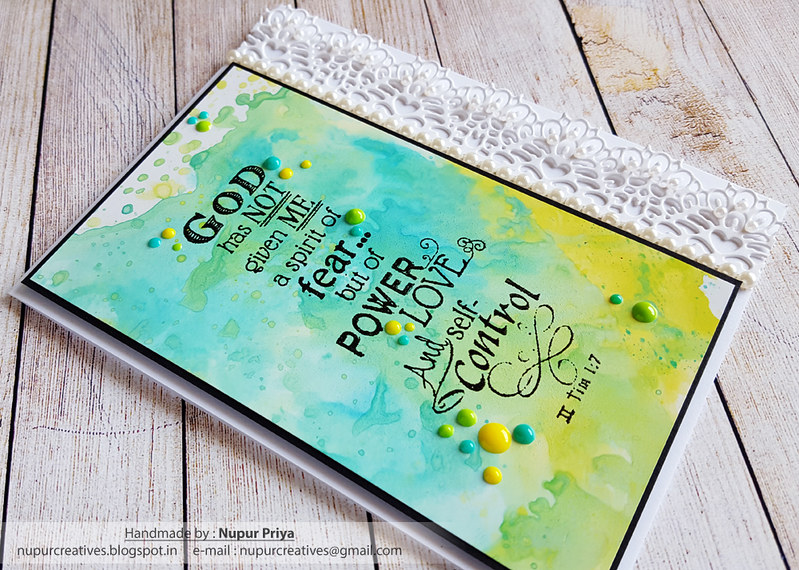
Heat emboss the sentiment from Paw-fect Pooches Cling Stamp Set using Versamark InkWhite Embossing Powder &  Heat It Craft Tool on a piece of black cardstock & trim it as shown. Adhere it to the card front using Darice Adhesive Foam Strips.

Make some ladybugs using Ebony Black & Red Berry Nuvo Crystal Drops and glue them to the flower arrangement. Add some drops of  White Blizzard Nuvo Glitter Drops around the flower  arrangement & some pearls on the border die cut to add finishing touch.

Hope you like this card...
Thank you for visiting today... :)

Nupur
Disclosure : Compensated affiliate links used when possible  at NO additional cost to you.. Thank you! 

Wednesday 25 April 2018

Layering Diecuts for Quick Decorative Cards

Hello friends & welcome to Heartfelt Wednesday...
Today we have a surprise release for you all... 
Frame a Card Dies !!!
This release has 4 beautiful die sets & I have made a card with these dies


Read till the end for the supply list & instructions for this project...
20180209_160056

20180209_160806

Heartfelt Creations Products: 

HCPC-3824 Fluttering Butterfly Cling Stamp Set
HCD1-7161 Sweetheart Borders Die
HCD1-7178 Fluttering Butterfly Die
HCD1-7179 Butterfly Kisses Decorative Die
HCD2-7189 Eyelet Rectangle & Basics Die
HCD2-7191 Intricate Swirl Frames Die
HCD2-7192 Eyelet Lace Frames Die
HCDP1-289 Butterfly Dreams Paper Collection
359843 Embossing Tinsel - Bridal
RAHT Heat It Craft Tool
HCDA2-450 Stack and Store Daubers-Pack of 30
173842 Scor-Pal Measuring & Scoring Board
D110305 Stamp Mat Pad
359848 Spellbinders Tool N' One
31510 Funnel Tray
411231 5pc. Acrylic Block Set
532423-KIT Sizzix Vagabond 2 With Solo Wafer-Thin Die Adapter
352854 Metal Tip for Adhesive Bottles
159723 Designer Dries Clear Adhesive
D120601 Darice Adhesive Foam Strips
HCPP3-452 12 x 12 Cardstock Pack of 25 - White
242174 Vellum Paper

Other Products:

Worn Lipstick and Cracked Pistachio Distress Oxide ink, Versamark Ink, Cuttlebug Anna Griffin Acanthus Embossing Folder and pearls .

Instructions :

Cut a piece of 4 3/4" x 6 3/4" patterned paper from Butterfly Dreams Paper Collection and adhere it on a  5" x 7" white cardbase. Die cut a piece of white cardstock  using Eyelet Lace Frames Die and adhere it on the card base. 

Take a piece of 4 1/4" x 5 3/4" patterned paper from same paper collection and adhere it on a same sized piece of white cardstock. Ink the edges using Cracked Pistachio Distress Oxide ink.  Now take a piece of 4" x 5 1/2" contrasting patterned paper from same paper collection, ink the edges with Worn Lipstick Distress Oxide ink and mat it on the previous piece.


Die cut 4 pieces of white cardstock using Butterfly Kisses Decorative Die and adhere them together to make a thicker piece. Take the inner piece from one of the die cuts and emboss it using Cuttlebug Anna Griffin Acanthus Embossing Folder. Die cut a piece of  white cardstock using the decorative circle die from Butterfly Kisses Decorative Die. Ink both of them using Worn Lipstick Distress Oxide ink. Die cut a border from  white cardstock using Sweetheart Borders Die. Adhere all the die cuts as shown. Stamp the butterfly from Fluttering Butterfly Cling Stamp Set using versamark ink on a piece of white cardstock and heat emboss using Heat It Craft Tool and Bridal Embossing Tinsel. Die cut the stamped image using Fluttering Butterfly Die. Die cut a piece of Vellum Paper using only the outline die of the same butterfly. Curl the wings of both the butterflies and adhere them in the center. Adhere the resulting butterfly in the center of the die cut as shown. Die cut a piece of  white cardstock using 
Eyelet Rectangle & Basics Die and adhere it behind this panel as shown.

Die cut a piece of  white cardstock using 
Intricate Swirl Frames Die and adhere it on a piece of pattern paper. Adhere this on a piece of white cardstock and then trim off the extra paper around the edges of the die cut. cut the die cut in half and then adhere both the pieces as shown behind the previous panel. Adhere the resulting panel to the card base. Decorate the die cuts with pearls to add finishing touches.


Hope you like this card...
Thank you for visiting today... :)
Nupur
Disclosure : Compensated affiliate links used when possible  at NO additional cost to you.. Thank you! 

Saturday 21 April 2018

Power of Love

Hello friends & welcome to Heartfelt inspiration...
I am back to share another card....
Read till the end for the list of products & instructions for this card...
20180328_124728

20180328_124831

Heartfelt Creations Products: 
HCPC-3814 Words Of Encouragement Stamp Set
HCD1-7161 Sweetheart Borders Die
HCPP3-452 12 x 12 Cardstock Pack of 25 - White
HCPP1-438-1 Paper Pack of 10 - Black
NU673 Nuvo Crystal Drops - Dandelion Yellow
NU669 Nuvo Crystal Drops Gloss - Apple Green
NU670 Nuvo Crystal Drops Gloss - Caribbean Ocean
RAHT Heat It Craft Tool
HCDA2-450 Stack and Store Daubers-Pack of 30
173842 Scor-Pal Measuring & Scoring Board
D110305 Stamp Mat Pad
359848 Spellbinders Tool N' One
31510 Funnel Tray
411231 5pc. Acrylic Block Set
532423-KIT Sizzix Vagabond 2 With Solo Wafer-Thin Die Adapter
159723 Designer Dries Clear Adhesive
352854 Metal Tip for Adhesive Bottles
D120601 Darice Adhesive Foam Strips

Other Products:
Twisted Citron, Salty Ocean & Peacock Feathers Distress oxide Inks, WOW Clear embossing Powder, Onyx Black Versafine Ink, Tim Holtz Micro Glaze, Non-stick Craft mat, anti-static powder tool, white glossy cardstock & pearls.

Instructions:
Apply Twisted Citron, Salty Ocean & Peacock Feathers Distress oxide Inks on Non-stick Craft mat, spray with water & smoosh a piece of white glossy cardstock over it. Let the layer dry or use Heat It Craft Tool to dry the ink & then again repeate the process till you achieve the pattern that you like. Apply Tim Holtz Micro Glaze on it using Stack and Store Daubers & buff it to shine using a clean rag. Apply anti-static powder over this & stamp the sentiment from Words Of Encouragement Stamp Set using Onyx Black Versafine Ink. Heat emboss this sentiment using WOW Clear embossing Powder & Heat It Craft Tool. Trim it to 3" x 5 1/4" & mat it on a slightly larger piece of black cardstock. Adhere this panel on a 4 1/4" x 5 1/2" white cardbase

Die cut a piece of white cardstock using Sweetheart Borders Die & adhere it to the right side of the sentiment panel. Embellish the card with some pearls & Dandelion Yellow Apple Green & Caribbean Ocean Nuvo Crystal Drops Gloss to add finishing touch.


Hope you like this card...
Thank you for visiting today... :)

Nupur
Disclosure : Compensated affiliate links used when possible  at NO additional cost to you.. Thank you! 

Butterfly Dreams

Hello friends....

I have been MIA for the past few weeks... but now I am back & I will be sharing many new projects over the next few days...
1st one is a card made with new Butterfly Dreams Collection which was released last week by Heartfelt Creations....

Soft breezes blow carrying the sweet scent of flowers through the air, while the summer sunshine fills your heart with warmth! There’s no grander place to leave your cares and worries behind than a beautiful garden! It’s the perfect place to lose yourself in a day dream as you’re surrounded by bountiful blooms playing host to a kaleidoscope of butterflies! What is it about butterflies that evoke so many feelings of joy, memories of loved ones gone before us, and the gentle reminder that the trials of life can transform us into something beautiful! Join us in celebrating the beauty of life with the new Butterfly Dreams Collection by Heartfelt Creations! Lose yourself in a bright and happy hued paper collection filled with vivid pinks, blazing oranges, soft blues and soothing teals, boasting dynamic imagery of beautifully illustrated butterflies and divine florals encompassed in whimsical swirls and beautiful brocades! Several sizes of artfully illustrated premade card fronts, and elegant scrapbook pages set the perfect scene for hand shaped and embellished butterflies, along with your favorite dimensional flowers! Three fanciful cling stamp sets with coordinating dies lend themselves perfectly to adding a touch of elegance and grace to your one of a kind paper creations with delightfully scripted sentiments, stylish butterfly borders, detailed decorative dies, and several fascinating butterfly illustrations! So close your eyes, allow yourself to relax, and come along with us as we escape to a place filled with Butterfly Dreams!


I have made a watercolored card with this collection.... Read till the end for the supply list & instructions on how to make this card....


20180403_165049


20180403_164231


Heartfelt Creations Products: 
HCPC-3823 Butterfly Dreams Border Cling Stamp Set
HCD1-7120 Fleur Border Basics Die
HCD1-7177 Butterfly Dreams Border Die
HCPP3-452 12 x 12 Cardstock Pack of 25 - White
RAHT Heat It Craft Tool
RPEJ685 Embossing Powder - White
HCDA2-450 Stack and Store Daubers-Pack of 30
173842 Scor-Pal Measuring & Scoring Board
D110305 Stamp Mat Pad
359848 Spellbinders Tool N' One
31510 Funnel Tray
411231 5pc. Acrylic Block Set
532423-KIT Sizzix Vagabond 2 With Solo Wafer-Thin Die Adapter
159723 Designer Dries Clear Adhesive
352854 Metal Tip for Adhesive Bottles
3D1844 3-D Crystal Lacquer

Other Products:

Black Soot Distress Ink, Picked Raspberry Distress Oxide Ink, Versamark Ink, Gansai Tambi Watercolors, paint brush, masking paper, watercolor cardstock, rhinestones & pearls.

Instructions:

Stamp the Butterfly Dreams Border Cling Stamp Set on a 5" x 7" piece of watercolor cardstock using Versamark Ink & heat emboss Heat It Craft Tool & White Embossing Powder. Watercolor this stamped image using Gansai Tambi Watercolors. Die cut a piece of masking paper using the matching die from Butterfly Dreams Border Die & lay it on top of the stamped & colored image. Splatter some diluted black & gold watercolor on this piece taking care to let it dry in between.  Remove the masking paper & die cut the right edge using Fleur Border Basics Die. Stamp the same image using Black Soot Distress ink randomly on the remaining piece of watercolor cardstock & score it horizontally as shown. Ink it using Black Soot Distress ink& Stack and Store Daubers 

Take a 5" x 7" white cardbase & ink it using Picked Raspberry Distress Oxide Ink & Stack and Store Daubers so that it covers the open are of the border die cut in the previous step. Glue down both the pieces of watercolor cardstock.as shown. Add some pearls & rhinestones to the die cut border & Crystal Lacquer to the body of the butterflies to add finishing touch.


Hope you like it...

Thank you for visiting today... :)
Nupur
Disclosure : Compensated affiliate links used when possible  at NO additional cost to you.. Thank you!