Wednesday 29 November 2017

Die Cut Coral Card

Hello friends & welcome to Heartfelt Wednesday...
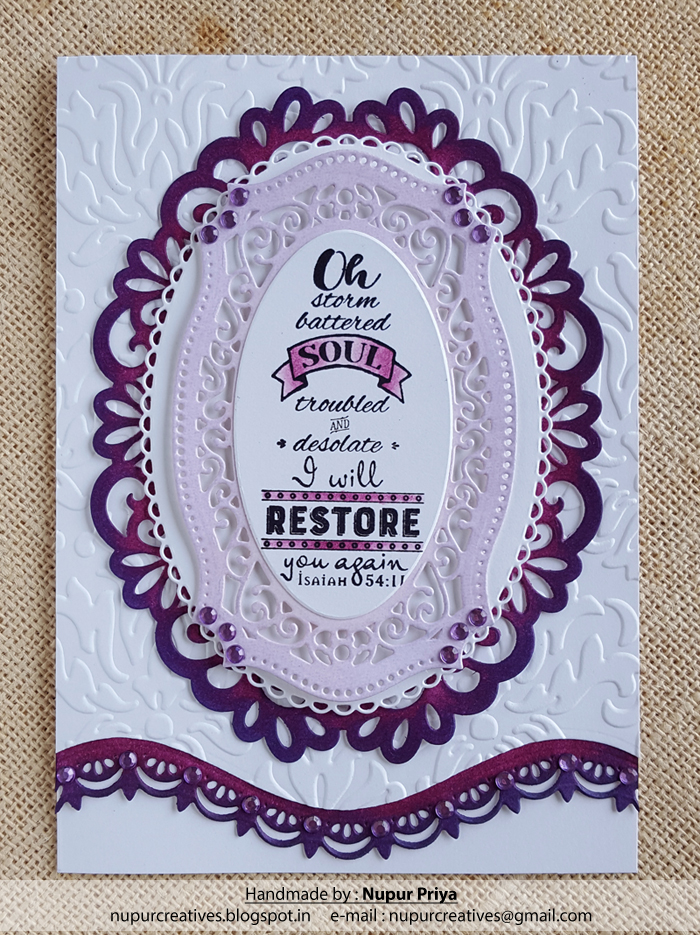
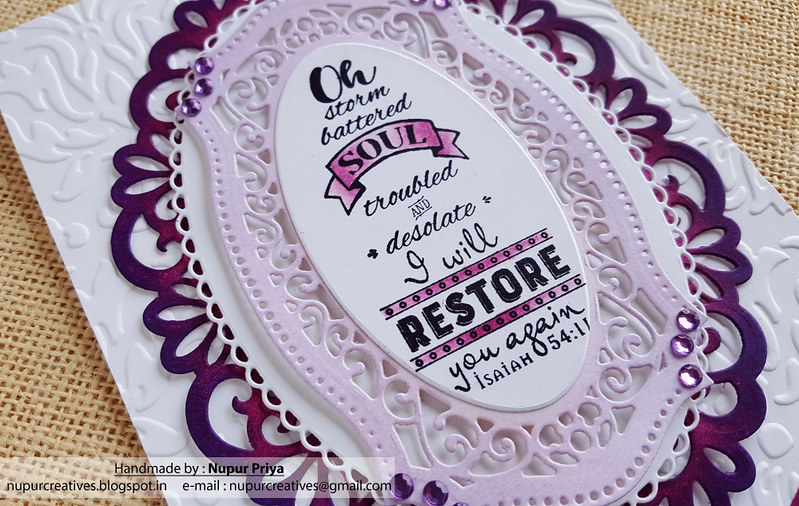
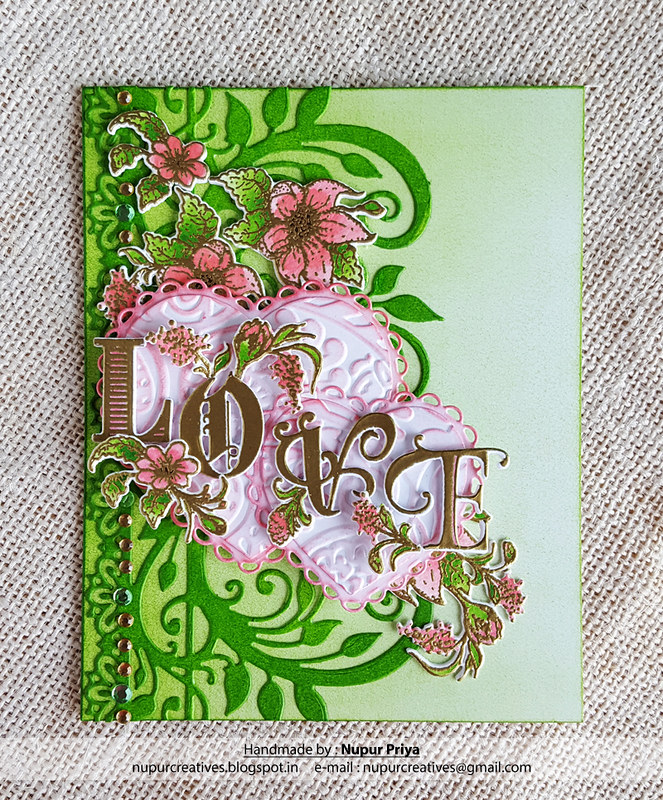
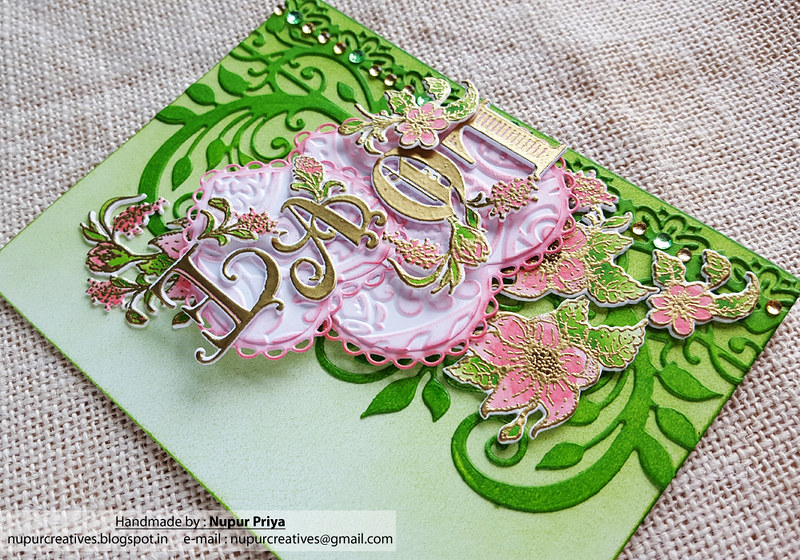
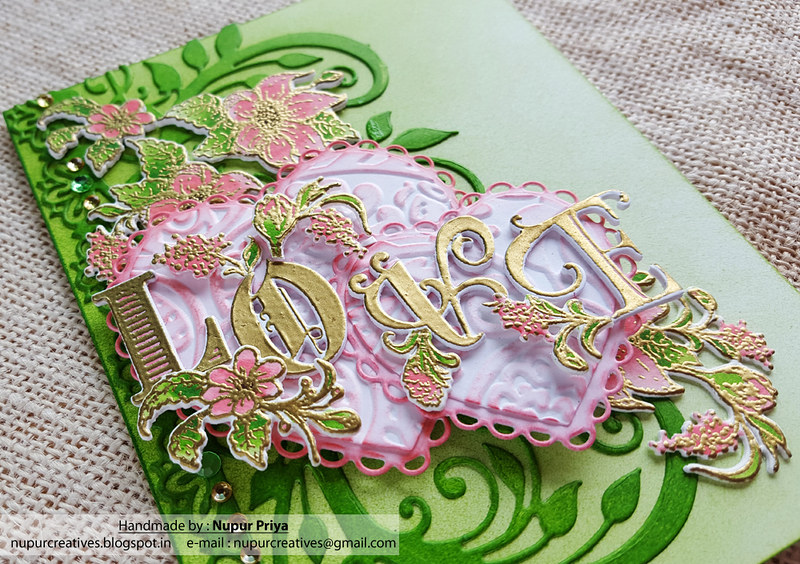
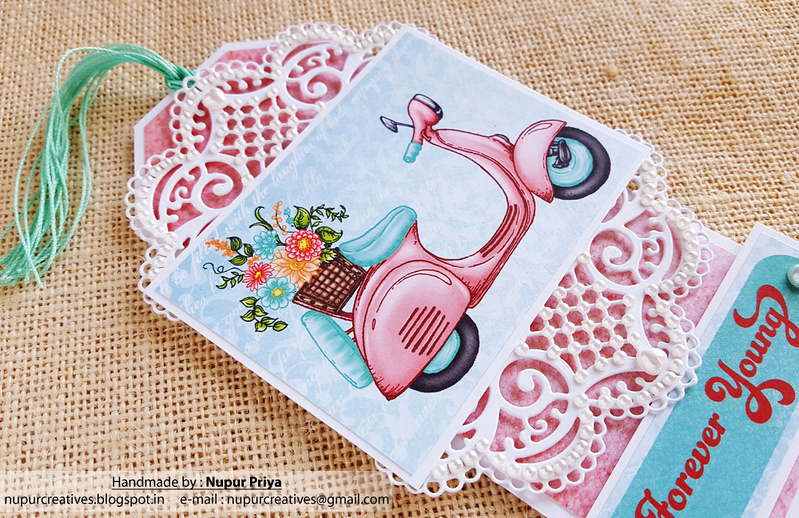
I have made a card using the border dies from Sweetheart Borders Die for today's inspiration...
Read till the end for the list of products used & instructions for this card...
20170728_132432

20170728_132437

Heartfelt Creations Products: 
HCD1-7161 Sweetheart Borders Die
HCDA2-450 Stack and Store Daubers-Pack of 30
Other Products:
Abandoned Coral Distress ink, Ebosser, Clarity Stencil BrushesPick me Up, rhinestones, pearls & adhesive.

Project Instruction:
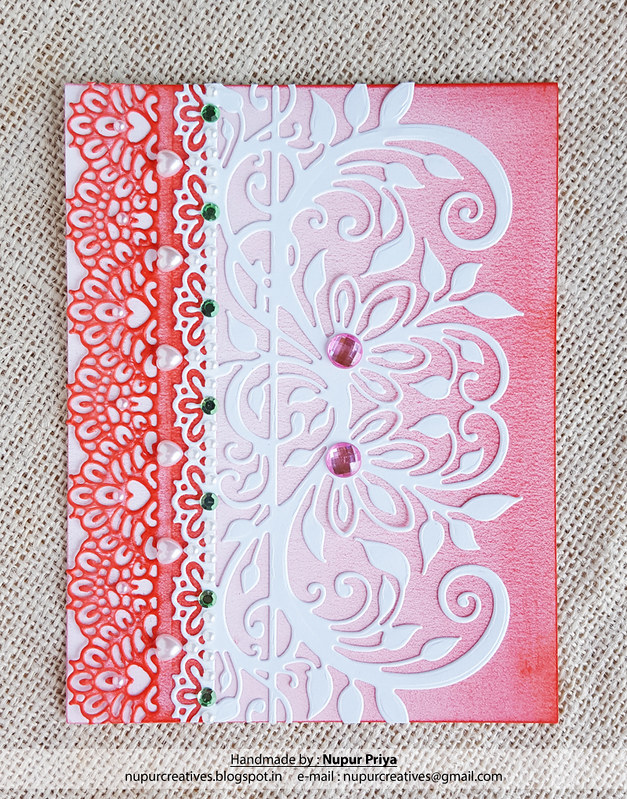
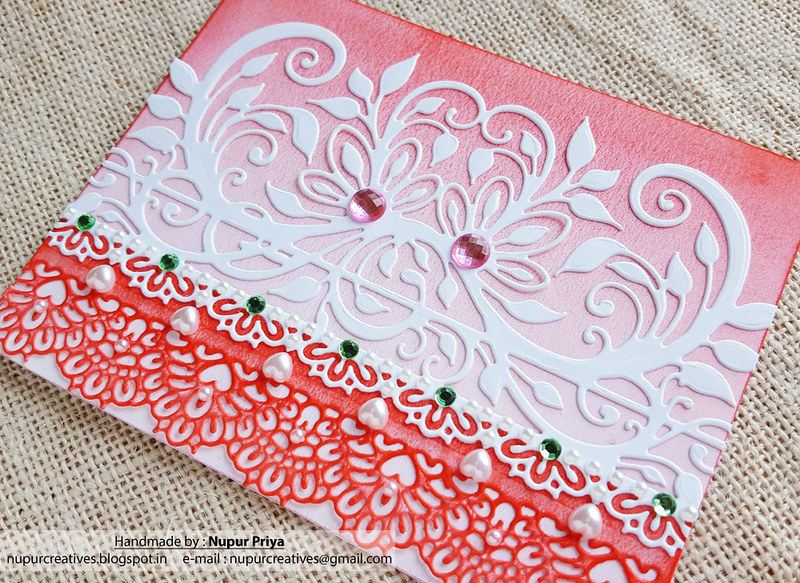
Take a 4 1/4" x 5 1/2" white cardbase. Ink it with Abandoned Coral Distress ink using Clarity Stencil Brush using heavy color application on the right side to get the ombre effect.

Die cut white cardstock using both the dies from Sweetheart Borders Die. Ink the thinner border die cut using  Abandoned Coral Distress ink using Stack and Store Daubers. Adhere both the die cuts as shown using Designer Dries Clear Adhesive along with the Metal Tip. Add some rhinestones & pearls to the die cuts using Pick me Up for finishing touch.


Hope you like this card...
Thank you for visiting today... :)
Nupur
Disclosure : Compensated affiliate links used when possible  at NO additional cost to you.. Thank you! 

Friday 24 November 2017

Black Friday 2017

Hello friends & welcome to Black Friday Release by Heartfelt Creations...
I have made a card using The stamps from newly launched Black Friday Collection for today's inspiration...

Read till the end for the list of products used & instructions for this card...

20170916_154127

20170916_154151

20170916_154922_001

Heartfelt Creations Products: 
HCD1-7119 Classic Border Basics Die
HCD1-756 Eyelet Oval and Basics Small Dies
HCD1-757 Eyelet Oval and Basics Large Dies
HCDA2-450 Stack and Store Daubers-Pack of 30
HCDA1-449 Stack and Store Daubers-Pack of 6
HCPP2-451 8.5 x 11 Cardstock Pack of 25 - White
368771 Scor-Tool
173842 Scor-Pal Measuring & Scoring Board
411231 5pc. Acrylic Block Set
D110305 Stamp Mat Pad
359848 Spellbinders Tool N' One
159723 Designer Dries Clear Adhesive
352854 Metal Tip for Adhesive Bottles
D120601 Darice Adhesive Foam Strips
DDOTS Double Dots 100pc. -3D Foam Circles
RACP468 Ranger Archival Ink Pad - Jet Black

Other Products:
Milled LavenderSeedless Preserves & Wilted Violet Distress inks, Anna Griffin Damask Embossing Folder, Koi Watrbrush, Ebosser, watercolor cardstock, Spellbinders Majestic Label 25 dies, Spellbinders  Heirloom Oval dies, Pick me Up & rhinestones. 

Project Instruction:

Take 2 pieces of 5" x 7" white cardstock & cut the bottom of both using dies from Classic Border Basics Die Ink the die cut border of the bigger piece using Seedless Preserve &

Wilted Violet Distress inks. Use Anna Griffin Damask Embossing Folder to emboss the other piece. Adhere them on a 5" x 7" white cardbase. Die cut 4 pieces of white cardstock using the dies from Spellbinders Heirloom Oval dies,

Eyelet Oval and Basics Large dies, Spellbinders Majestic Label 25 dies & Eyelet Oval and Basics Small dies. Ink the largest piece using Seedless Preserve & Wilted Violet Distress inks & Stack and Store Daubers. Ink the Spellbinders Majestic Labels 25  die cut piece using Milled Lavander Distress inks & Stack and Store Daubers.

Stamp the sentiment from Words Of Encouragement Stamp Set using Mini MSITI & black Archival ink. Color in some parts of the sentiment using Seedless Preserve Distress ink pad & Koi Waterbrush.


Hope you like this card...
Thank you for visiting today... :)
Nupur
Disclosure : Compensated affiliate links used when possible  at NO additional cost to you.. Thank you! 

Wednesday 15 November 2017

Double Stencil Fun

Hello friends & welcome to Heartfelt Wednesday...
I have made a card using stenciling technique for today's inspiration...
Read till the end for the list of products used & instructions for this card...
20170906_161413

20170906_161420


Heartfelt Creations Products: 
HCD1-755 Circle Basics Large Dies
HCDA2-450 Stack and Store Daubers-Pack of 30

Other Products:
Peacock feathers & Seedless Preserve Distress inks, Black Archival ink,  Anna Griffen Pirouette Embossing folder, Art Antrology Kaleidoscope stencil, Memorybox Heartwood stencil, Ebosser, Clarity Stencil BrushesPick me Up, rhinestones, pearls & adhesive.

Project Instruction:
Take a 4" x 5 1/4" white cardstock and emboss it using Anna Griffen Pirouette Embossing folder. Adhere it on a 4 1/4" x 5 1/2" white cardbase.

Take another piece of white cardstock & ink it using Art Antrology Kaleidoscope stencil, Seedless Preserve Distress ink & Clarity Stencil Brush. Remove the stencil & align the  Memorybox Heartwood stencil to the center of the inked design & ink with Peacock feathers Distress ink & Clarity Stencil Brush. Die cut this piece using Eyelet Circle and Basics Small Dies. Die cut a piece of white cardstock using the eyelet circle from the same die set & ink the edges of both the pieces with Seedless Preserve Distress ink using Stack and Store Daubers. Die cut another piece of white cardstock using Circle Basics Large Dies. Stack & adhere them together. Cut off a portion of this piece as shown & adhere to the card front with 3D Foam Circles.

Stamp the sentiment from Heartfelt Love Sentiments Stamp Set using Black Archival ink & cut it into banner shape. Adhere it on top of the circle arrangement using Foam Strips. Add some rhinestones & pearls to the stenciled background & embossed background using Pick me Up for finishing touch.


Hope you like this card...
Thank you for visiting today... :)
Nupur
Disclosure : Compensated affiliate links used when possible  at NO additional cost to you.. Thank you! 

Wednesday 8 November 2017

Golden Love

Hello friends & welcome to Heartfelt Wednesday...
Today is the release day of a brand new collection:

Heartfelt Love Collection
Are you ready to change the world one paper craft at a time? Spread love and encouragement wherever you go with the new Heartfelt Love Collection by Heartfelt Creations! Filled with uplifting sentiments for all occasions, you will find that this assembling of heartwarming papers, cling stamp sets and die cuts will allow you to brighten the days of friends, loved ones and those you meet along the road of life needing a little pick me up or celebrating a special day! What better way to spread smiles than through one of a kind creative projects and handmade art from the heart! The amazing assembling of decorative papers in this love themed compilation has been created of bits and pieces featuring many previously released collections and will coordinate perfectly with many of the stamp and die combinations and decorative papers from past releases already residing in your craft room. The stunning color palette incorporates every color imaginable…from deep reds, pretty pinks, lush lilacs, to chocolate browns, sky blues and gorgeous greens, while beautiful eye catching backgrounds are filled with bold stripes, zig zag chevrons, delicate hearts, petite polka dots and dainty florals. Three lovely cling stamp sets filled with images of decorative banners, beautiful carnation like florals, and a wide assortment of love sentiments are ideal for use on cards, scrapbook layouts or altered art pieces. Two delicately patterned die cuts resembling elegant eyelet lace are ideal to bring a soft look perfect for adding a dreamy and romantic feel to any paper crafting project! Lastly, an adorable gift box die rounds out this love themed collection and creates quaint treat boxes ideal for quick packaging and makes a charming way to let those in your life know how special they are. So come alongside and join us as we share love, joy, and encouragement with everyone we meet through crafty passions one paper craft at a time!

This is a beautiful collection & I have made a card using the stamps & dies from this collection...
Read till the end for the list of products used & instructions for this card...

20170728_132036

20170728_132208

20170728_132244

Heartfelt Creations Products: 
HCPC-3803 Banners Of Love Stamp Set
HCD1-7160 Banners Of Love Die
HCD1-7161 Sweetheart Borders Die
HCD1-7162 Eyelet Hearts Die
Other Products:
Mowed Lawn & Worn Lipstick Distress inks, Versamark Ink, Sizzix Tropical Paisley Embossing Folder, Koi Waterbrush, Ebosser, watercolor cardstock, Clarity Stencil BrushesPick me Up & rhinestones.
Project Instruction:
Take a 4 1/4" x 5 1/2" white card base & ink it with Mowed Lawn Distress ink using Clarity Stencil Brush. Keep the ink application heavy on the left side & light on the right side to get an ombre effect.

Die cut a piece of white cardstock using the border die from Sweetheart Borders Die & ink it with Mowed Lawn Distress ink using Stack and Store Daubers. Adhere this to the card front on the left side. 

Stamp the LOVE & flower images from Banners Of Love Stamp Set with Versamark Ink on watercolor cardstock & heat emboss using Gold Embossing Powder & Ranger Heat-it-tool. Die cut them using matching dies from Banners Of Love Die. Die cut few more pieces of white cardstock using the same dies. Color in the images using Mowed Lawn & Worn Lipstick Distress ink pads & Koi Waterbrush.

Die cut 2 eyelet hearts & 2 plain hearts of different sizes from white cardstock using Eyelet Hearts Die. Emboss the plain hearts using Sizzix Tropical Paisley Embossing Folder. Ink all the 4 heart die cuts lightly with Worn Lipstick Distress inks & Stack and Store Daubers

Cut apart the floral images. Stack the similar die cuts to make faux chipboards.  Arrange & adhere all the images & hearts as shown using foam adhesive where necessary. Add some rhinestones to the die cuts using Pick me Up for finishing touch.


Hope you like this card...
Thank you for visiting today... :)
Nupur
Disclosure : Compensated affiliate links used when possible  at NO additional cost to you.. Thank you! 

Wednesday 1 November 2017

Forever Young

Hello friends & welcome to Heartfelt Wednesday...
I have a tag to share today which is made with Young At Heart Collection.
Read till the end for the list of products used & instructions for this tag...
020170906_161157

20170906_161205
Other Products:  Ebosser,  hole punch, teal twine, Pick me Up & pearls.

Project Instruction:
Take a piece of 6 3/4" x 3" white cardstock & cut off the top corners to make the tag base. Cut a piece of 6 1/2" x 2 3/4" pattern paper from the Young At Heart Paper Collection & cut off the top corners & adhere to the white tag base. 

Cut the scooter image & sentiment from the same paper collection & adhere them on a slightly larger pieces of white cardstock. Die cut 2 pieces of white cardstock using  Festive Holiday Die. Adhere them on top & bottom of the scooter panel. Adhere this resulting piece & the sentiment on the tag base using foam adhesive as shown. 

Punch a hole in the top center of the tag using hole punch. Thread a bunch of teal twine through this hole. Add some pearls using  Pick me Up to the die cuts & sentiment for finishing touch.


Hope you like this card...
Thank you for visiting today... :)
Nupur
Disclosure : Compensated affiliate links used when possible  at NO additional cost to you.. Thank you!