
Hello friends & welcome to another Heartfelt Wednesday inspiration post
I have made a card for today's inspiration.
I find that when the stamped image doesn't standout well on a busy background so I use this simple technique to lift up the stamped image by giving it some dimension.
I use 4 or 5 pieces of cardstock die cut with the same coordinating die that was used to cut the stamped image and stack them up.
You could do this by simply using foam adhesive behind the image but I think that the stacked die cut method is much better because it serves 2 purpose... It gives the image a solid and sturdy base so the image doesn't warp while mailing and it also looks nice from the sides.
Read till the end for the supply list & full instructions for making this card.
Heartfelt Creations Products:
HCPC-3830 Honey Bee Bungalows Cling Stamp Set
HCD1-7179 Butterfly Kisses Decorative Die
HCD1-7184 Honey Bee Bungalows Die
HCDP1-291 Sweet as Honey Paper Collection
HCPP3-452 12 x 12 Cardstock Pack of 25 - White
RACP468 Ranger Archival Ink Pad - Jet Black
3D1844 3-D Crystal Lacquer
NU650 Nuvo Crystal Drops - Ebony Black
NU667 Nuvo Crystal Drops - Red Berry
173842 Scor-Pal Measuring & Scoring Board
D110305 Stamp Mat Pad
359848 Spellbinders Tool N' One
31510 Funnel Tray
411231 5pc. Acrylic Block Set
532423-KIT Sizzix Vagabond 2 With Solo Wafer-Thin Die Adapter
159723 Designer Dries Clear Adhesive
352854 Metal Tip for Adhesive Bottles
D120601 Darice Adhesive Foam Strips
Other Products:
Gansai Tambi Watercolors, Paint brushes, Canson watercolor cardstock and brown cardstock.
Instructions:
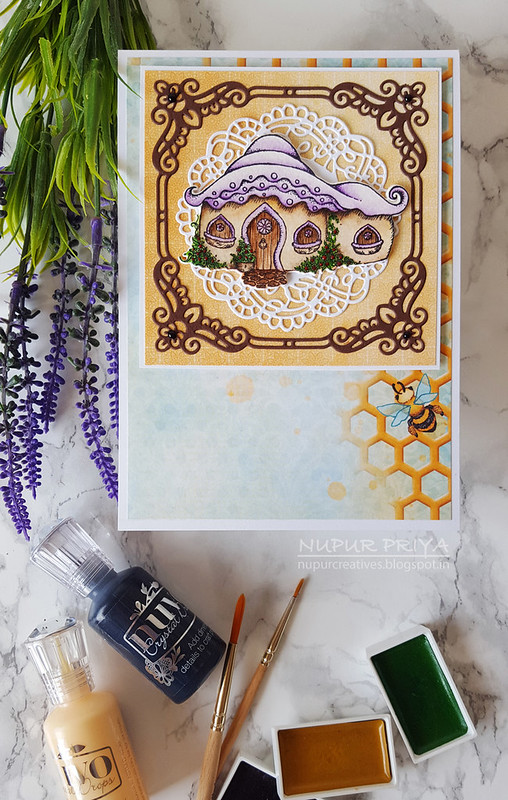
Cut a piece of 4 3/4" x 6 3/4" pattern paper from Sweet as Honey Paper Collection and adhere it to a 5" x 7" white cardbase. Cut a 5 1/4" square piece of pattern paper from.the same paper collection and adhere it to a slightly bigger piece of white cardstock. Adhere it to the top of card front as shown using Darice Adhesive Foam Strips.
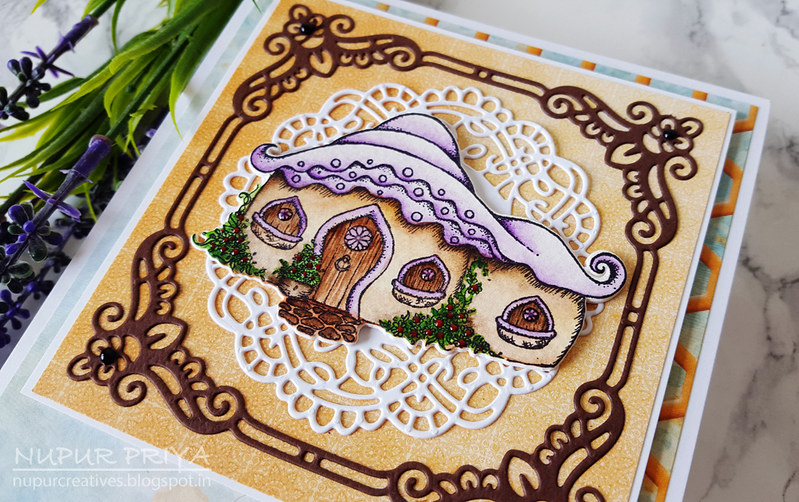
Die cut a piece of brown cardstock using Butterfly Kisses Decorative Die and adhere it to the square panel. Die cut a piece of white cardstock using the doily die from the same die set and adhere it inside the previous die cut.
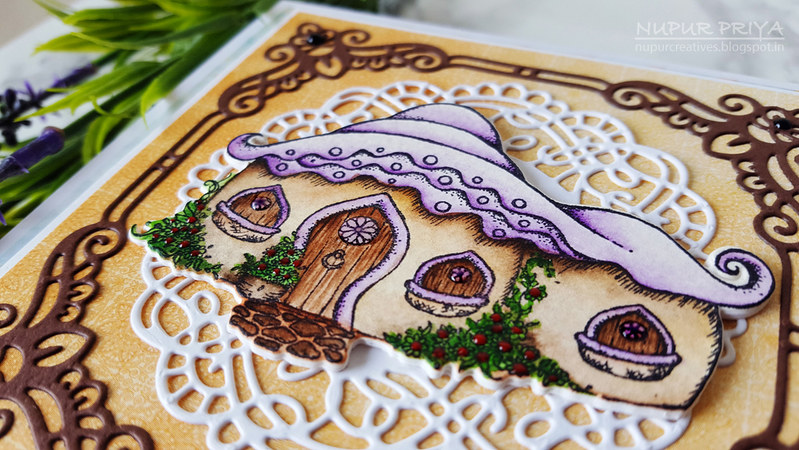
Stamp the house image from Honey Bee Bungalows Cling Stamp Set on a piece of watercolor cardstock using Black Archival Ink. Color it using Gansai Tambi Watercolors. Die cut it using matching die from Honey Bee Bungalows Die. Die cut 3 more pieces of white cardstock using the same die. Stack and adhere them together keeping the colored image on top to make a thicker piece. Adhere it on the doily die cut as shown. Add tiny drops of Red Berry Nuvo Crystal Drops to the bushes on the house. Add drops of Ebony Black Nuvo Crystal Drops on the brown die cut to add finishing touch to the card.
Hope you like it...
I have made a card for today's inspiration.
I find that when the stamped image doesn't standout well on a busy background so I use this simple technique to lift up the stamped image by giving it some dimension.
I use 4 or 5 pieces of cardstock die cut with the same coordinating die that was used to cut the stamped image and stack them up.
You could do this by simply using foam adhesive behind the image but I think that the stacked die cut method is much better because it serves 2 purpose... It gives the image a solid and sturdy base so the image doesn't warp while mailing and it also looks nice from the sides.
Read till the end for the supply list & full instructions for making this card.
Heartfelt Creations Products:
HCPC-3830 Honey Bee Bungalows Cling Stamp Set
HCD1-7179 Butterfly Kisses Decorative Die
HCD1-7184 Honey Bee Bungalows Die
HCDP1-291 Sweet as Honey Paper Collection
HCPP3-452 12 x 12 Cardstock Pack of 25 - White
RACP468 Ranger Archival Ink Pad - Jet Black
3D1844 3-D Crystal Lacquer
NU650 Nuvo Crystal Drops - Ebony Black
NU667 Nuvo Crystal Drops - Red Berry
173842 Scor-Pal Measuring & Scoring Board
D110305 Stamp Mat Pad
359848 Spellbinders Tool N' One
31510 Funnel Tray
411231 5pc. Acrylic Block Set
532423-KIT Sizzix Vagabond 2 With Solo Wafer-Thin Die Adapter
159723 Designer Dries Clear Adhesive
352854 Metal Tip for Adhesive Bottles
D120601 Darice Adhesive Foam Strips
Other Products:
Gansai Tambi Watercolors, Paint brushes, Canson watercolor cardstock and brown cardstock.
Instructions:
Cut a piece of 4 3/4" x 6 3/4" pattern paper from Sweet as Honey Paper Collection and adhere it to a 5" x 7" white cardbase. Cut a 5 1/4" square piece of pattern paper from.the same paper collection and adhere it to a slightly bigger piece of white cardstock. Adhere it to the top of card front as shown using Darice Adhesive Foam Strips.
Die cut a piece of brown cardstock using Butterfly Kisses Decorative Die and adhere it to the square panel. Die cut a piece of white cardstock using the doily die from the same die set and adhere it inside the previous die cut.
Stamp the house image from Honey Bee Bungalows Cling Stamp Set on a piece of watercolor cardstock using Black Archival Ink. Color it using Gansai Tambi Watercolors. Die cut it using matching die from Honey Bee Bungalows Die. Die cut 3 more pieces of white cardstock using the same die. Stack and adhere them together keeping the colored image on top to make a thicker piece. Adhere it on the doily die cut as shown. Add tiny drops of Red Berry Nuvo Crystal Drops to the bushes on the house. Add drops of Ebony Black Nuvo Crystal Drops on the brown die cut to add finishing touch to the card.
Hope you like it...
Thank you for visiting today... :)

Such a pretty card, I love your coloring!
ReplyDeleteThank you :)
DeleteSo pretty Nupur! Love your gorgeous coloring!
ReplyDeleteThank you :)
Delete