
Hello friends and welcome to Heartfelt inspiration post...
Today I have a card inspired by Jennifer McGuire
She shared a card technique recently which adds a lot of depth to a card and I loved it...
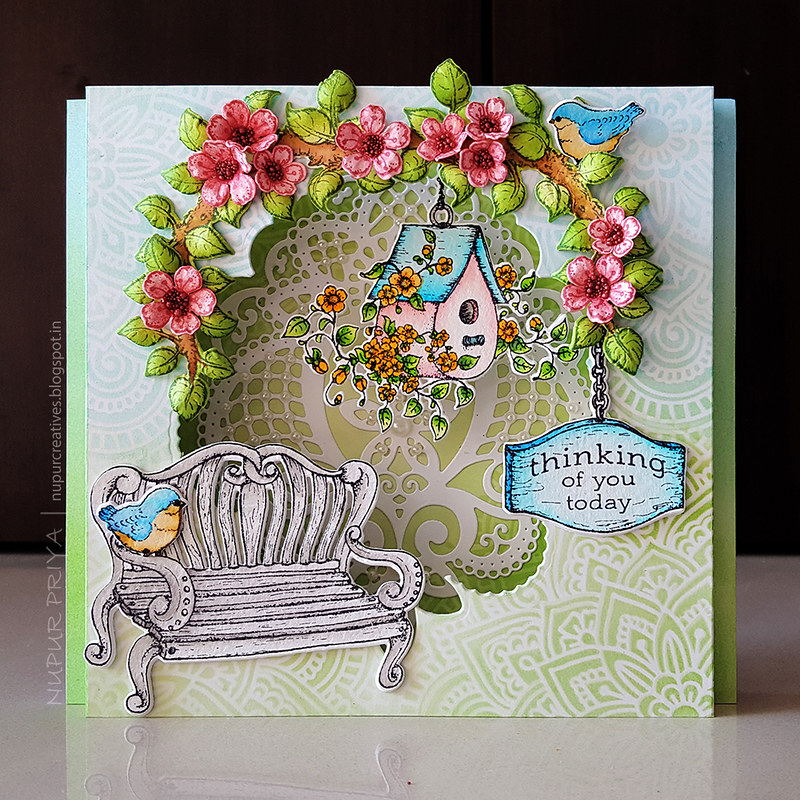
Here is my take on that technique.
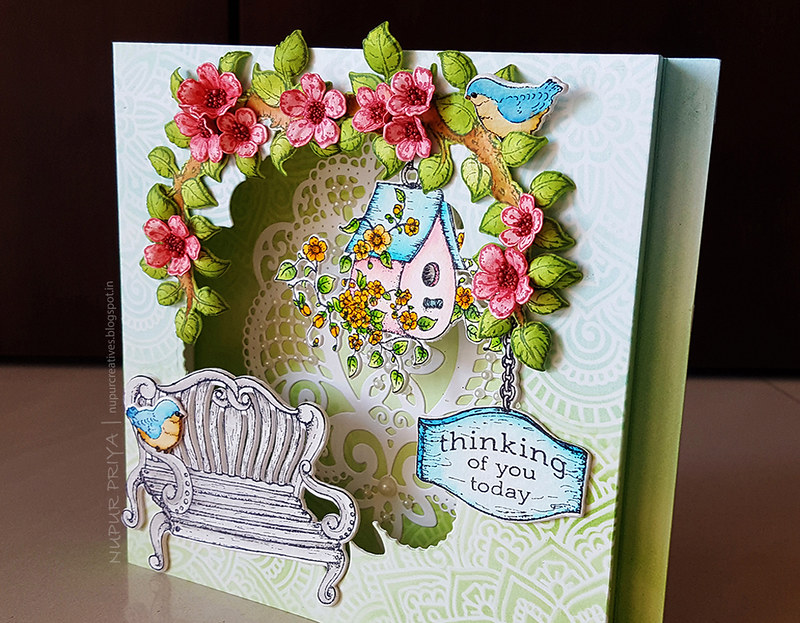
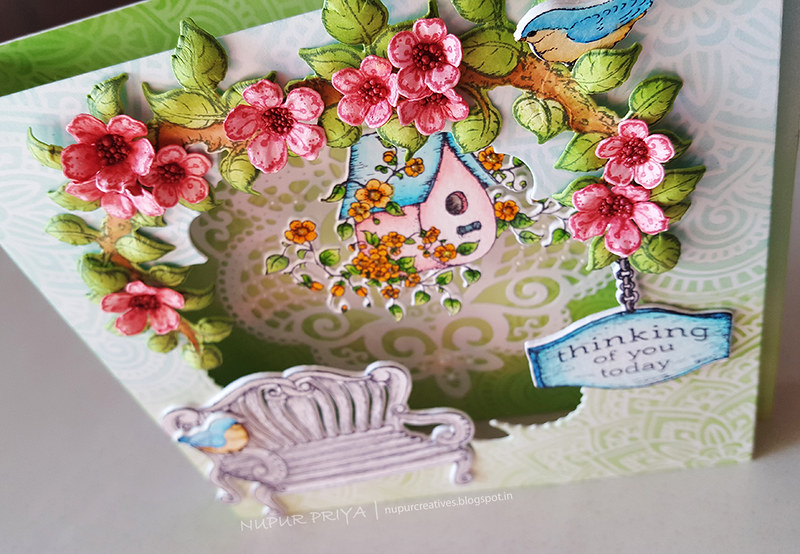
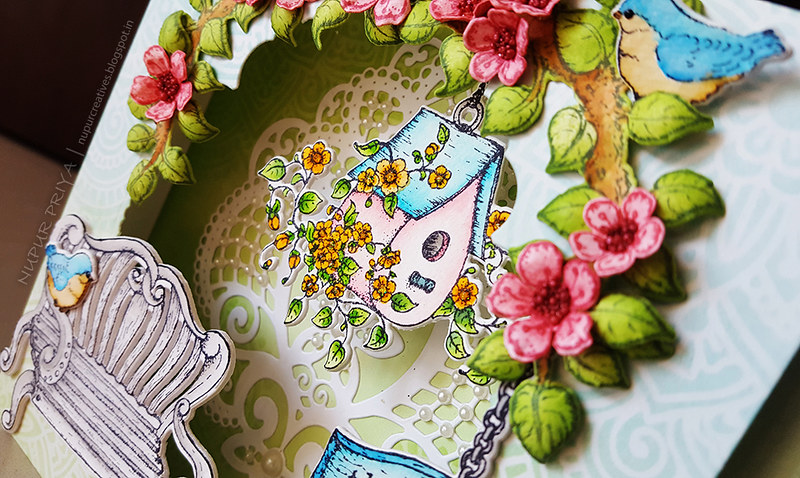
I have used 3D flowers and raised elements so it won't fit in a flat envelope but it will still fold flatter than the actual dimension...The gap between the front and back panel of the card is almost 1" and it stands on its own for displaying... The birdhouse inside appears to be floating midair thanks to the acetate piece (visible in last pic)
Read till the end for full list of products used and instructions for this card...

Heartfelt Creations Products:
HCPC-3866 Tweet Cherry Blossoms Cling Stamp Set
HCPC-3867 Cherry Blossom Retreat Cling Stamp Set
HCPC-3868 Wishing Well Oasis Cling Stamp Set
HCD1-7230 Tweet Cherry Blossoms Die
HCD1-7231 Cherry Blossom Retreat Die
HCD1-7232 Wishing Well Oasis Die
HCD1-7233 Daydreams Bridge Die
HCPP3-452 12 x 12 Cardstock Pack of 25 - White
GBKK811B1 Clear Cardstock 8.5 x 11
RACP482 Ranger Archival Ink Pad - Olive
RACP531 Ranger Archival Ink Pad - Vivid Chartreuse
RACP468 Ranger Archival Ink Pad - Jet Black
RACP993 Ranger Archival Ink Pad - Red Geranium
RACP461 Ranger Archival Ink Pad - Vermillion
RACP451 Ranger Archival Ink Pad - Coffee
Zig Clean Color Real Brush Markers
ANC851 Rock N' Roll Prills - Stop Wining
352854 Metal Tip for Adhesive Bottles
159723 Designer Dries Clear Adhesive
HCST1-401 Deluxe Flower Shaping Kit
HCFB1-474 3D Cherry Blossom Shaping Mold
HCDA2-450 Stack and Store Daubers-Pack of 30
359848 Spellbinders Tool N' One.
173842 Scor-Pal Measuring & Scoring Board
411231 5pc. Acrylic Block Set
Other Products:
Tumbled Glass and Mowed Lawn Distress Inks, Mudra Indian Ornate- Mandala Stencil, Watercolor cardstock, White Blizzard Nuvo Glitter Drops and Pearls.
Instructions:
Score 2 pieces of 8" x 6" piece of white cardstocks at 1/2", 1", 7" and 7 1/2" and then fold them in this sequence : valley, mountain, mountain and valley. Use the decorative die from Daydreams Bridge Die to die cut the center from one of the pieces.
Take 2 piece of 6" x 6" white cardstock and ink one with Mowed Lawn distress ink lightly and then use the Mudra Indian Ornate- Mandala Stencil to again ink it with the same ink. Adhere to the inside of the back piece. Die cut the center of the other piece using the same decorative die as above making sure to line it up with the previous die cut piece and then adhere it to the back of the front piece to add more strength. Adhere one of the decorative die cuts on the inked panel again lining it up with the hole in the front piece and add pearls to decorate it.
Take the front panel with the center hole and mask off the side tabs with scrap pieces of paper and ink the center using Tumbled Glass and Mowed Lawn distress inks along with Mudra Indian Ornate- Mandala Stencil. Take the masks off the side tabs and ink them with the same inks without using the stencil.
Stamp the bird, bird house, wood sign and garden bench images from Tweet Cherry Blossoms Cling Stamp Set, Cherry Blossom Retreat Cling Stamp Set and Wishing Well Oasis Cling Stamp Set on a piece of watercolor cardstock using Jet Black Archival Ink and color them using Zig Clean Color Real Brush Markers. Die cut them using the matching dies from Tweet Cherry Blossoms Die, Cherry Blossom Retreat Die and Wishing Well Oasis Die. Die cut 3 more pieces for all the images from white cardstock and stack and adhere them behind the matching images to create a thicker piece.
For the bird house image cut 2 strips of Clear Cardstock and sandwich one end between the layers so that the loose end in on the right side. Position the bird house and adhere the acetate strip on the right outermost tab of the back piece. Adhere the outermost tabs of both the front and back piece of our card so that it looks like an inside pointing arrow from the top.
Stamp the branch images from Cherry Blossom Retreat Cling Stamp Set using Olive Archival Ink on a piece of white cardstock. ink it using Vivid Chartreuse and Coffee Archival Ink. Die cut them using matching dies from Cherry Blossom Retreat Die. Shape them using Deluxe Flower Shaping Kit and adhere them around the die cut center as shown.
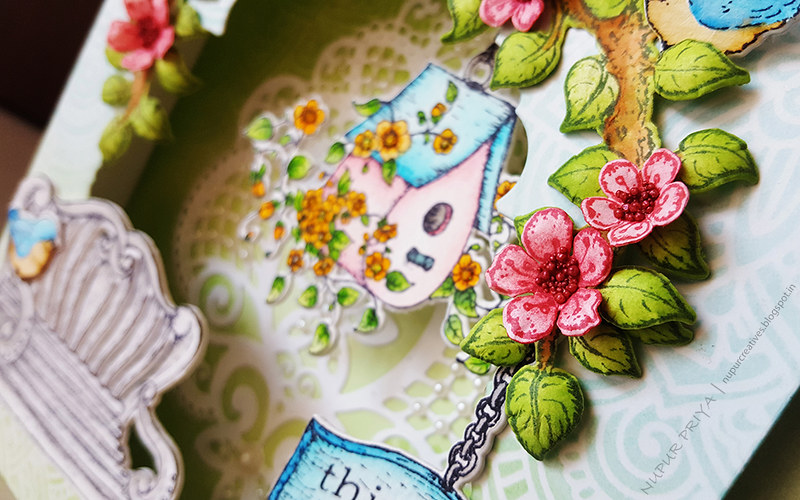
Stamp the Cherry blossoms from Tweet Cherry Blossoms Cling Stamp Set with Red Geranium and Vermillion Archival Ink Pads. Ink them with the same inks using Stack and Store Daubers. Shape them using 3D Cherry Blossom Shaping Mold and Deluxe Flower Shaping Kit. Add a little Stop Wining Prills to the flower centers.
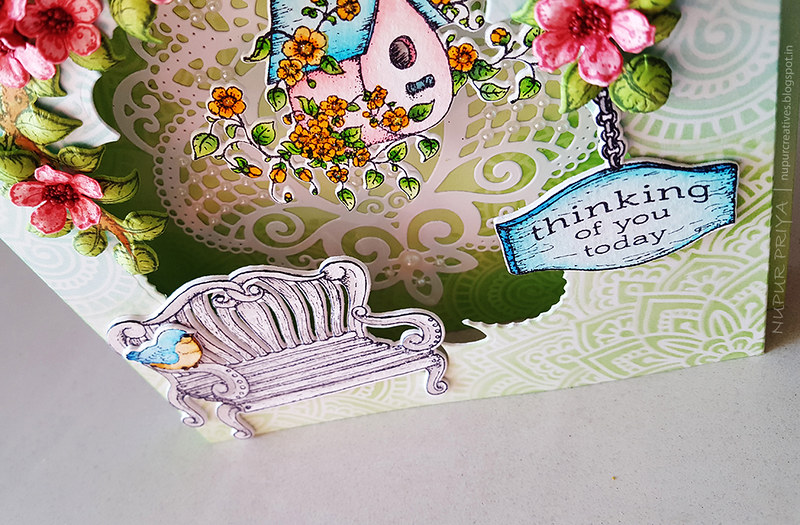
Arrange and adhere the flowers on the branches. Adhere the garden bench, wood sign and birds on the front of the card as shown. Add tiny drops of White Blizzard Nuvo Glitter Drops to the flower centers of the bird house for finishing touch.
Hope you like it...
Today I have a card inspired by Jennifer McGuire
She shared a card technique recently which adds a lot of depth to a card and I loved it...
Here is my take on that technique.
I have used 3D flowers and raised elements so it won't fit in a flat envelope but it will still fold flatter than the actual dimension...The gap between the front and back panel of the card is almost 1" and it stands on its own for displaying... The birdhouse inside appears to be floating midair thanks to the acetate piece (visible in last pic)
Read till the end for full list of products used and instructions for this card...
Heartfelt Creations Products:
HCPC-3866 Tweet Cherry Blossoms Cling Stamp Set
HCPC-3867 Cherry Blossom Retreat Cling Stamp Set
HCPC-3868 Wishing Well Oasis Cling Stamp Set
HCD1-7230 Tweet Cherry Blossoms Die
HCD1-7231 Cherry Blossom Retreat Die
HCD1-7232 Wishing Well Oasis Die
HCD1-7233 Daydreams Bridge Die
HCPP3-452 12 x 12 Cardstock Pack of 25 - White
GBKK811B1 Clear Cardstock 8.5 x 11
RACP482 Ranger Archival Ink Pad - Olive
RACP531 Ranger Archival Ink Pad - Vivid Chartreuse
RACP468 Ranger Archival Ink Pad - Jet Black
RACP993 Ranger Archival Ink Pad - Red Geranium
RACP461 Ranger Archival Ink Pad - Vermillion
RACP451 Ranger Archival Ink Pad - Coffee
Zig Clean Color Real Brush Markers
ANC851 Rock N' Roll Prills - Stop Wining
352854 Metal Tip for Adhesive Bottles
159723 Designer Dries Clear Adhesive
HCST1-401 Deluxe Flower Shaping Kit
HCFB1-474 3D Cherry Blossom Shaping Mold
HCDA2-450 Stack and Store Daubers-Pack of 30
359848 Spellbinders Tool N' One.
173842 Scor-Pal Measuring & Scoring Board
411231 5pc. Acrylic Block Set
Other Products:
Tumbled Glass and Mowed Lawn Distress Inks, Mudra Indian Ornate- Mandala Stencil, Watercolor cardstock, White Blizzard Nuvo Glitter Drops and Pearls.
Instructions:
Score 2 pieces of 8" x 6" piece of white cardstocks at 1/2", 1", 7" and 7 1/2" and then fold them in this sequence : valley, mountain, mountain and valley. Use the decorative die from Daydreams Bridge Die to die cut the center from one of the pieces.
Take 2 piece of 6" x 6" white cardstock and ink one with Mowed Lawn distress ink lightly and then use the Mudra Indian Ornate- Mandala Stencil to again ink it with the same ink. Adhere to the inside of the back piece. Die cut the center of the other piece using the same decorative die as above making sure to line it up with the previous die cut piece and then adhere it to the back of the front piece to add more strength. Adhere one of the decorative die cuts on the inked panel again lining it up with the hole in the front piece and add pearls to decorate it.
Take the front panel with the center hole and mask off the side tabs with scrap pieces of paper and ink the center using Tumbled Glass and Mowed Lawn distress inks along with Mudra Indian Ornate- Mandala Stencil. Take the masks off the side tabs and ink them with the same inks without using the stencil.
Stamp the bird, bird house, wood sign and garden bench images from Tweet Cherry Blossoms Cling Stamp Set, Cherry Blossom Retreat Cling Stamp Set and Wishing Well Oasis Cling Stamp Set on a piece of watercolor cardstock using Jet Black Archival Ink and color them using Zig Clean Color Real Brush Markers. Die cut them using the matching dies from Tweet Cherry Blossoms Die, Cherry Blossom Retreat Die and Wishing Well Oasis Die. Die cut 3 more pieces for all the images from white cardstock and stack and adhere them behind the matching images to create a thicker piece.
For the bird house image cut 2 strips of Clear Cardstock and sandwich one end between the layers so that the loose end in on the right side. Position the bird house and adhere the acetate strip on the right outermost tab of the back piece. Adhere the outermost tabs of both the front and back piece of our card so that it looks like an inside pointing arrow from the top.
Stamp the branch images from Cherry Blossom Retreat Cling Stamp Set using Olive Archival Ink on a piece of white cardstock. ink it using Vivid Chartreuse and Coffee Archival Ink. Die cut them using matching dies from Cherry Blossom Retreat Die. Shape them using Deluxe Flower Shaping Kit and adhere them around the die cut center as shown.
Stamp the Cherry blossoms from Tweet Cherry Blossoms Cling Stamp Set with Red Geranium and Vermillion Archival Ink Pads. Ink them with the same inks using Stack and Store Daubers. Shape them using 3D Cherry Blossom Shaping Mold and Deluxe Flower Shaping Kit. Add a little Stop Wining Prills to the flower centers.
Arrange and adhere the flowers on the branches. Adhere the garden bench, wood sign and birds on the front of the card as shown. Add tiny drops of White Blizzard Nuvo Glitter Drops to the flower centers of the bird house for finishing touch.
Hope you like it...
Thank you for visiting today... :)

Wow this is gorgeous Nupur. I love this technique!
ReplyDelete