
Hello friends,
Welcome to my blog and heartfelt Wednesday...
You might have seen this card few weeks back on Heartfelt Creations blog but the reason I am postions it so late is that my pc dies down and we couldn't get it fixed due to the lockdown. Finally it is done and I can start posting again yayyyy
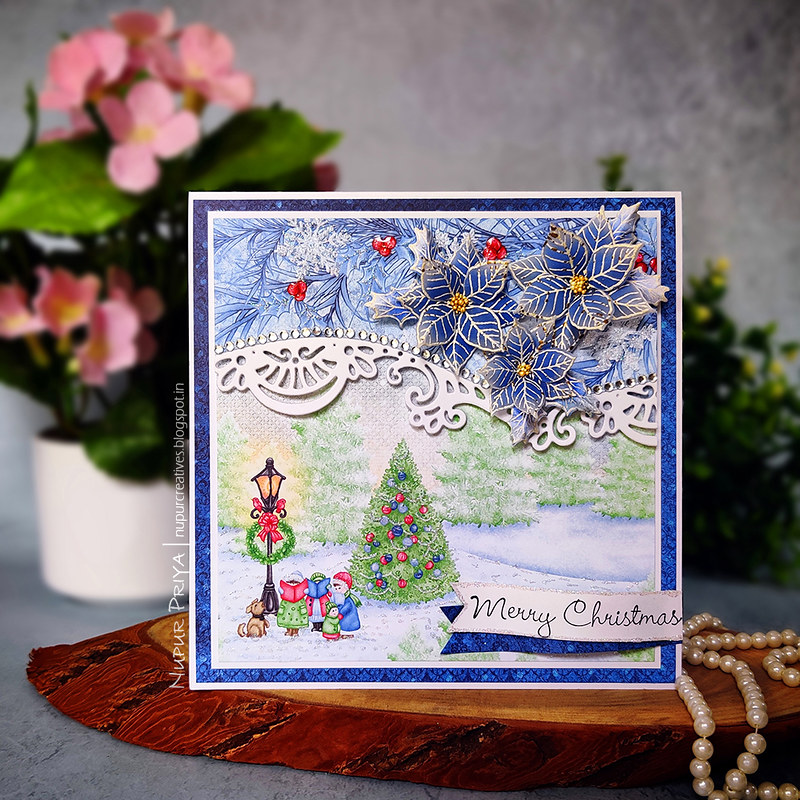
So let's move on to the card I am sharing today... It is a Christmas card in non-traditional color combination. and I love the vellum poinsettias in blue!
As usual the full supply list and instructions are at the end of the post.
As usual the full supply list and instructions are at the end of the post.


Heartfelt Creations Products:
HCPC-3881 Christmas Poinsettia & Holly Cling Stamp Set
HCD1-7120 Fleur Border Basics Die
HCDP1-2118 Festive Winterscapes Paper Collection
HCD1-7120 Fleur Border Basics Die
HCDP1-2118 Festive Winterscapes Paper Collection
HCPP1-438-2 Paper Pack of 10 - White
18002 Rajni Chawla's Vellum Flowerite
HCPP1-475 Deluxe Flower Shaping Paper - Pack of 50
RACP468 Ranger Archival Ink Pad - Jet Black
HCST1-401 Deluxe Flower Shaping Kit
DMCT4185 Groove Golf Tool Set
HCDA2-450 Stack and Store Daubers-Pack of 30
RAHT Heat It Craft Tool
359848 Spellbinders Tool N' One
411231 5pc. Acrylic Block Set
209277 Embossing Enamel - Aged Ivory
ANC851 Rock N' Roll Prills - I'm A-Maized
352854 Metal Tip for Adhesive Bottles
159723 Designer Dries Clear Adhesive
3D1844 3-D Crystal Lacquer
Other Products:
Blueprint Sketch Distress Oxide ink, Hero arts Unicorn White Pigment ink, foam tape, transparent holographic glitter and silver rhinestones.
Instructions:
Card Base : Cut a piece of 5 7/8 x 5 7/8" pattern paper from Festive Winterscapes Paper Collection and adhere it on a 6" x 6" piece of white cardbase. Take a 5 1/2" x 5 1/2" piece of white cardstock and adhere it on the previous layer of pattern paper and adhere a slightly smaller size of pattern paper from the same collection on it.
Die cut a 5 3/8" x 2 1/2" piece of pattern paper from the same collection using the border die from Fleur Border Basics Die and adhere it on a 5 3/8" x 3" piece of white cardstock. Line up the inner edge of the border die from Elegant Border Basics Die with the edge of pattern paper and die cut the white cardstock to create the border. Adhere this piece on the card base as shown using foam adhesive.
Apply Designer Dries Clear Adhesive on the snowflakes, snow, leaves, caps and garland on the tree and sprinkle transparent holographic glitter on top. Apply a layer of 3-D Crystal Lacquer on the lamp, berries and ornaments and let it dry.
Sentiment : Stamp the sentiment from Festive Winterscapes Cling Stamp Set on a piece of white cardstock and trim it to create a banner. Create another banner of the same size from the pattern paper that was used for the 1st layer. Use the stylus from Deluxe Flower Shaping Kit to curl the banners and adhere them as shown. Apply a line of Designer Dries Clear Adhesive on the border of white banner and sprinkle glitter on top.
Flower and Leaves : Stamp the flowers and leaves from Christmas Poinsettia & Holly Cling Stamp Set on a piece of Rajni Chawla's Vellum Flowerite and Deluxe Flower Shaping Paper with Hero arts Unicorn White Pigment ink and heat emboss them using Aged Ivory Embossing Enamel and Heat It Craft Tool. Ink the heat embossed flowers and leaves with Blueprint Sketch Distress Oxide ink and die cut them using the matching dies from Christmas Poinsettia & Holly Die. Shape them using Deluxe Flower Shaping Kit and Groove Golf Tool Set. Add a little I'm A-Maized Prills to the flower centers using 3-D Crystal Lacquer. Arrange and adhere them on the card again using 3-D Crystal Lacquer. Add a line of silver rhinestones along the die cut border to add finishing touch.
Hope you like it...
Thank you for visiting today... :)

No comments :
Post a Comment
Hi thanks for dropping by and having a look at my blog. Your comments are much appreciated. Hugs. Nupur...