
Hello friends and welcome to my 1st Post of 2019!!!
Wishing You All a Very Happy & Prosperous New Year!!!
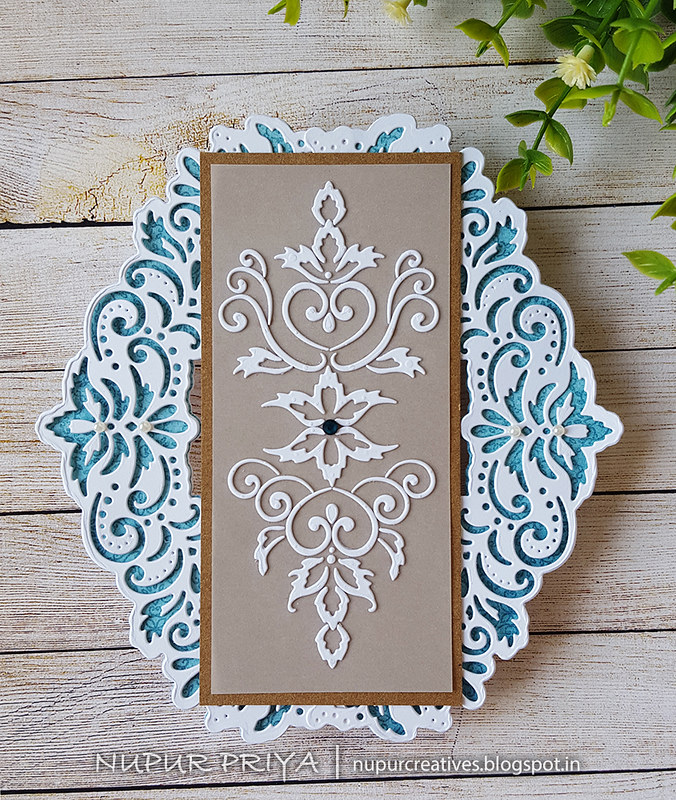
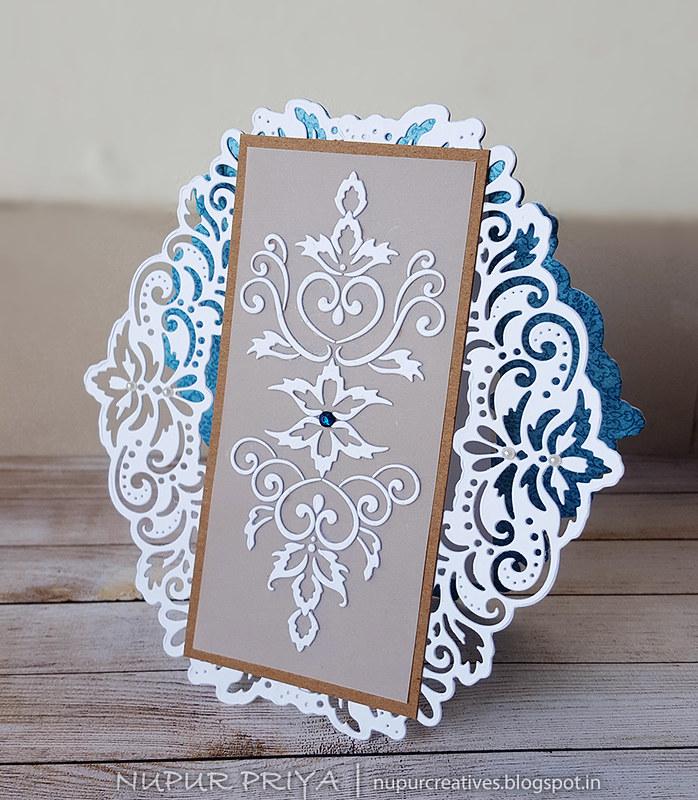
Have you ever thought of using the negative die cuts in a creative way?
Sometimes the negative die cuts are as beautiful as the die cut itself and one such example is the Elegant Pocket Accents Die...When I saw this die I knew I had to save the negative pieces too...They were just too beautiful to throw away!
After I collected a little pile of these pieces I payed around with them and came up with a few gorgeous designs and I have used one of these designs on the card I am sharing today...
I hope this will give you ideas to see your dies in new light and use them more creatively.
I can't wait to see what you came up with... I would love it if you share your projects with me if I manage to inspire you in any way...
Read till the end for a complete list of products and full instructions of how I created this card...
Heartfelt creations Products:
HCD1-7213 Elegant Pocket Accents Die
HCDP1-296 Patchwork Daisy Paper Collection
HCPP3-452 12 x 12 Cardstock Pack of 25 - White
 Disclosure : Compensated affiliate links used when possible at NO additional cost to you.. Thank you!
Wishing You All a Very Happy & Prosperous New Year!!!
Have you ever thought of using the negative die cuts in a creative way?
Sometimes the negative die cuts are as beautiful as the die cut itself and one such example is the Elegant Pocket Accents Die...When I saw this die I knew I had to save the negative pieces too...They were just too beautiful to throw away!
After I collected a little pile of these pieces I payed around with them and came up with a few gorgeous designs and I have used one of these designs on the card I am sharing today...
I hope this will give you ideas to see your dies in new light and use them more creatively.
I can't wait to see what you came up with... I would love it if you share your projects with me if I manage to inspire you in any way...
Read till the end for a complete list of products and full instructions of how I created this card...
Heartfelt creations Products:
HCD1-7213 Elegant Pocket Accents Die
HCDP1-296 Patchwork Daisy Paper Collection
HCPP3-452 12 x 12 Cardstock Pack of 25 - White
352854 Metal Tip for Adhesive Bottles
159723 Designer Dries Clear Adhesive
173842 Scor-Pal Measuring & Scoring Board
359848 Spellbinders Tool N' One
HCDA2-450 Stack and Store Daubers-Pack of 30
Other products:
Rhinestons, pearls and Ebosser.
Instructions:
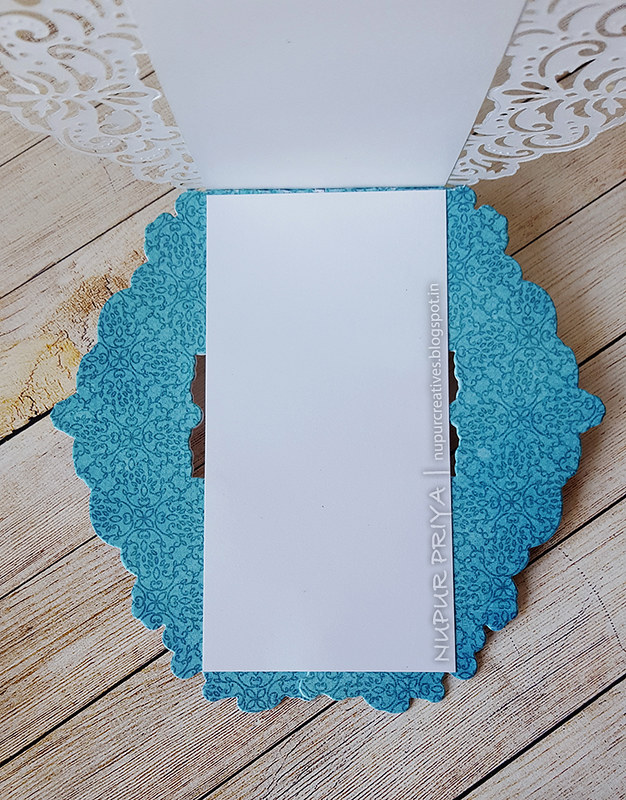
Die cut 2 pieces of white cardstock using both the outline and detailed dies from Elegant Pocket Accents Die. Save the negative die cuts for further use. Adhere both the die cuts as shown so that the die cuts overlap a little at the ends. This will be the card front piece.
Die cut 2 pieces of white cardstock and 2 pieces of pattern paper from Patchwork Daisy Paper Collection using only the outline die from Elegant Pocket Accents Die. Adhere the pattern paper die cuts on the white die cuts. Adhere both the resulting die cuts as shown so that they overlap a little at the ends same width as the card front piece. Score this piece at 1/2" from the top. Adhere this tab to the back of the card front.
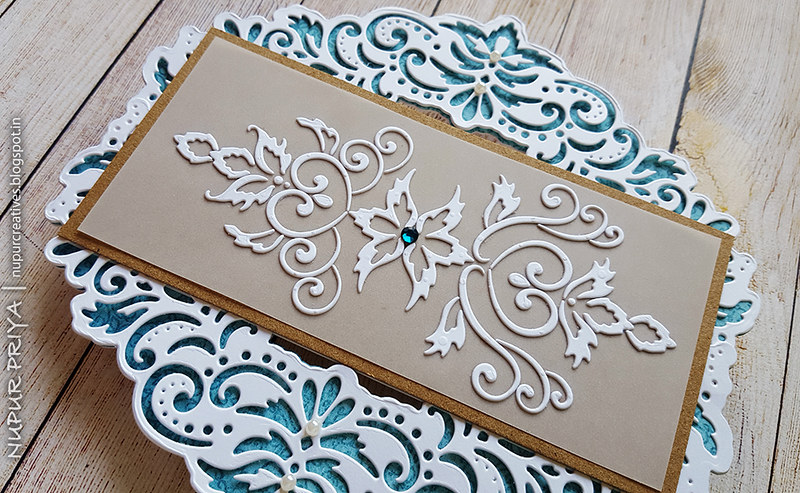
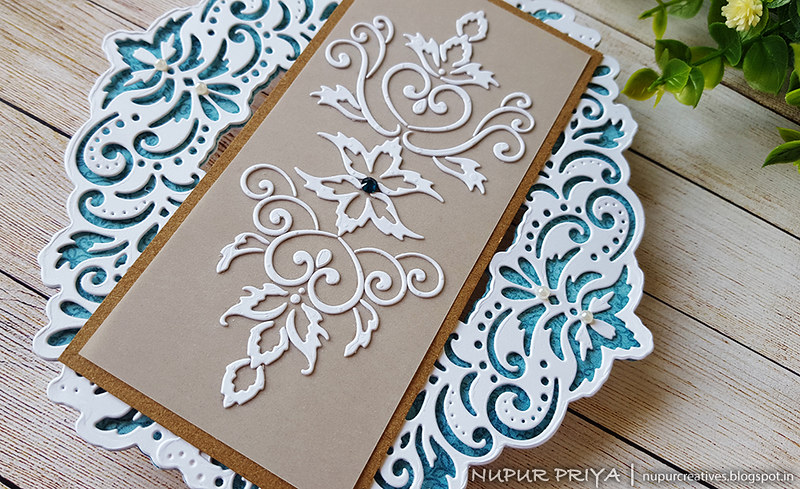
Take a piece of vellum and arrange the negative die cuts from the first step and any other negative die cuts from the other dies from the same set on this piece to create the design as shown. Trim the piece so that it is 1 1/2" less than the height of the card base. Adhere it on the cardboard that comes as a backing of the pattern paper pack and trim it after leaving 1/4" border on all sides of the vellum piece. Adhere this piece on the cardfront.
Cut 3 more pieces of white cardstock and adhere it on both sides of the card base to cover the hole n the center. Add few rhinestones and pearls to add finishing touch.
159723 Designer Dries Clear Adhesive
173842 Scor-Pal Measuring & Scoring Board
359848 Spellbinders Tool N' One
HCDA2-450 Stack and Store Daubers-Pack of 30
Other products:
Rhinestons, pearls and Ebosser.
Instructions:
Die cut 2 pieces of white cardstock using both the outline and detailed dies from Elegant Pocket Accents Die. Save the negative die cuts for further use. Adhere both the die cuts as shown so that the die cuts overlap a little at the ends. This will be the card front piece.
Die cut 2 pieces of white cardstock and 2 pieces of pattern paper from Patchwork Daisy Paper Collection using only the outline die from Elegant Pocket Accents Die. Adhere the pattern paper die cuts on the white die cuts. Adhere both the resulting die cuts as shown so that they overlap a little at the ends same width as the card front piece. Score this piece at 1/2" from the top. Adhere this tab to the back of the card front.
Take a piece of vellum and arrange the negative die cuts from the first step and any other negative die cuts from the other dies from the same set on this piece to create the design as shown. Trim the piece so that it is 1 1/2" less than the height of the card base. Adhere it on the cardboard that comes as a backing of the pattern paper pack and trim it after leaving 1/4" border on all sides of the vellum piece. Adhere this piece on the cardfront.
Cut 3 more pieces of white cardstock and adhere it on both sides of the card base to cover the hole n the center. Add few rhinestones and pearls to add finishing touch.
Hope you like it...
Thank you for visiting today... :)
I love this beautiful card, Nupur. Using the negative is very clever. Enjoy your day!
ReplyDeleteBeautiful!
ReplyDelete