Wednesday 21 June 2017

Jewell Toned Blushing Rose

Hello friends & welcome to Heartfelt Wednesday...
I have a floral card for today's Heartfelt inspiration
Read on to know how I created it....
20170621_153955

20170621_154012

Products Used:

HCPC-3752 Classic Rose Cling Stamp Set
HCPC-3785 Small Classic Petunia Cling Stamp Set
HCPC-3786 Large Classic Petunia Cling Stamp Set
HCD1-7110 Classic Rose Die
HCD1-7119 Classic Border Basics Die
HCD1-7139 Small Classic Petunia Die
HCD1-7140 Large Classic Petunia Die
HCD1-7144 Decorative Medallion Die
HCDP1-271 Blushing Rose Paper Collection
HCDA2-450 Stack and Store Daubers
HCST1-401 Deluxe Flower Shaping Kit

Other Products: 
Seedless Preserve, Dusty Concord, Peacock Feathers, Worn Lipstick, Forest Moss, Squeezed Lemonade & Black Soot Distress Inks, Pick me Up, Ebosser, Martha Stewart scoreboard, white cardstock, pollens, rhinestones, pearls & adhesive.

Project Instruction: 
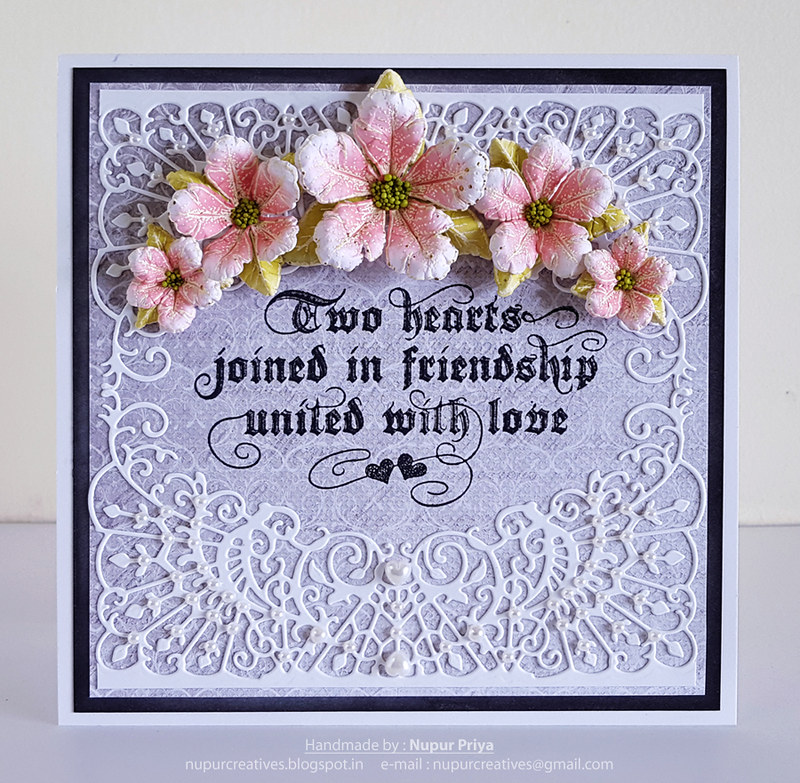
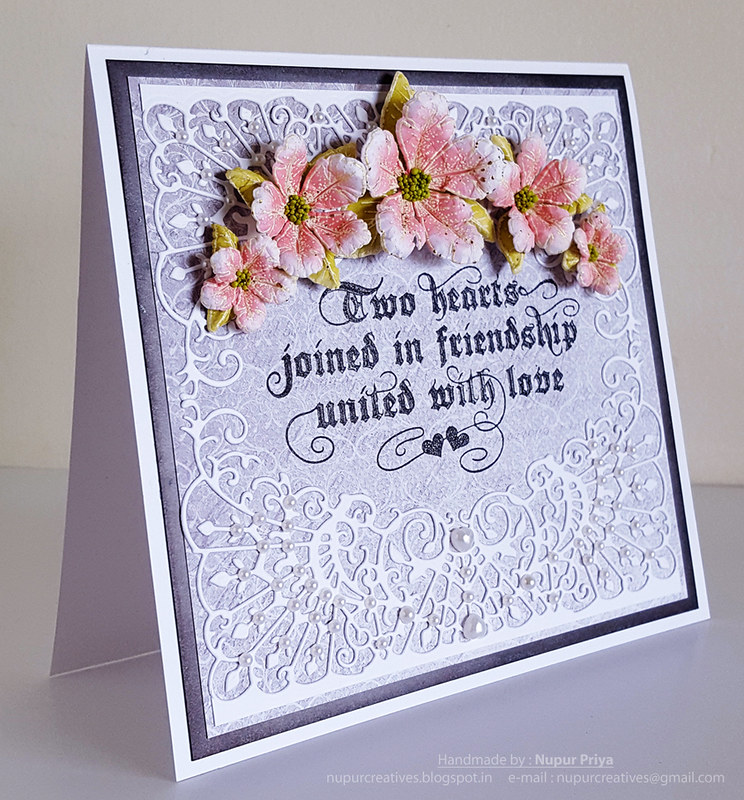
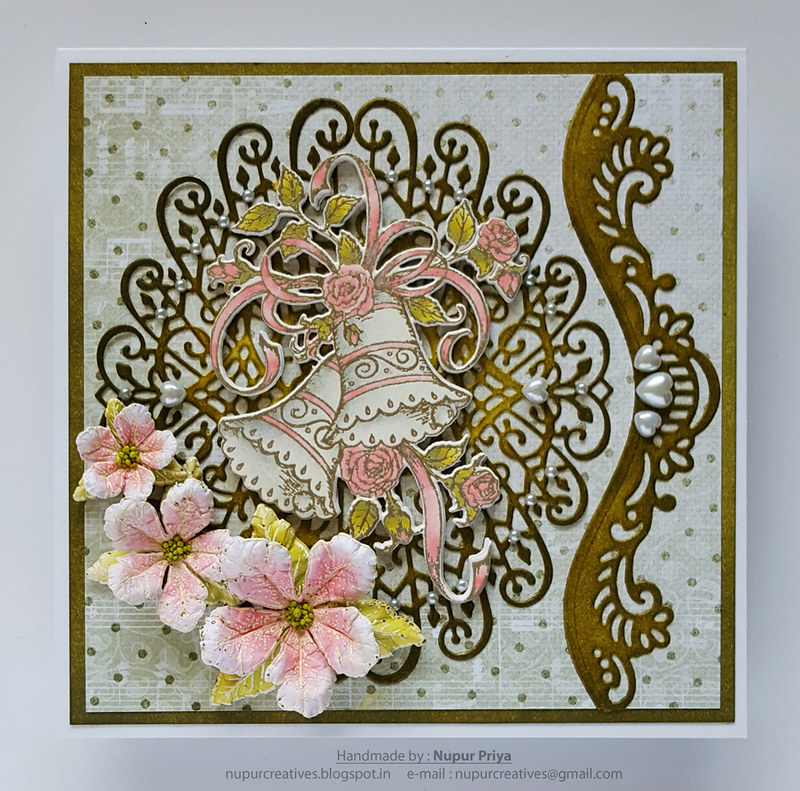
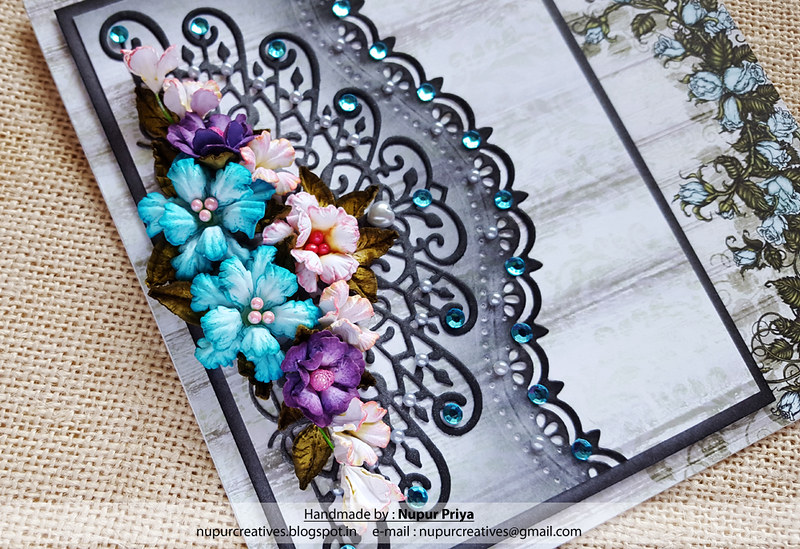
Cut a piece of 6" x 6" pattern paper from Blushing Rose Paper Collection and adhere it on a same sized card base. Take a 4 1/4" x 5 1/2" white cardstock & ink it's borders with Black Soot Distress ink. Cut a piece of 4" x 5 1/4" pattern paper from Blushing Rose Paper Collection and adhere it on the inked cardstock. Cut a piece of 5 1/4" x 3" pattern paper from the same collection & die cut one edge withClassic Border Basics Die. Ink the edges with Black Soot Distress ink & adhere it on the previous panel. Die cut a piece of white cardstock using Decorative Medallion Die, ink it with Black Soot Distress ink & adhere it on the previous panel as shown. Adhere this on the card front using foam adhesive.

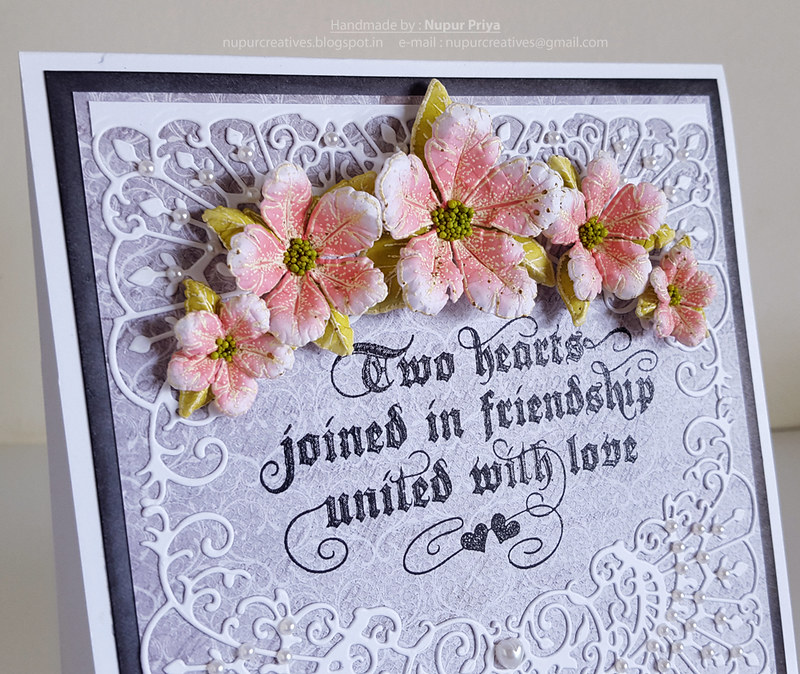
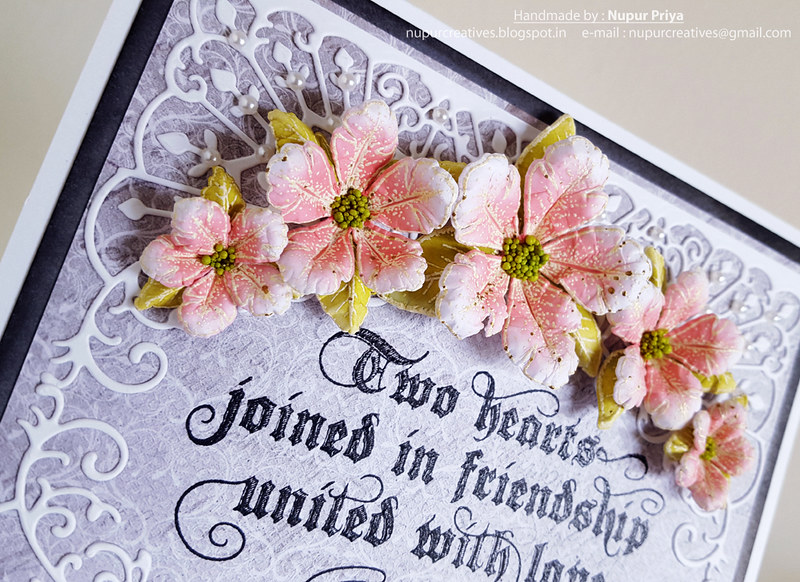
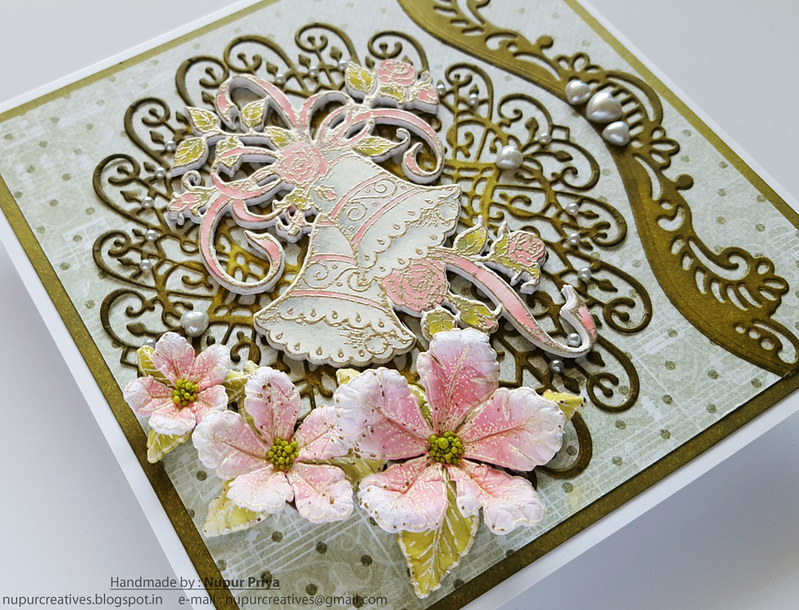
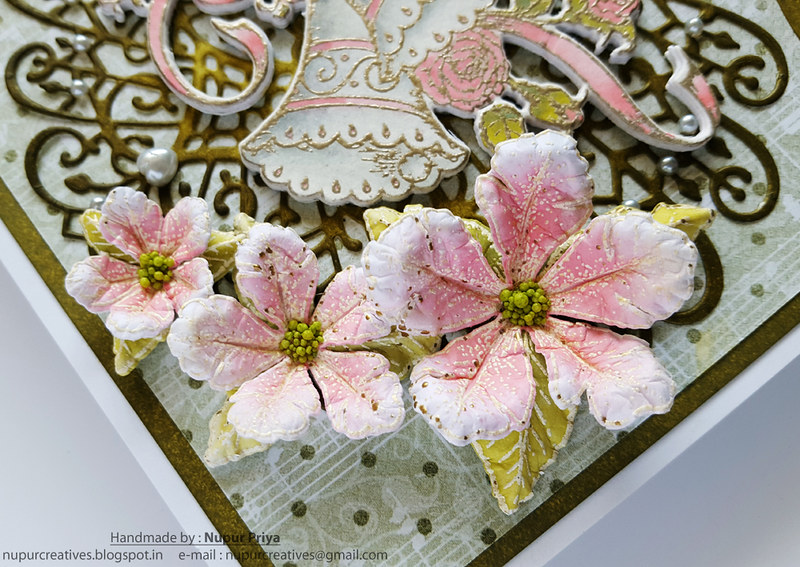
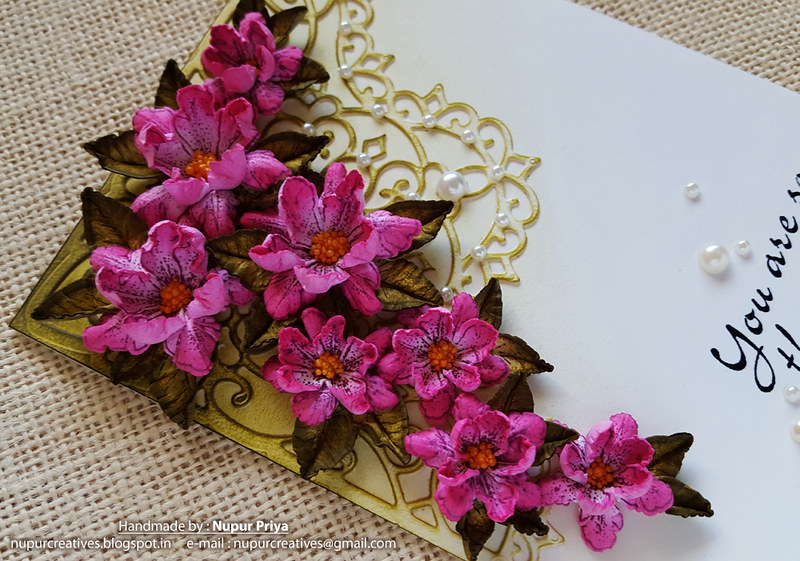
Stamp the flowers from  Classic Rose Cling Stamp Set using Seedless Preserve, Dusty Concord, Peacock Feathers, Worn Lipstick & Squeezed Lemonade Distress Inks. Stamp the leaves from Small Classic Petunia Cling Stamp Set & Large Classic Petunia Cling Stamp Set using Forest Moss Distress Ink. Die cut them using matching dies from Classic Rose DieSmall Classic Petunia Die & Large Classic Petunia Die. Ink them using the same colors and  SStack and Store Daubers. Shape them using Deluxe Flower Shaping Kit. Add pollens to the flower centers.

Arrange and adhere all the flowers & leaves as shown. Add some rhinestones & pearls using  Pick me Upto the die cuts to add finishing touch to the card.


 Hope you like this card...
Thank you for visiting today... :)
Nupur
Disclosure : Compensated affiliate links used when possible  at NO additional cost to you.. Thank you! 

Two Hearts

Hello friends & welcome to Heartfelt Wednesday...
I have made a floral card for today's inspiration which  can be used for weddings & anniversaries...
I have used the Classic Petunia & Classic Wedding Collections to make this card...
Stay with me till the end to see full list of supplies & instructions for this card...
20170515_125305

20170515_125438

20170515_125344

20170515_125354


Heartfelt Creations Products Used:
HCPC-3785 Small Classic Petunia Cling Stamp Set
HCPC-3786 Large Classic Petunia Cling Stamp Set
HCPC-3790 Classic Wedding Wishes Cling Stamp Set
ANC852 Bright Ideas Prills - Ribbit
HCDA2-450 Stack and Store Daubers
HCST1-401 Deluxe Flower Shaping Kit
209277 Embossing Enamel - Aged Ivory

Other Products:
Black Soot Distress Ink, Worn Lipstick & Peeled Paint Distress Oxide Inks, Black Versafine Ink, Versamark Ink, Ranger Heat-it Tool, Zing Charcoal Embossing Powder, Ebosser, Martha Stewart scoreboard, white cardstock, pearls & adhesive.

Project Instruction:
Take a 5 3/4" x 5 3/4" piece of white cardstock & ink the edges with Black Soot Distress Ink. Adhere it on a 6" x 6" card base.

Stamp the sentiment from Classic Wedding Wishes Cling Stamp Set in the center of a 5 1/2" x 5 1/2" pattern paper from Classic Wedding Paper Collection with Black Versafine Ink & heat emboss using Ranger Heat-it Tool & Zing Charcoal Embossing Powder. Adhere it on the card front.

Die cut 2 pieces of white cardstock with Decorative Medallion Die and adhere them on the card front as shown. 

Stamp the flowers & leaves from Small Classic Petunia Cling Stamp Set &  Large Classic Petunia Cling Stamp Set using Versamark ink & heat emboss using anger Heat-it Tool & Aged Ivory Embossing Enamel. Die cut them using matching dies from Small Classic Petunia Die & Large Classic Petunia Die. Use the Stack and Store Daubers, Worn Lipstick & Peeled Paint Distress Oxide Inks to color the flower & leaves. Shape them using Deluxe Flower Shaping Kit. Add a little Ribbit Prills from Bright Ideas  collection to the flower centers. Decorate the card with the flowers & leaves as shown. Add some pearls to the die cuts to add finishing touch to the card.


 Hope you like this card...
Thank you for visiting today... :)
Nupur
Disclosure : Compensated affiliate links used when possible  at NO additional cost to you.. Thank you! 

Wednesday 14 June 2017

Classic Wedding Collection

Hello friends & welcome to Heartfelt Wednesday...
Today is the new release day & this new release is gorgeous...

Classic Wedding Collection


Church bells ring out and there’s an excitement in the air!  Loved ones have gathered together to celebrate two hearts joined in friendship being united in love!  Beautiful roses provide a classic and romantic décor while soft music lends to the ambiance as the bride and groom beam seeing one another for the first time on their wedding day!  Preserve those special “Happily Ever After” memories with the new Classic Wedding Collection by Heartfelt Creations.  Filled with romantic imagery of stately church bells, classic roses and fanciful doves, this softly hued paper collection is sure to add to the nostalgia and romance of these precious moments while showcasing memories of such a special day.  Soft peaches, pinks, greens and blue tones lend a timeless and elegant backdrop to graceful swirls, lace like elements and romantic script!  Commemorate the special occasion with dreamily illustrated cling stamp sets depicting glorious heart shaped rose wreaths, elegant church bells, beautiful wedding rings and a delicate image of a bride and groom, complete with coordinating dies perfect for embellishing bridal shower, wedding or anniversary creations!  Five marvelous sentiments are included to ensure you have the perfect well wishes to complete your bridal or anniversary card or scrapbook layout!  Add a touch of splendor and sophistication with either of the two intricate and impressive lace like dies included in this sentimental collection!  So, please rise…and join with us in celebrating those special moments that represent “Always and Forever”!

I have made a card for today's inspiration with this new collection & paired it with Classic Petunia flowers...
Stay with me till the end to see all the supply list & instructions for this card..
20170517_131823_001

20170517_131939

20170517_132047


Heartfelt Creations Products Used:
HCPC-3785 Small Classic Petunia Cling Stamp Set
HCPC-3786 Large Classic Petunia Cling Stamp Set
HCPC-3789 Classic Wedding Bells Cling Stamp Set
HCPC-3790 Classic Wedding Wishes Cling Stamp Set
HCD1-7118 Delicate Border Basics Die
HCD1-7119 Classic Border Basics Die
HCD1-7139 Small Classic Petunia Die
HCD1-7143 Classic Wedding Bells Die
HCDP1-279 Classic Wedding Paper Collection
Other Products:
Forest Moss Distress Ink, Iced Spruce, Worn Lipstick & Peeled Paint Distress Oxide Inks, Versamark Ink, Ranger Platinum Embossing Powder, Ranger Heat-it Tool, Koi waterbrush, Ebosser, Martha Stewart scoreboard, white & watercolor cardstock, pearls & adhesive.

Project Instruction:
Take a 5 3/4" x 5 3/4" piece of white cardstock & ink the edges with Forest Moss Distress Ink. Adhere it on a 6" x 6" card base. Adhere a 5 1/2" x 5 1/2" pattern paper from Classic Wedding Paper Collection on the card front.

Die cut 2 pieces of white cardstock with Decorative Medallion Die & a border with Delicate Border Basics Die & Classic Border Basics Die. Ink them with Forest Moss Distress Ink and adhere them on the card front as shown.

Stamp the bells image from Classic Wedding Wishes Cling Stamp Set with versamark ink on a piece of watercolor cardstock & heat emboss using Ranger Platinum Embossing Powder & Heait-it tool. Color it using Iced Spruce, Worn Lipstick & Peeled Paint Distress Oxide Inks & Koi waterbrush. Die cut it using matching die from Classic Wedding Bells DieDie cut 4 more pieces with the same die. Stack and glue them below the colored piece. Adhere it on the  Decorative Medallion Die cuts as shown.

Stamp the flowers & leaves from Small Classic Petunia Cling Stamp Set &  Large Classic Petunia Cling Stamp Set using Versamark ink & heat emboss using anger Heat-it Tool & Aged Ivory Embossing Enamel. Die cut them using matching dies from Small Classic Petunia Die & Large Classic Petunia Die. Use the Stack and Store Daubers, Worn Lipstick & Peeled Paint Distress Oxide Inks to color the flower & leaves. Shape them using Deluxe Flower Shaping Kit. Add a little Ribbit Prills from Bright Ideas  collection to the flower centers. Decorate the card with the flowers & leaves as shown. Add some pearls to the die cuts to add finishing touch to the card.

 Hope you like this card...
Thank you for visiting today... :)
Nupur
Disclosure : Compensated affiliate links used when possible  at NO additional cost to you.. Thank you! 

Wednesday 7 June 2017

You are so Thoughtful

Hello friends & welcome to Heartfelt Wednesday...
I have made a floral card for today's inspiration...
Stay with me till the end to see all the supply list & instructions for this card...
20170531_171910

20170531_171916


Heartfelt Creations Products Used:
HCPC-3758 Encourage You Cling Stamp Set
HCPC-3785 Small Classic Petunia Cling Stamp Set
HCD1-729 Decorative Blossom Corner Die
HCD1-7139 Small Classic Petunia Die
HCST1-401 Deluxe Flower Shaping Kit
ANC852 Bright Ideas Prills - ManGo
HCDA2-450 Stack and Store Daubers

Other Products:

Seedless Preserve, Picked Raspberry & Forest Moss Distress inks, Black Archival Ink, Ebosser, Martha Stewart scoreboard, white cardstock, Clarity Stencil BrushesMini MISTIPick me Uppearls & adhesive.

Instructions:

Take a 4 1/4" x 5 1/2" white card base. Die cut a piece of white cardstock with Decorative Blossom Corner Die & adhere it to the top left corner of the card front. Use Clarity Stencil Brush to ink Forest Moss distress ink on the top left corner of the card front where the die cut is glued down.

Stamp the sentiment from Encourage You Cling Stamp Set with Black Archival Ink on the bottom right of the card front using 
Mini MISTI to position it perfectly. 


Stamp the flowers from Small Classic Petunia Cling Stamp Set using Seedless Preserve distress ink & leaves using Forest Moss Distress Ink. Die cut them using matching dies from Small Classic Petunia Die. Ink the flowers with Picked Raspberry Disttress ink & the leaves with forest moss distress ink. Shape these using Deluxe Flower Shaping Kit. Add a little ManGo Prills from Bright Ideas collection to the flower centers. Adhere them on the Decorative Blossom die cut as shown. Add some pearls using 
Pick me Up to add finishing touch.


 Hope you like this card...
Thank you for visiting today... :)
Nupur
Disclosure : Compensated affiliate links used when possible  at NO additional cost to you.. Thank you!