Friday 26 June 2020

Black White and a hint of Pink

Welcome to day 3 of Tender Moments Collection
My fellow design team members have made so many beautiful cards with this collection and you can head over to Heartfelt Creations blog to see them.
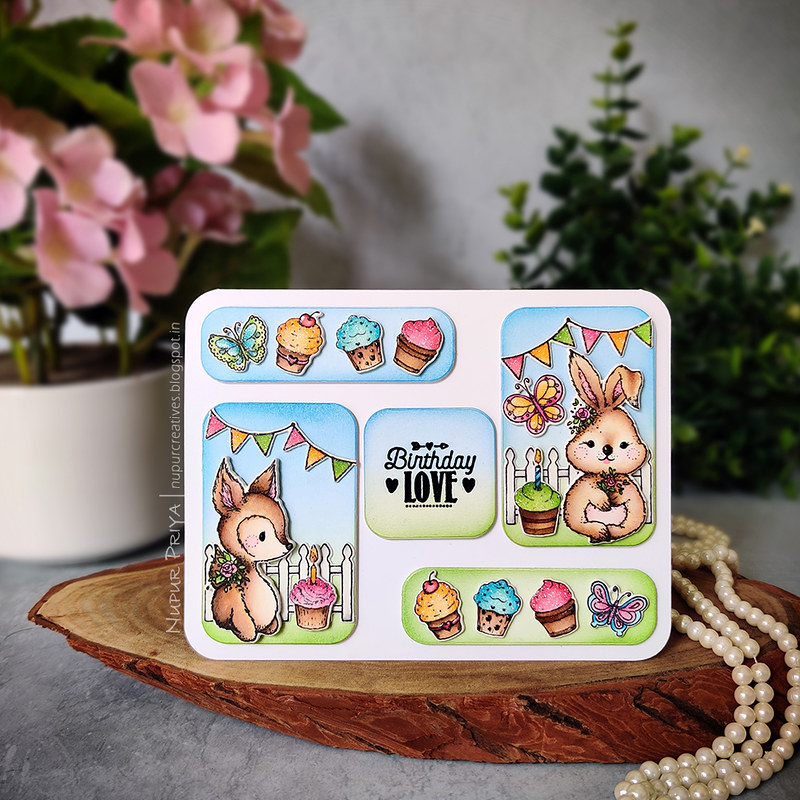
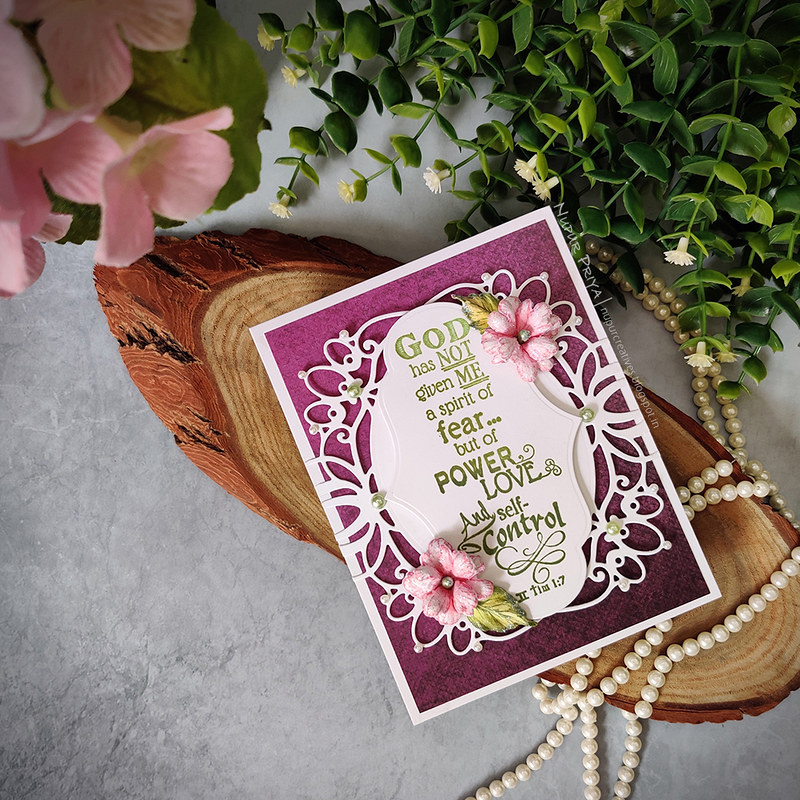
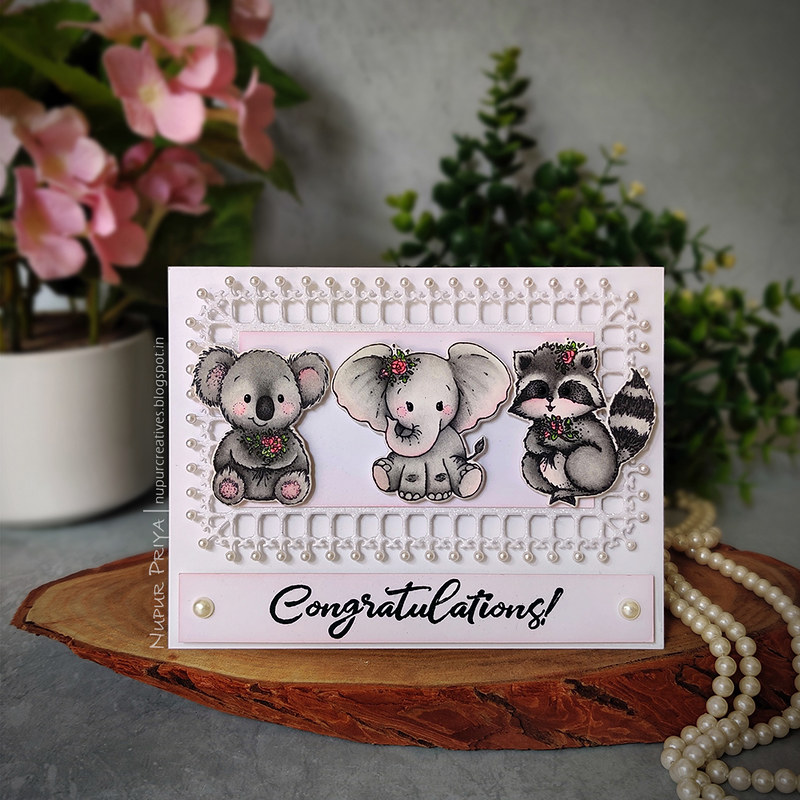
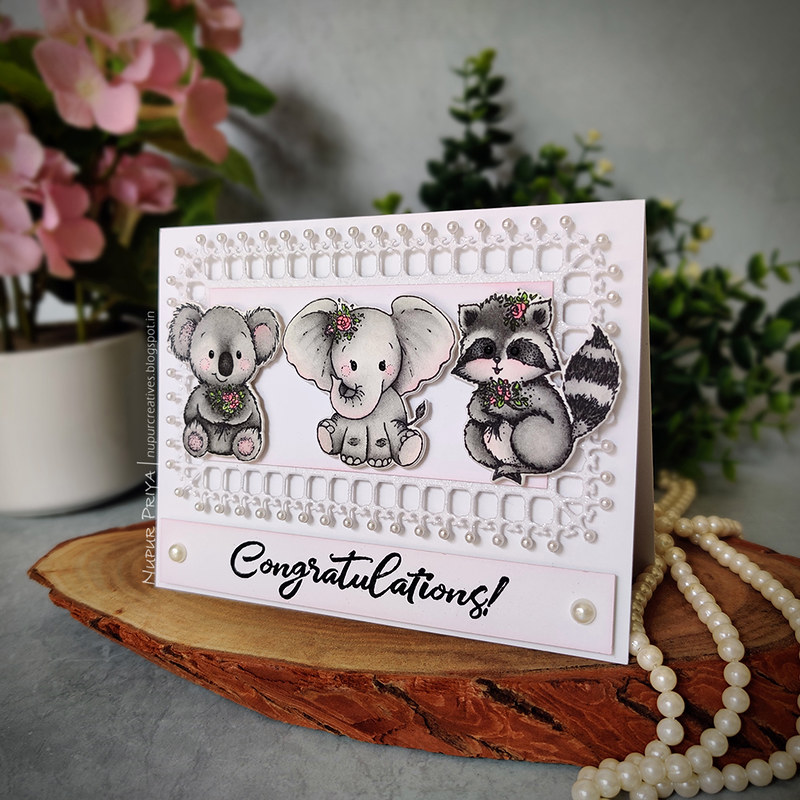
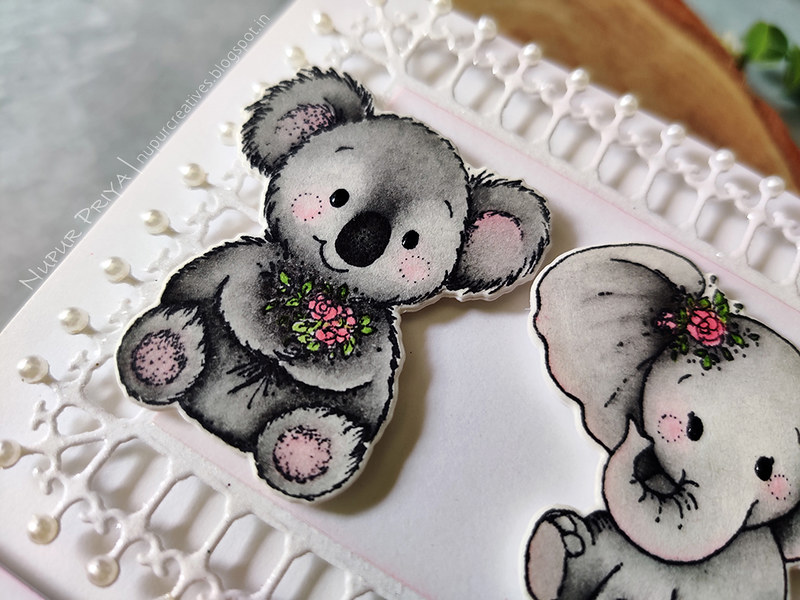
I have created a Black and white with a hint of pink card for today.
Today's card features Baby's Friends Cling Stamp Set. This set has lots of cute critters and the little elephant is my favorite! Don't you just love how adorable they are !!!
As usual all this supplies and instructions can be found below the photographs.
Critters Congratulations_Nupur Priya_01

Critters Congratulations_Nupur Priya_02

Critters Congratulations_Nupur Priya_03

Critters Congratulations_Nupur Priya_04

Critters Congratulations_Nupur Priya_05

Critters Congratulations_Nupur Priya_06

Critters Congratulations_Nupur Priya_07

Heartfelt Creations Products: 
HCPC-3847 Celebrate Love Sentiments Cling Stamp Set
HCPC-3916 Baby's Friends Cling Stamp Set
HCD1-7301 Baby's Friends Die
HCD2-7308 Majestic Swirl Frames Die
HCPP1-438-2 Paper Pack of 10 - White
RACP468 Ranger Archival Ink Pad - Jet Black
RAHT Heat It Craft Tool
359848 Spellbinders Tool N' One
411231 5pc. Acrylic Block Set
NU650 Nuvo Crystal Drops - Ebony Black
352854 Metal Tip for Adhesive Bottles
159723 Designer Dries Clear Adhesive
D120601 Darice Adhesive Foam Strips
RLHS100 Hydra Sponges

Other Products:

Black Soot, Worn Lipstick and Mowed Lawn Distress inks, Versafine Onyx Black Ink, Ranger Black Embossing Powder, oval makeup blending brush, paint brush, watercolor cardstock, transparent glitter and pearls.

Instructions: 

Die cut a piece of white cardstock using the die from Majestic Swirl Frames DieApply a layer of Designer Dries Clear Adhesive on the die cut using Hydra Sponges and sprinkle clear glitter on top. Burnish the glitter with fingertips once the glue has dried completely. Cut a piece of white cardstock to mat on the die cut, ink it lightly with Worn Lipstick distress ink and adhere it on the die cut. Adhere the die cut on a 4 1/4" x 5 1/2" white card base as shown using Darice Adhesive Foam Strips.

Stamp the sentiment from Celebrate Love Sentiments Cling Stamp Set on a strip of white cardstock with Versafine Onyx Black Ink and heat emboss using  Ranger Black Embossing Powder and Heat It Craft Tool. Trim the sentiment strip to fit the space below the die cut and adhere using  Darice Adhesive Foam Strips.


Stamp the cute animals from Baby's Friends Cling Stamp Set on a piece of watercolor cardstock with Jet Black Archival Ink. Die cut them using matching dies from Baby's Friends Die and color them with Black Soot, Worn Lipstick and Mowed Lawn Distress inks. Die cut 1 more sent of white cardstock using the same dies. Stack the matching die cuts and adhere them together. Adhere them on the card front as shown using Darice Adhesive Foam Strips. Add tiny drops of Ebony Black Nuvo Crystal Drops to the eyes of all the animals.  Add pearls to add finishing touch.


Hope you like it...

Thank you for visiting today... :)
Nupur
Disclosure : Compensated affiliate links used when possible  at NO additional cost to you.. Thank you! 

Thursday 25 June 2020

Tender Moments Birthday Love Card

Hello and welcome to my blog
As promised I am back with another card made with the new Tender Moments Collection
And this time I have a cute birthday card made with the cute critters from this collection along with the cupcakes Sugarspun Collection, banner and fence from Happy Camper Collection and the butterflies from Woodsy Wonderland Collection. ( Find all the supplies listed below along with the instruction)
By combining elements from different collections I was able to create a cute card with a collage of tiny scenes.
Birthday Love Card_Nupur Priya_01

Birthday Love Card_Nupur Priya_02


Birthday Love Card_Nupur Priya_03

I love to add tiny details like gloss, glitter and dimension to my cards and I feel like they add such a special touch! Can you spot these details? These details look even better in real life!
Birthday Love Card_Nupur Priya_04


Birthday Love Card_Nupur Priya_05

Heartfelt Creations Products:
HCPC-3767 Woodsy Wonderland Cling Stamp Set

HCPC-3873 Sweet Shoppe Cling Stamp Set
HCPC-3843 Special Birthday Sentiments Cling Stamp Set
HCPC-3880 Elements of Home Cling Stamp Set
HCPC-3916 Baby's Friends Cling Stamp Set
HCD2-749 Cut Mat Create 1A Die
HCD2-752 Cut Mat Create 2B Die
HCD1-7123 Woodsy Wonderland Die
HCD1-7236 Sweet Shoppe Treats Die
HCD1-7244 Elements of Home Die
HCD1-7301 Baby's Friends Die
HCPP1-438-2 Paper Pack of 10 - White
RACP468 Ranger Archival Ink Pad - Jet Black
Zig Clean Color Real Brush Markers
RAHT Heat It Craft Tool
411231 5pc. Acrylic Block Set

NU650 Nuvo Crystal Drops - Ebony Black

Other Products:
Mowed Lawn, Worn Lipstick, Salty Ocean, Vintage Photo, Walnut Stain and Black Soot Distress inks, Versafine Onyx Black ink, Ranger black embossing powder, watercolor cardstock, paint brush, oval makeup brush and Sakura Gelly roll white gel pen.


Instructions:

Cardbase : Die cut 5 pieces of white cardstock using the dies from Cut Mat Create 1A Die and Cut Mat Create 2B Die. Stamp the sentiment from Special Birthday Sentiments Cling Stamp Set on the square die cut with Versafine Onyx Black ink and heat emboss using Ranger black embossing powder and Heat It Craft Tool. Ink all the die cut pieces with Mowed Lawn and Salty Ocean distress inks as shown. Adhere them on a piece of 4 1/4" x 5 1/2" white cardbase as shown.

Colored Images : Stamp the images from Baby's Friends Cling Stamp SetWoodsy Wonderland Cling Stamp Set, Sweet Shoppe Cling Stamp Set and Elements of Home Cling Stamp Set on watercolor cardstock and die cut with matching dies from Baby's Friends DieWoodsy Wonderland DieSweet Shoppe Treats Die and Elements of Home Die. Die cut few more pieces for all the die cuts from white cardstock using the same dies, stack and adhere all the similar die cuts together to make thicker pieces of varying thickness. Here I have used single piece for fence, 2 pieces for banner and 4 pieces for rest on the images.

Color all the images using Mowed Lawn, Worn Lipstick, Salty Ocean, Vintage Photo, Walnut Stain and Black Soot Distress inks and Zig Clean Color Real Brush Markers. Apply a layer of Designer Dries Clear Adhesive to the cup cake frosting, flames, parts of butterfly and the banner. Sprinkle transparent glitter on the glue and let it dry. Once dry burnish the glitter with fingertips. Arrange and adhere all the pieces on the card front as shown. add tiny drops of Ebony Black Nuvo Crystal Drops to the eyes and 3-D Crystal Lacquer to the nose of the bunny and fawn to add finishing touch.

Hope you like this card and try something similar...

And also don't forget to come back tomorrow for more inspiration with this collection... I have a card with the cutest elephant, koala and raccoon for tomorrow!

Hope you like it...

Thank you for visiting today... :)
Nupur
Disclosure : Compensated affiliate links used when possible  at NO additional cost to you.. Thank you! 

Wednesday 24 June 2020

Tender Moments Collection

Hello and welcome to my blog...
The much awaited and cutest collection is finally here... Woohooo

Tender Moments Collection

This is a super cute baby collection and it has cute little animals, hot air balloon and pretty rose swirls and sentiments... And it can be used for non-baby cards and projects too!
For today's card I have made slightly different type of card where the focal image lifts up to reveal the inside of the card where the personal message can be written. See the photographs below to see what I mean.
As usual you can find all the supplies used for this card listed below along with the instructions.

Also don't forget to check in tomorrow also for another cute card made with this collection...

Welcome baby_Nupur Priya_01

Welcome baby_Nupur Priya_02

Welcome baby_Nupur Priya_03

Welcome baby_Nupur Priya_04

Heartfelt Products:

HCPC-3914 Baby's Air Balloon Cling Stamp Set
HCPC-3915 Welcome Baby Cling Stamp Set
HCPC-3916 Baby's Friends Cling Stamp Set
HCD1-7299 Baby's Air Balloon Die
HCD1-7300 Welcome Baby Die
HCD1-7301 Baby's Friends Die
HCD2-7307 Royal Elegance Frames Die
HCPP1-438-2 Paper Pack of 10 - White
RACP468 Ranger Archival Ink Pad - Jet Black
RAHT Heat It Craft Tool
359848 Spellbinders Tool N' One
411231 5pc. Acrylic Block Set
NU650 Nuvo Crystal Drops - Ebony Black
352854 Metal Tip for Adhesive Bottles
159723 Designer Dries Clear Adhesive
D120601 Darice Adhesive Foam Strips
RLHS100 Hydra Sponges

Other Products: 

Antique Linen, Mermaid Lagoon, Gathered twigs, Walnut Stain, Black Soot, Worn Lipstick and Mowed Lawn Distress inks, Sakura Gelly Roll white gel pen, oval makeup blending brush, paint brush, watercolor cardstock, transparent glitter and pearls.

Instructions: 

Ink a piece of 5" x 7" white cardstock lightly with Mowed Lawn Distress ink. Adhere a 4 3/4" x 6 3/4" white cardstock on the inked piece. Die cut a piece of 5" x 7" white cardstock using the die from  Royal Elegance Frames Die and ink it lightly with Mowed Lawn distress ink. Adhere this piece on the 5" x 7" piece that we just created using Darice Adhesive Foam Strips.

Stamp the hot air balloon image from  Baby's Air Balloon Cling Stamp Set on a piece of watercolor cardstock with Antique Linen  Distress ink. Stamp the welcome stamp from the Welcome Baby Cling Stamp Set on the banner on the hot air balloon image with Jet Black Archival Ink. Color the image using Mermaid Lagoon, Gathered twigs, Walnut Stain, Black Soot, Worn Lipstick and Mowed Lawn Distress inks. Outline the hearts and the green diamonds strip across the top with Sakura Gelly Roll white gel pen. Die cut the image using matching dies from Baby's Air Balloon Die


Stamp the lamb from Baby's Friends Cling Stamp Set on a piece of watercolor cardstock with Jet Black Archival Ink. Die cut it using matching die from Baby's Friends Die and color it with Black Soot, Worn Lipstick and Mowed Lawn Distress inks. Add tiny drops of Ebony Black Nuvo Crystal Drops to the eyes of the lamb. Adhere it as shown on the hot air balloon. Use the Metal Tip along with Designer Dries Clear Adhesive to cover some details on the stamped and colored image and sprinkle transparent glitter.

Die cut a 6" x 4" top folding white card base using the outline die for the air balloon so that the top edge of the balloon is slightly above the hinge. Adhere the colored and die cut image on the front of the shaped card that we created. Adhere this the back of this shaped card on the Royal Elegance Frames Diecut as shown using Darice Adhesive Foam Strips.


Stamp the baby image from the Welcome Baby Cling Stamp Set on a piece of watercolor cardstock  with Jet Black Archival Ink. Color the image using Mermaid Lagoon and Mowed Lawn Distress inks. Die cut the image using the matching die from Welcome Baby Die. Adhere this inside the shaped card. Add pearls and rhinestones to the die cut and the hot air balloon to add finishing touch.

Hope you like it...

Thank you for visiting today... :)
Nupur
Disclosure : Compensated affiliate links used when possible  at NO additional cost to you.. Thank you! 

Wednesday 3 June 2020

Salvaging Imperfect Die Cut

Hello and welcome to my blog
Have you ever tried to diecut a piece of cardstock and it shifted during cutting that resulted in a die cut with a part cut off? If your answer is 'Yes' and you are going to throw it in the trash then I would suggest that you don't have to do that! With a little creativity you can still use that die cut and no one will ever know that it got messed up during the die cutting process.

This happens to me many times and I am going to show you how to use it 
Below is the card made with a the die cut on that was missing a small portion as a result of cardstock shifting during the die cutting. I trimmed off the center and glued the remaining 2 pieces together. Adhered it on the card base and covered the joint with another die cut. The excess die cut hanging off the edge on the side was trimmed off. I had positioned the die cut so that the already missing part on 1 side was hanging off the edge. So I got a new die cut shape and I was also able to salvage the die cut. 

Read till the end for the instructions and full list of supplies.
Altered Diecut Card_01

Altered Diecut Card_02

Altered Diecut Card_03

Heartfelt Creations Products : 

HCPC-3814 Words Of Encouragement Stamp Set
HCPC-3819 Small Sweet Peony Cling Stamp Set
HCPC-3842 Oakberry Lane Blossoms Cling Stamp Set
HCD1-7173 Small Sweet Peony Die
HCD1-7200 Oakberry Lane Blossoms Die
HCD2-7306 Decorative Circle Frames Die
HCD2-7309 Elaborate Oval Frames Die
HCDP1-2113 Wild Rose Paper Collection
HCPP1-438-2 Paper Pack of 10 - White
HCPP1-475 Deluxe Flower Shaping Paper - Pack of 50
RACP524 Ranger Archival Ink Pad - Vibrant Fuchsia
RACP531 Ranger Archival Ink Pad - Vivid Chartreuse
RACP482 Ranger Archival Ink Pad - Olive
RACP436 Ranger Archival Ink Pad - Leaf Green
HCST1-401 Deluxe Flower Shaping Kit
Transparent Glitter, pearls and MISTI.
HCFB1-469 3D Blossoms Shaping Mold
359848 Spellbinders Tool N' One
HCDA2-450 Stack and Store Daubers-Pack of 30
352854 Metal Tip for Adhesive Bottles
159723 Designer Dries Clear Adhesive
D120601 Darice Adhesive Foam Strips
HCS1-459-2 Assorted Pearl Stamens-Medium
RLHS100 Hydra Sponges

Other Products :
MISTI, transparent glitter and pearls.


Instructions :
Card Base : Cut a piece of 4" x 5 1/4" pattern paper from Wild Rose Paper Collection and adhere it on a 4 1/4" x 5 1/2" white card base. Die cut a piece of white cardstock using the die from Decorative Circle Frames Die. Cut away 1 1/4" from the middle and join the 2 bigger pieces in the middle. Adhere it to the card front using Darice Adhesive Foam Strips. Trim off the excess die cut hanging from the edge on both sides and adhere the edges to the card front using Designer Dries Clear Adhesive.


Sentiment : Stamp the sentiment from Words Of Encouragement Stamp Set on a piece of white cardstock with Vivid ChartreuseLeaf Green and Olive Archival Ink using MISTI to get an ombre look. Die cut this piece using the die from Elaborate Oval Frames Die and adhere it on the card front as shown using Darice Adhesive Foam Strips.


Flowers : Stamp the flowers from Small Sweet Peony Cling Stamp Set on a piece of Deluxe Flower Shaping Paper with Vibrant Fuchsia Archival Ink and ink it using the same ink. Die cut them using the matching dies from Small Sweet Peony Die and shape using Deluxe Flower Shaping Kit. Add a green stamen from Medium Assorted Pearl Stamens to the flower centers.


Leaves : Stamp the leaves from Oakberry Lane Blossoms Cling Stamp Set on a piece of Deluxe Flower Shaping Paper with Olive Archival Ink Pad  and color it with Leaf Green Archival Ink Pad. Die cut the leaves using matching dies from Oakberry Lane Blossoms Die and shape them using 3D Blossoms Shaping Mold.


Apply Designer Dries Clear Adhesive on the flowers and leaves using Hydra Sponges and sprinle transpaernt glue. Arrange and adhere all the flowers and leaves on the card as shown. Add pearls to the die cut for finishing touch.


Hope you like it...

Thank you for visiting today... :)
Nupur
Disclosure : Compensated affiliate links used when possible  at NO additional cost to you.. Thank you!