Hello Friends and welcome to Heartfelt inspiration post...
Heartfelt Creations have opened the Design Team VOTING for the next DT term. I love working with Heartfelt Creations it is the best design team and I would like to continue my journey with them and I need your help. If you like my work then please vote for me and 4 more DT members by clicking on THIS link.
Thank you so much!
From today I will be posting few cards that I missed earlier...
If you follow Heartfelt Creations blog then you might have seen today's card and few other cards that I will be posting in the coming weeks...
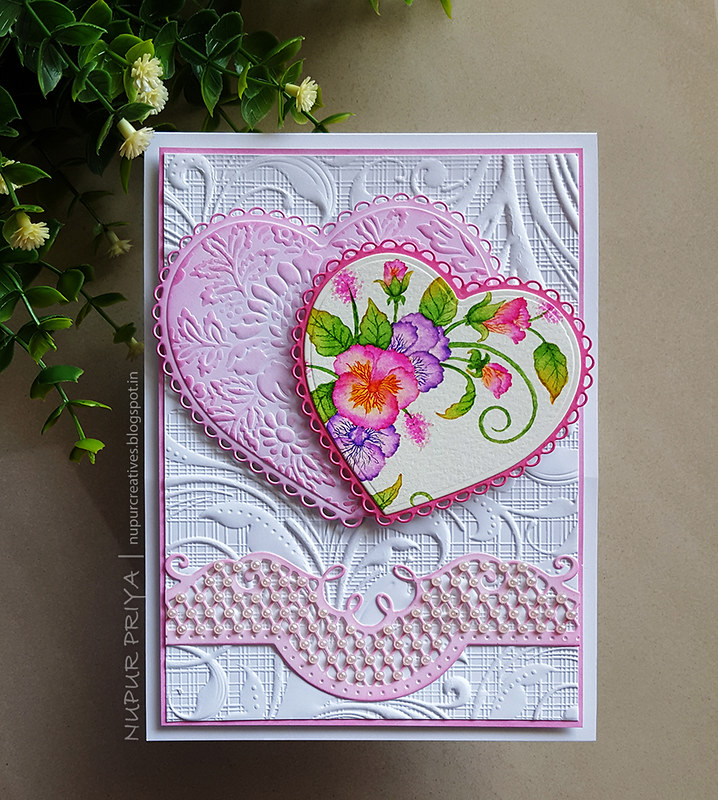
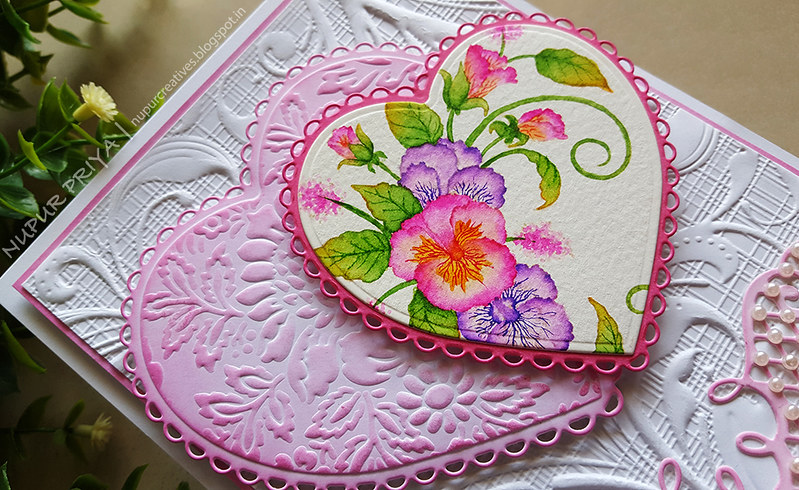
This card was created using the Calla Lily Collection that was released in December 2019. This is a beautiful image and I love the sparkling swans so I added lots of clear glitter on them so they shine and sparkle and look gorgeous in real life. They add so much glamour to this simple card!


Heartfelt Creations Products:
HCPC-3847 Celebrate Love Sentiments Cling Stamp Set
HCPC-3898 Feathery Swan Cling Stamp Set
HCD1-7162 Eyelet Hearts Die
HCD1-7276 Feathery Swan Die
HCPP1-438-2 Paper Pack of 10 - White
HCGP1-488 Luxe Gold Cardstock
359760 Embossing Powder - Gold
352854 Metal Tip for Adhesive Bottles
159723 Designer Dries Clear Adhesive
D120601 Darice Adhesive Foam Strips
3D1844 3-D Crystal Lacquer
RAHT Heat It Craft Tool
HCDA2-450 Stack and Store Daubers-Pack of 30
Other Products:
Black Soot, Seedless Preserve, Carved Pumpkin, Mustard Seed Distress inks, Versamark ink, watercolor cardstock, transparent glitter, Dew drops, Craft Treat Mandal Stencil and Crafter's Companion 3D Embossing Folder - Ornate Lace
Instructions:
Lightly ink the edges of a 4 1/4" x 5 1/2" white card base with Seedless Preserve Distress ink. Emboss a 4" x 5 1/4" white cardstock using Ornate Lace Crafter's Companion 3D Embossing Folder and adhere it on the card base using Darice Adhesive Foam Strips.
Die cut a piece of Luxe Gold Cardstock using the largest Eyelet Hearts Die. Adhere it on the card base as shown using Darice Adhesive Foam Strips. Trace the inner edge of the die on a piece of white cardstock and fussy cut the traced heart. Ink this heart using Seedless Preserve Distress ink and Craft Treat Mandal Stencil then adhere it on the card base using Darice Adhesive Foam Strips.
Stamp the swan image from Feathery Swan Cling Stamp Set on a piece of watercolor cardstock using Versamark ink and heat emboss using Heat It Craft Tool and Gold Embossing Powder. Color the image using Black soot, Seedless Preserve, Carved Pumpkin, Mustard Seed Distress inks. Die cut the image using the matching die from Feathery Swan Die. Die cut 4 more pieces of white cardstock using the same die, stack and adhere them all together to make a thicker piece. Adhere it on the Heart piece as shown. Use Stack and Store Daubers to apply a thin layer of Designer Dries Clear Adhesive on the swans and sprinkle it with transparent glitter. Apply 2 or 3 layers of 3-D Crystal Lacquer on the beak and feathers of the swan using Metal Tip for Adhesive Bottles. Let the layers dry completely before applying the next coat.
Stamp the sentiment from Celebrate Love Sentiments Cling Stamp Set on a strip if white cardstock using Versamark ink and heat emboss using Heat It Craft Tool and Gold Embossing Powder. Trim it to 4" width and adhere it on a slightly wider strip of Luxe Gold Cardstock. Adhere it on the card front below the heart and swans using Darice Adhesive Foam Strips. Adhere few Clear Dew Drops around the swans for finishing touch.
Hope you like it...
Heartfelt Creations have opened the Design Team VOTING for the next DT term. I love working with Heartfelt Creations it is the best design team and I would like to continue my journey with them and I need your help. If you like my work then please vote for me and 4 more DT members by clicking on THIS link.
Thank you so much!
From today I will be posting few cards that I missed earlier...
If you follow Heartfelt Creations blog then you might have seen today's card and few other cards that I will be posting in the coming weeks...
This card was created using the Calla Lily Collection that was released in December 2019. This is a beautiful image and I love the sparkling swans so I added lots of clear glitter on them so they shine and sparkle and look gorgeous in real life. They add so much glamour to this simple card!
Heartfelt Creations Products:
HCPC-3847 Celebrate Love Sentiments Cling Stamp Set
HCPC-3898 Feathery Swan Cling Stamp Set
HCD1-7162 Eyelet Hearts Die
HCD1-7276 Feathery Swan Die
HCPP1-438-2 Paper Pack of 10 - White
HCGP1-488 Luxe Gold Cardstock
359760 Embossing Powder - Gold
352854 Metal Tip for Adhesive Bottles
159723 Designer Dries Clear Adhesive
D120601 Darice Adhesive Foam Strips
3D1844 3-D Crystal Lacquer
RAHT Heat It Craft Tool
HCDA2-450 Stack and Store Daubers-Pack of 30
Other Products:
Black Soot, Seedless Preserve, Carved Pumpkin, Mustard Seed Distress inks, Versamark ink, watercolor cardstock, transparent glitter, Dew drops, Craft Treat Mandal Stencil and Crafter's Companion 3D Embossing Folder - Ornate Lace
Instructions:
Lightly ink the edges of a 4 1/4" x 5 1/2" white card base with Seedless Preserve Distress ink. Emboss a 4" x 5 1/4" white cardstock using Ornate Lace Crafter's Companion 3D Embossing Folder and adhere it on the card base using Darice Adhesive Foam Strips.
Die cut a piece of Luxe Gold Cardstock using the largest Eyelet Hearts Die. Adhere it on the card base as shown using Darice Adhesive Foam Strips. Trace the inner edge of the die on a piece of white cardstock and fussy cut the traced heart. Ink this heart using Seedless Preserve Distress ink and Craft Treat Mandal Stencil then adhere it on the card base using Darice Adhesive Foam Strips.
Stamp the swan image from Feathery Swan Cling Stamp Set on a piece of watercolor cardstock using Versamark ink and heat emboss using Heat It Craft Tool and Gold Embossing Powder. Color the image using Black soot, Seedless Preserve, Carved Pumpkin, Mustard Seed Distress inks. Die cut the image using the matching die from Feathery Swan Die. Die cut 4 more pieces of white cardstock using the same die, stack and adhere them all together to make a thicker piece. Adhere it on the Heart piece as shown. Use Stack and Store Daubers to apply a thin layer of Designer Dries Clear Adhesive on the swans and sprinkle it with transparent glitter. Apply 2 or 3 layers of 3-D Crystal Lacquer on the beak and feathers of the swan using Metal Tip for Adhesive Bottles. Let the layers dry completely before applying the next coat.
Stamp the sentiment from Celebrate Love Sentiments Cling Stamp Set on a strip if white cardstock using Versamark ink and heat emboss using Heat It Craft Tool and Gold Embossing Powder. Trim it to 4" width and adhere it on a slightly wider strip of Luxe Gold Cardstock. Adhere it on the card front below the heart and swans using Darice Adhesive Foam Strips. Adhere few Clear Dew Drops around the swans for finishing touch.
Hope you like it...
Thank you for visiting today... :)