Wednesday 27 June 2018

Dimensional Stamped Image Technique

Hello friends & welcome to another Heartfelt Wednesday inspiration post
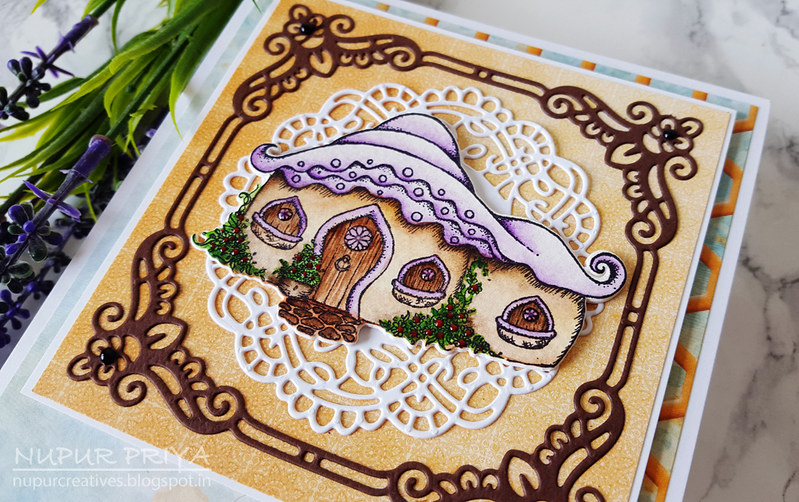
I have made a card for today's inspiration.

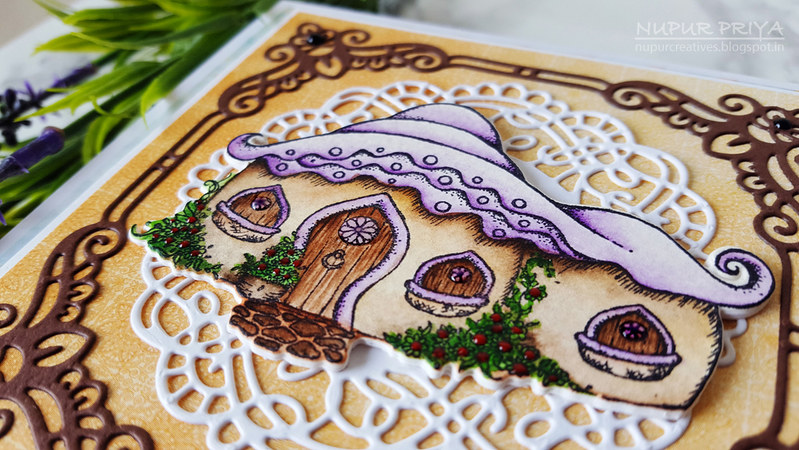
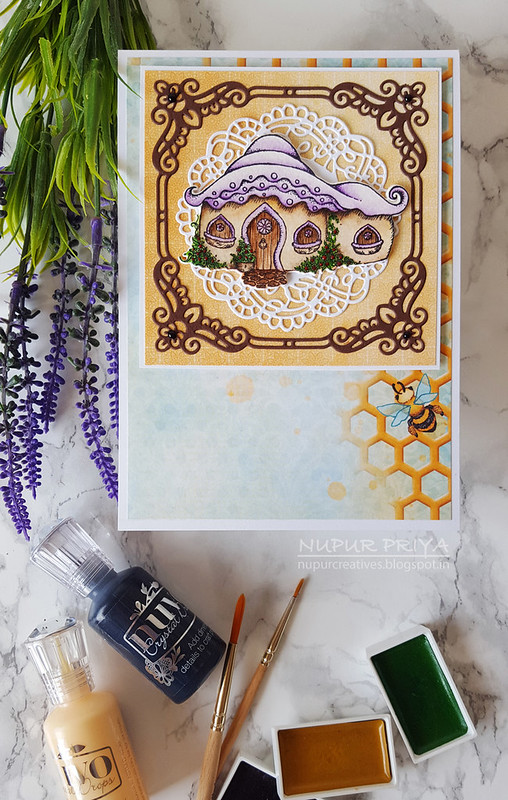
I find that when the stamped image doesn't standout well on a busy background so I use this simple technique to lift up the stamped image by giving it some dimension.
I use 4 or 5 pieces of cardstock die cut with the same coordinating die that was used to cut the stamped image and stack them up. 

You could do this by simply using foam adhesive behind the image but I think that the stacked die cut method is much better because it serves 2 purpose... It gives the image a solid and sturdy base so the image doesn't warp while mailing and it also looks nice from the sides.

Read till the end for the supply list & full instructions for making this card.
20180618_165701

20180618_165800


20180618_165826


Heartfelt Creations Products: 

HCPC-3830 Honey Bee Bungalows Cling Stamp Set
HCD1-7179 Butterfly Kisses Decorative Die
HCD1-7184 Honey Bee Bungalows Die
HCDP1-291 Sweet as Honey Paper Collection
HCPP3-452 12 x 12 Cardstock Pack of 25 - White
RACP468 Ranger Archival Ink Pad - Jet Black
3D1844 3-D Crystal Lacquer
NU650 Nuvo Crystal Drops - Ebony Black
NU667 Nuvo Crystal Drops - Red Berry
173842 Scor-Pal Measuring & Scoring Board
D110305 Stamp Mat Pad
359848 Spellbinders Tool N' One
31510 Funnel Tray
411231 5pc. Acrylic Block Set
532423-KIT Sizzix Vagabond 2 With Solo Wafer-Thin Die Adapter
159723 Designer Dries Clear Adhesive
352854 Metal Tip for Adhesive Bottles
D120601 Darice Adhesive Foam Strips

Other Products:

Gansai Tambi Watercolors, Paint brushes, Canson watercolor cardstock and brown cardstock.

Instructions:

Cut a piece of 4 3/4" x 6 3/4" pattern paper from Sweet as Honey Paper Collection and adhere it to a 5" x 7" white cardbase. Cut a 5 1/4" square piece of  pattern paper from.the same paper collection and adhere it to a slightly bigger piece of white cardstock. Adhere it to the top of card front as shown using Darice Adhesive Foam Strips.

Die cut a piece of brown cardstock using Butterfly Kisses Decorative Die and adhere it to the square panel. Die cut a piece of  white cardstock using the doily die from the same die set and adhere it inside the previous die cut.


Stamp the house image from Honey Bee Bungalows Cling Stamp Set on a piece of watercolor cardstock using Black Archival Ink. Color it using Gansai Tambi Watercolors. Die cut it using matching die from Honey Bee Bungalows Die. Die cut 3 more pieces of  white cardstock using the same die. Stack and adhere them together keeping the colored image on top to make a thicker piece. Adhere it on the doily die cut as shown. Add tiny drops of Red Berry Nuvo Crystal Drops to the bushes on the house. Add drops of Ebony Black Nuvo Crystal Drops on the brown die cut to add finishing touch to the card.


Hope you like it...

Thank you for visiting today... :)
Nupur
Disclosure : Compensated affiliate links used when possible  at NO additional cost to you.. Thank you! 

Wednesday 20 June 2018

Card Made With Leafy Accents Stamp, Die and Mold

Hello friends & welcome to another Heartfelt Wednesday inspiration post...

Today we have a brand new special release today which is a must have if you make handmade flowers... Heartfelt Creations has launched Leafy Accents Stamp, Die and Mold today ...  They are quick and easy to use, these leafy accents stamp, die, and shaping mold are wonderful tools to create dimensional leaves when time is running short, tired hands need a break or a design calls for a significant number of leaves!


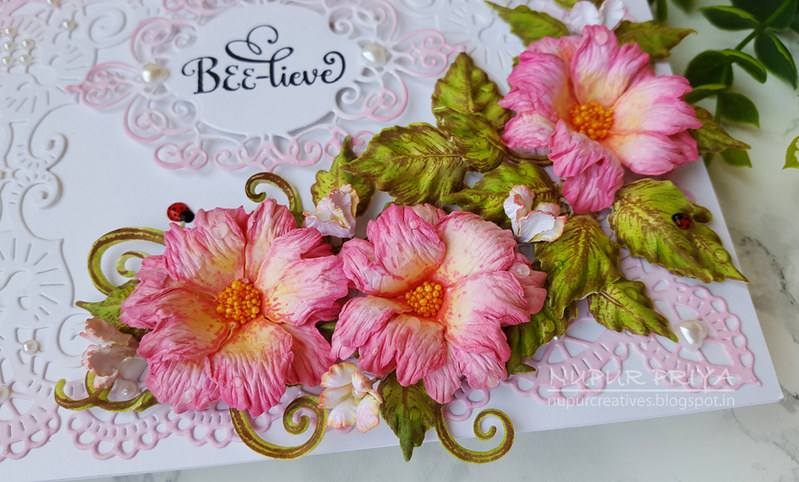
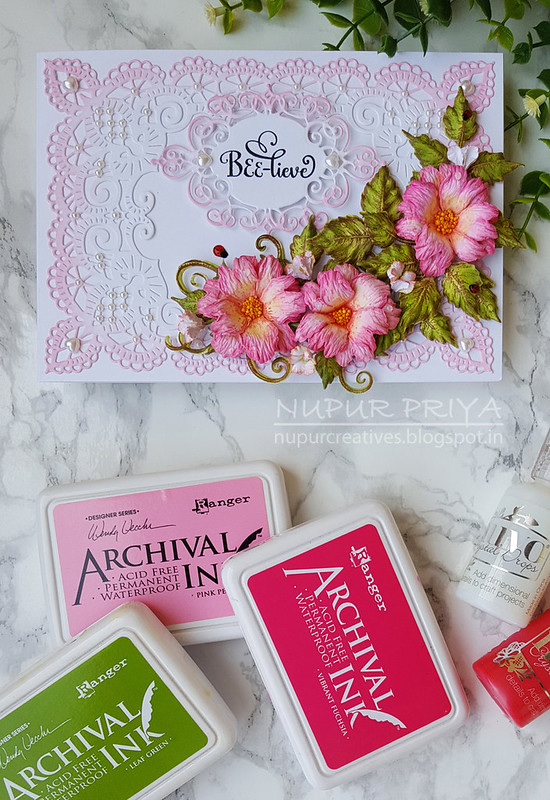
I loved using this set for the floral arrangement on my card... cuts the creating time significantly and look at the leaf details!!! Simply gorgeous... I have a 1 year old hyper-active baby who demands all my time and attention and that leaves me with very little crafty time. Leafy Accents Stamp, Die and Mold set is God sent for me... I can safely say I will be using these leaves for most of my floral projects now...


Special Savings: The Leafy Accents Stamp, Die and Mold Bundle has a 10% discount, only available until June 30th or while supplies last! Get yours today to ensure that you don't miss out on this special savings! 


Now moving on to my card for today.

( Read till the end for the supply list & instructions on how to make this card. )
20180621_085123

20180621_085139


20180621_085143


Heartfelt Creations Products:
HCPC 3644 Birds & Blooms Cling Stamp Set
HCPC-3819 Small Sweet Peony Cling Stamp Set
HCPC-3831 Sweet as Honey Cling Stamp Set

HCPC 3835 Leafy Accents Cling Stamp SetHCD1-757 Leafy Branch Die
HCD1-7173 Small Sweet Peony Die
HCD2-7191 Intricate Swirl Frames Die
HCD2-7192 Eyelet Lace Frames Die
HCD1-7193 Leafy Accents Die
HCFB1-464 3D Floral Basics Shaping Mold
HCFB1-467 3D Leafy Accents Shaping Mold
HCST1-401 Deluxe Flower Shaping Kit
HCPP3-452 12 x 12 Cardstock Pack of 25 - White
RACP468 Ranger Archival Ink Pad - Jet Black
RACP451 Ranger Archival Ink Pad - Coffee
RACP649 Ranger Archival Ink Pad - Pink Peony
RACP436 Ranger Archival Ink Pad - Leaf Green
RACP524 Ranger Archival Ink Pad - Vibrant Fuchsia
RACP632 Ranger Archival Ink Pad - Buttercup
ANC852 Bright Ideas Prills -  Go ManGo
HCS1-457-1 Pastel Pearl Stamens-Small
NU650 Nuvo Crystal Drops - Ebony Black
NU667 Nuvo Crystal Drops - Red Berry
HCDA2-450 Stack and Store Daubers-Pack of 30
173842 Scor-Pal Measuring & Scoring Board
D110305 Stamp Mat Pad
359848 Spellbinders Tool N' One
31510 Funnel Tray
411231 5pc. Acrylic Block Set
532423-KIT Sizzix Vagabond 2 With Solo Wafer-Thin Die Adapter
159723 Designer Dries Clear Adhesive
352854 Metal Tip for Adhesive Bottles
D120601 Darice Adhesive Foam Strips

Other Products:

Morning Dew Nuvo Crystal Drops and Pearls.

Instructions:

Die cut a piece of white cardstock using the largest die from Eyelet Lace Frames Die set. Ink the edges using Pink Peony Archival Ink and Stack and Store Daubers. Adhere it to a 5" x 7" white cardbase. Stamp the sentiment from Sweet as Honey Cling Stamp Set on a piece of white cardstock  using Black Archival Ink and die cut this piece using the die from  Intricate Swirl Frames Die. Adhere it on the card front as shown using Darice Adhesive Foam Strips.

Stamp the leaves from  Leafy Accents Cling Stamp Set on a piece of white cardstock using Coffee Archival Ink  and die cut them using matching dies from Leafy Accents Die. Ink them using Leaf Green Archival Ink and  Stack and Store Daubers. Shape them using 3D Leafy Accents Shaping Mold.


Stamp the Peonies from Small Sweet Peony Cling Stamp Set on a piece of white cardstock using Vibrant Fuchsia Archival Ink and die cut the using matching dies from Small Sweet Peony Die. Ink the flowers using Vibrant Fuchsia and Buttercup Archival Inks and  Stack and Store Daubers. Shape them using Floral Basics Shaping Mold and Deluxe Flower Shaping Kit. Add a little Go ManGo Prills  from Bright Ideas set to the flower centers.


Stamp the flowers from Birds & Blooms Cling Stamp Set on a piece of white cardstock using Buttercup Archival Ink and die cut the using matching dies from Leafy Branch Die. Shape them using Deluxe Flower Shaping Kit. Add a pollen form Small Pastel Pearl Stamens to the flower centers and ink the edges lightly using Vibrant Fuchsia Archival Ink and Stack and Store Daubers.


Arrange and adhere the flowers and leaves on the card as shown. Make some ladybugs using Ebony Black & Red Berry Nuvo Crystal Drops and glue them to the flower arrangement. Add some drops of  Morning Dew Nuvo Crystal Drops on the flower  arrangement & some pearls on the die cuts to add finishing touch.


Hope you like it...

Thank you for visiting today... :)
Nupur
Disclosure : Compensated affiliate links used when possible  at NO additional cost to you.. Thank you! 

Borders from Frame dies with Honey Bee Maiden

Hello friends & welcome to another Heartfelt  inspiration post

Are you looking to get more use out of your dies ??? I like to use my dies in new ways so that I get more bang for my buck and if you are like me then I hope this post helps you to look at your dies in a different way and get more uses out of them. I have also shared more ways to use the dies in my previous post HERE.

 This technique also helps you to use up your cardstock and/or pattern paper scraps. After I cut cardstocks for my card base or card layers I am left with lots of strips of cardstocks with different widths and soon they began to pileup and take over my craft room! I have a hard time throwing away papers be it cardstocks or pattern papers. So I decided to use them to make my stash of ready die cuts. I used few border dies and few frame dies to do this and one of them was used on this card.

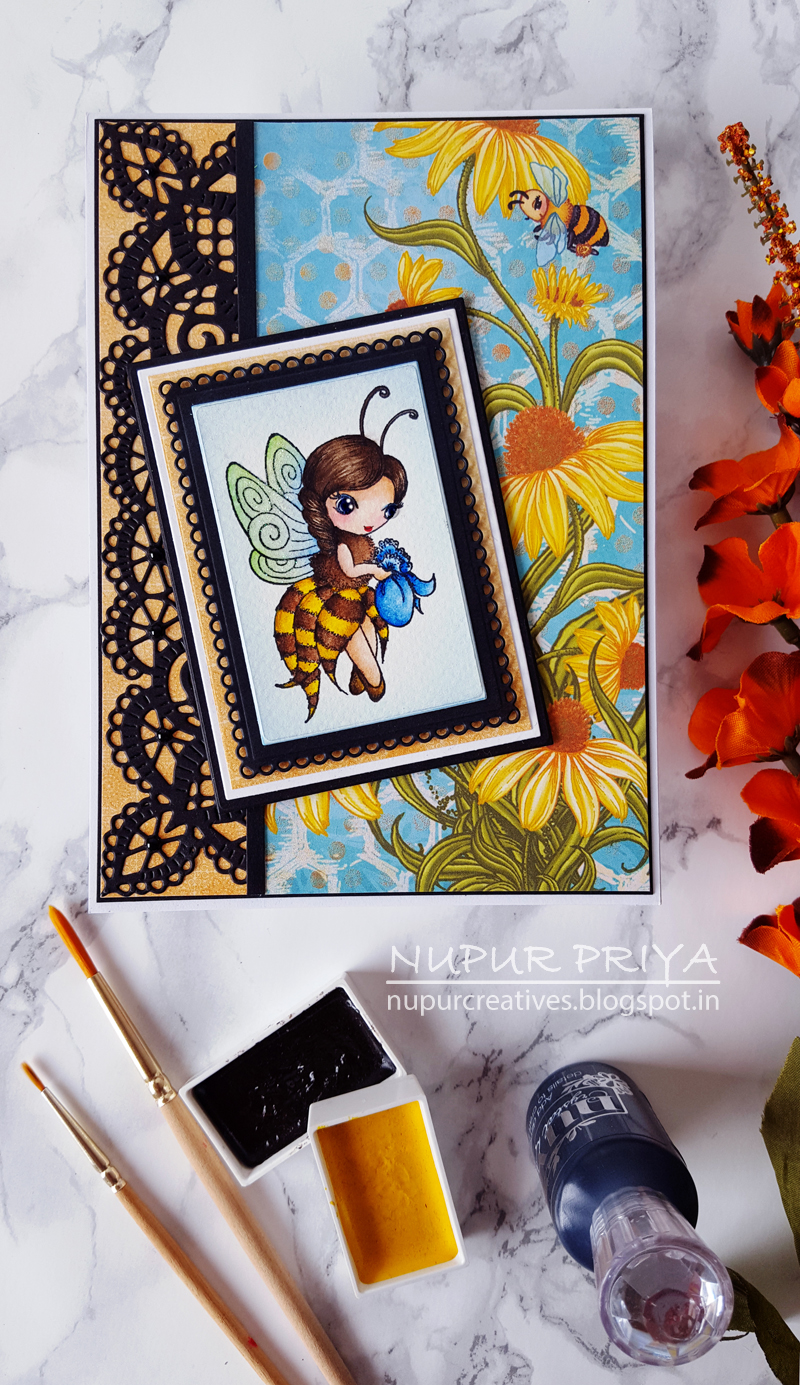
I have used Eyelet Lace Frames Die to diecut one of my black cardstock strip as a border for this card and I think it adds to the beauty of this card.  Read till the end for the full supply list & instructions on how to make this card.

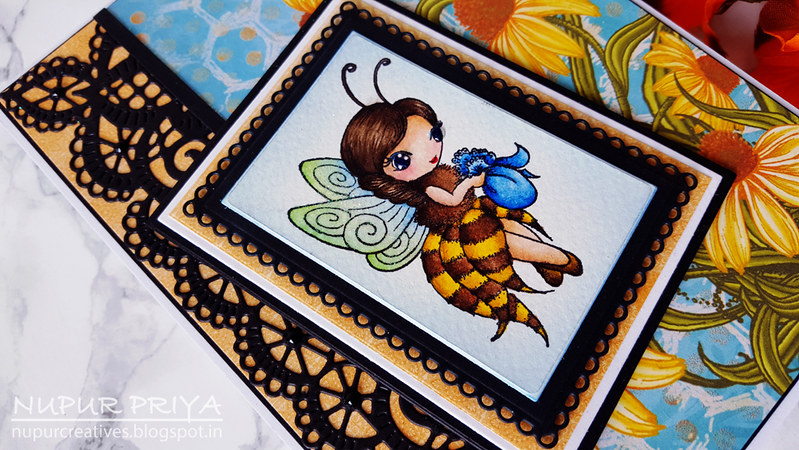
I have used Sweet as Honey Collection for this card. I love the cute Honey bee maidens in this collection and I loved coloring them.
20180611_160434
I have kept the card very simple because I wanted the focus to be on the cute honey bee maiden. I added a drop of 3-D Crystal Lacquer to her eyes and some glitter to her wings to make her shine... 20180611_160521


Heartfelt Creations Products:

HCPC-3829 Honey Bee Maidens Cling Stamp Set
HCD2-7189 Eyelet Rectangle & Basics Die
HCD2-7192 Eyelet Lace Frames Die

HCDP1-291 Sweet as Honey Paper Collection
HCPP1-438-1 Paper Pack of 10 - Black
HCPP3-452 12 x 12 Cardstock Pack of 25 - White
RACP468 Ranger Archival Ink Pad - Jet Black
173842 Scor-Pal Measuring & Scoring Board
D110305 Stamp Mat Pad
359848 Spellbinders Tool N' One
411231 5pc. Acrylic Block Set
532423-KIT Sizzix Vagabond 2 With Solo Wafer-Thin Die Adapter
3D1844 3-D Crystal Lacquer
NU650 Nuvo Crystal Drops - Ebony Black
120 Blue Rain Ultrafine Transparent Glitter
D120601 Darice Adhesive Foam Strips
159723 Designer Dries Clear Adhesive

Other Products:

Gansai Tambi Watercolors, paint brushes and Canson watercolor cardstock.


Instructions:
Die cut a piece of black cardstock using Eyelet Lace Frames Die. Trim it to 1 1/2" width and adhere to a same sized pattern paper from Sweet as Honey Paper CollectionAdhere it to a 4 3/4 " x 6 3/4" piece of black cardstock. Cut a 3 1/2" x 6 3/4" piece of patterned paper from the same collection and adhere it to the same piece of black cardstock and glue a thin strip of black cardstock to hide the joint. Adhere it to a 5 " x 7" white cardbase.

Stamp the image from Honey Bee Maidens Cling Stamp Set on a piece of watercolor cardstock using Jet Black Archival Ink. Color the image using Gansai Tambi Watercolors and paint brushes. Die cut it using a rectangle die from Eyelet Rectangle & Basics Die. Die cut 3 more layers from the pattern paper from the above collection,  white and black cardstock. Layer them and glue them together using  Darice Adhesive Foam Strips. Adhere it to the card front too using  Darice Adhesive Foam Strips as shown.


Use Designer Dries Clear Adhesive and add Blue Rain Ultrafine Transparent Glitter to the wings of Honey Bee Maiden. Add drops of 3-D Crystal Lacquer to her eyes and Ebony Black Nuvo Crystal Drops to the die cut to add finishing touches.


Are you looking for more ways to use your dies??? If your answer is yes then click on the link below:
Embossed Background with Dies

Hope you like this technique and give it a try...

Thank you for visiting today... :)
Nupur
Disclosure : Compensated affiliate links used when possible  at NO additional cost to you.. Thank you!