Hello and welcome to my blog...
Today I have yet another card made with the new Cascading Petals Collection that was released this month along with the decorative die.
Read till the end for full list of supplies and instructions for this card.

Heartfelt Creations Products:
HCPC-3845 Just For You Sentiments Cling Stamp Set
HCPC-3913 Floral Song Cling Stamp Set
HCD1-7297 Floral Song Die
HCD2-7308 Majestic Swirl Frames Die
HCDP1-2115 Cascading Petals Paper Collection
HCPP1-438-2 Paper Pack of 10 - White
18002 Rajni Chawla's Vellum Flowerite
HCDA2-450 Stack and Store Daubers-Pack of 30
RLHS100 Hydra Sponges
RAHT Heat It Craft Tool
359848 Spellbinders Tool N' One
411231 5pc. Acrylic Block Set
NU650 Nuvo Crystal Drops - Ebony Black
352854 Metal Tip for Adhesive Bottles
159723 Designer Dries Clear Adhesive
3D1844 3-D Crystal Lacquer
D120601 Darice Adhesive Foam Strips
Other Products:
Seedless Preserve, Mermaid Lagoon, Mowed Lawn, Mustard Seed and Vintage Photo Distress inks, Hero Arts Unicorn White pigment ink pad, WOW white embossing powder, Sakura white gelly roll pen, transparent Glitter and pearls.
Instructions:
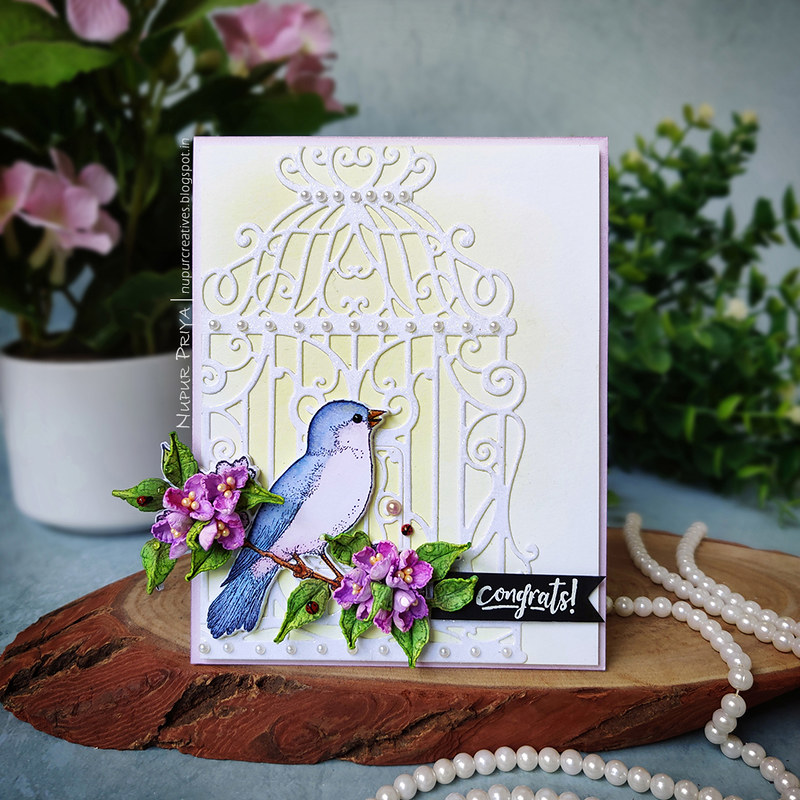
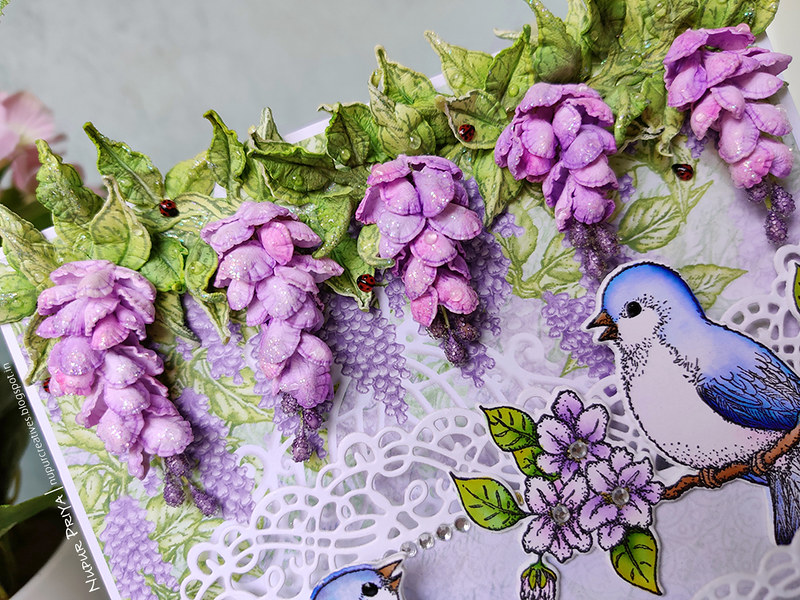
Card Base : Die cut a piece of white cardstock using the die from Majestic Swirl Frames Die. Apply a thin layer of Designer Dries Clear Adhesive on the front using Hydra Sponges and sprinkle transparent glitter. Let it dry and then burnish with finger tips to remove excess glitter.
Cut 2 pieces of pattern paper from Cascading Petals Paper Collection measuring 4 3/4" x 6 3/4" and 3" x 5". Adhere them on same sized white cardstock pieces. Ink the edges lightly with Seedless preserve distress ink. Adhere both pieces and the die cut on a 5" x 7" white card base as shown using Darice Adhesive Foam Strips between each layer.
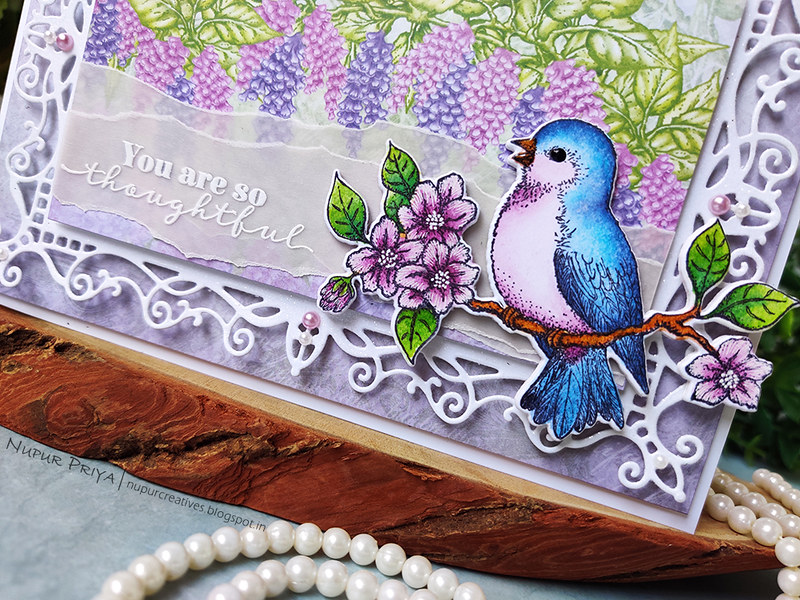
Sentiment : Stamp the sentiment from Just For You Sentiments Cling Stamp Set on Rajni Chawla's Vellum Flowerite using Hero Arts Unicorn White pigment ink pad and heat emboss using WOW white embossing powder and Heat It Craft Tool. Tear the sentiment strip from the sheet and one more strip of the vellum, layer and adhere them on the card front as shown. Use teeny-tiny drops of Designer Dries Clear Adhesive using Metal Tip for Adhesive Bottles behind the sentiment to hide the glue spots.
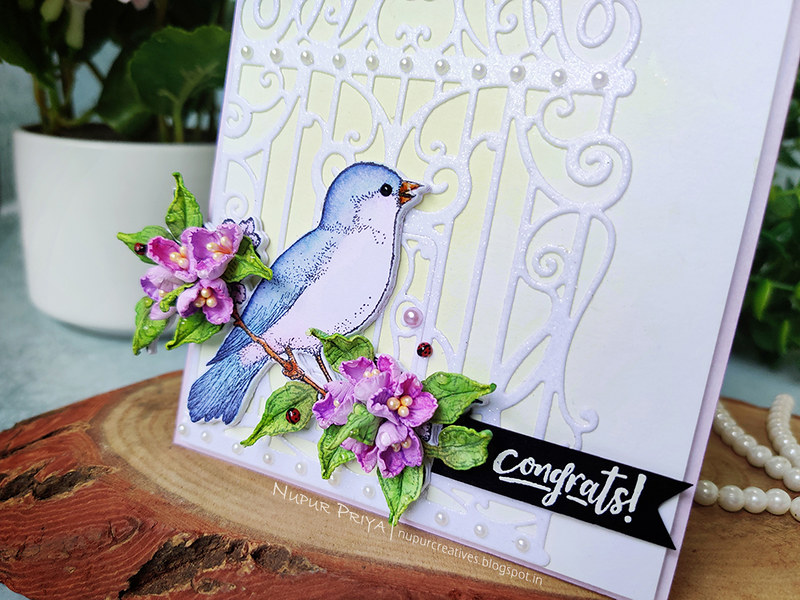
Focal Image : Stamp the bird image from Floral Song Cling Stamp Set on a piece of watercolor cardstock using Jet Black Archival Ink . Color the image using Seedless Preserve, Mermaid Lagoon, Mowed Lawn, Mustard Seed and Vintage Photo Distress inks. Use Sakura white gelly roll pen to add details to the flowers. Die cut it using the matching die from Floral Song Die. Die cut 4 more pieces of white cardstock using the same die stack and adhere them together to make a thicker piece. Adhere this piece on the sentiment strip as shown.
Finishing Touch : Add a drop Ebony Black Nuvo Crystal Drops on the eye of the bird and apply 3-D Crystal Lacquer to the beak. Add pearls to the die cut to add finishing touch.
Hope you like it...
Today I have yet another card made with the new Cascading Petals Collection that was released this month along with the decorative die.
Read till the end for full list of supplies and instructions for this card.
Heartfelt Creations Products:
HCPC-3845 Just For You Sentiments Cling Stamp Set
HCPC-3913 Floral Song Cling Stamp Set
HCD1-7297 Floral Song Die
HCD2-7308 Majestic Swirl Frames Die
HCDP1-2115 Cascading Petals Paper Collection
HCPP1-438-2 Paper Pack of 10 - White
18002 Rajni Chawla's Vellum Flowerite
HCDA2-450 Stack and Store Daubers-Pack of 30
RLHS100 Hydra Sponges
RAHT Heat It Craft Tool
359848 Spellbinders Tool N' One
411231 5pc. Acrylic Block Set
NU650 Nuvo Crystal Drops - Ebony Black
352854 Metal Tip for Adhesive Bottles
159723 Designer Dries Clear Adhesive
3D1844 3-D Crystal Lacquer
D120601 Darice Adhesive Foam Strips
Other Products:
Seedless Preserve, Mermaid Lagoon, Mowed Lawn, Mustard Seed and Vintage Photo Distress inks, Hero Arts Unicorn White pigment ink pad, WOW white embossing powder, Sakura white gelly roll pen, transparent Glitter and pearls.
Instructions:
Card Base : Die cut a piece of white cardstock using the die from Majestic Swirl Frames Die. Apply a thin layer of Designer Dries Clear Adhesive on the front using Hydra Sponges and sprinkle transparent glitter. Let it dry and then burnish with finger tips to remove excess glitter.
Cut 2 pieces of pattern paper from Cascading Petals Paper Collection measuring 4 3/4" x 6 3/4" and 3" x 5". Adhere them on same sized white cardstock pieces. Ink the edges lightly with Seedless preserve distress ink. Adhere both pieces and the die cut on a 5" x 7" white card base as shown using Darice Adhesive Foam Strips between each layer.
Sentiment : Stamp the sentiment from Just For You Sentiments Cling Stamp Set on Rajni Chawla's Vellum Flowerite using Hero Arts Unicorn White pigment ink pad and heat emboss using WOW white embossing powder and Heat It Craft Tool. Tear the sentiment strip from the sheet and one more strip of the vellum, layer and adhere them on the card front as shown. Use teeny-tiny drops of Designer Dries Clear Adhesive using Metal Tip for Adhesive Bottles behind the sentiment to hide the glue spots.
Focal Image : Stamp the bird image from Floral Song Cling Stamp Set on a piece of watercolor cardstock using Jet Black Archival Ink . Color the image using Seedless Preserve, Mermaid Lagoon, Mowed Lawn, Mustard Seed and Vintage Photo Distress inks. Use Sakura white gelly roll pen to add details to the flowers. Die cut it using the matching die from Floral Song Die. Die cut 4 more pieces of white cardstock using the same die stack and adhere them together to make a thicker piece. Adhere this piece on the sentiment strip as shown.
Finishing Touch : Add a drop Ebony Black Nuvo Crystal Drops on the eye of the bird and apply 3-D Crystal Lacquer to the beak. Add pearls to the die cut to add finishing touch.
Thank you for visiting today... :)