Wednesday 31 January 2018

Altered Art and 2 News

Hello friends & welcome to Heartfelt Wednesday...
Before we go on to my project for today I have 2 news to share with you all...
1st is Heartfelt Love Collection is at 10% discount right now... Yayyyyy...
Click HERE  to avail this offer
And the 2nd news is that Heartfelt Creations is having a DT Call for 2018-19 team.
Have you ever wanted to be on Heartfelt DT? then now is the time to try your luck...
And this also means that they need you to vote for the current DT members who get to stay on the team for another year... So if you like my work & would like me to stay on the team for 1 more year then please do vote for me and 4 more designers by clicking on the link HEREVoting ends on February 9th, 2018.

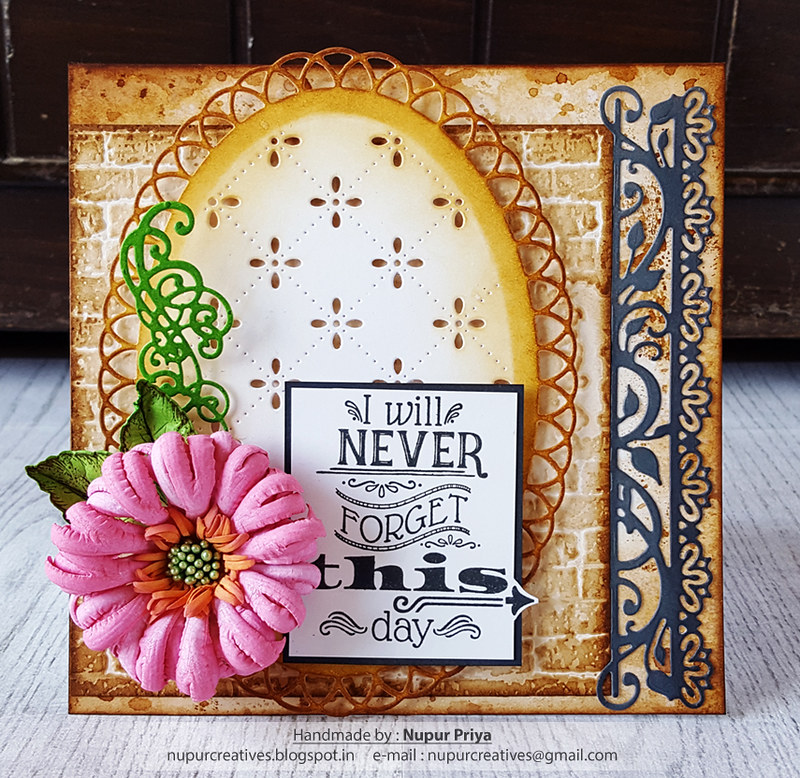
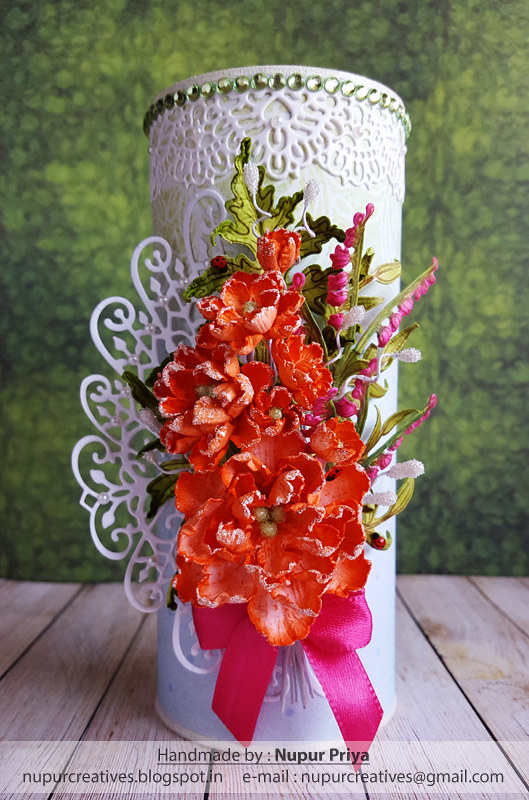
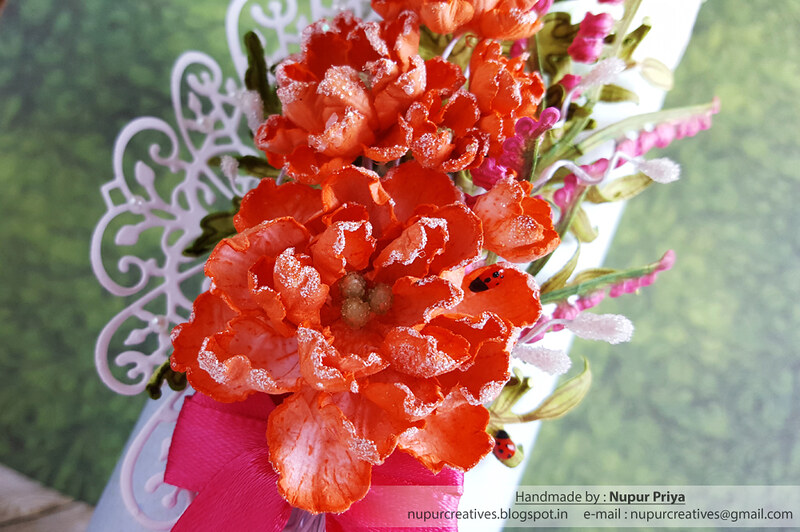
Now moving on to my project for today... I have altered a Titan Eyeplus sunglasses box to create a home decor piece...
Read till the end for the list of products used & instructions for this altered box...
20180124_125724

20180124_130224_001

20180124_130350

20180124_130049(0)

20180124_130124

Heartfelt Creations Products: 
HCPC 3651 Botanical Rose Cling Stamp Set
HCPC-3656 Delightful Daisies Cling Stamp Set
HCPC-3811 Rain Boots and Blossoms Cling Stamp Set
HCD1-758 Botanical Wings Die
HCD1-760 Delightful Daisy Die
HCD1-7144 Decorative Medallion Die
HCD1-7155 Circle Basics Large Dies
HCD1-7161 Sweetheart Borders Die
HCD1-7169 Rain Boots and Blossoms Die
HCDP1-286 Singing in the Rain Paper Collection
HCS1-457-3 Pastel Bead Stamens-Medium
NU650 Nuvo Crystal Drops - Ebony Black
NU667 Nuvo Crystal Drops - Red Berry
PGM15016 Rajni Chawla's Frosting Powder
RACP451 Ranger Archival Ink Pad - Coffee
RACP670 Ranger Archival Ink Pad - Tiger Lily
RACP436 Ranger Archival Ink Pad - Leaf Green
RACP475 Ranger Archival Ink Pad - Library Green
RACP524 Ranger Archival Ink Pad - Vibrant Fuchsia
HCPP3-452 12 x 12 Cardstock Pack of 25 - White
HCST2-406 Flower Shaping Essentials
STP1-421 Stylus Handle
STP1-420 Molding Mat
HCST1-401 Deluxe Flower Shaping Kit
HCFB1-464 3D Floral Basics Shaping Mold
RAHT Heat It Craft Tool
HCDA2-450 Stack and Store Daubers-Pack of 30
D110305 Stamp Mat Pad
359848 Spellbinders Tool N' One
31510 Funnel Tray
411231 5pc. Acrylic Block Set
352854 Metal Tip for Adhesive Bottles
PIN6 Glue Tip Pins
159723 Designer Dries Clear Adhesive

Other Products:
Sunglasses box, Ebosser, White Gesso, Paint Brush, Ribbon, Rhinestones & Pearls.

Instruction:
Paint the sunglasses box with White Gesso. Cover the box using a sheet of pattern paper from Singing in the Rain Paper Collection. Use the Circle Basics Large Dies to cut a circle from the same paper to cover the top of the box.  Die cut 2 pieces of white cardstock using Sweetheart Borders Die & adhere it to the top edge of the box. Die cut another piece of white cardstock using Decorative Medallion Die & adhere its edge on the box as shown.

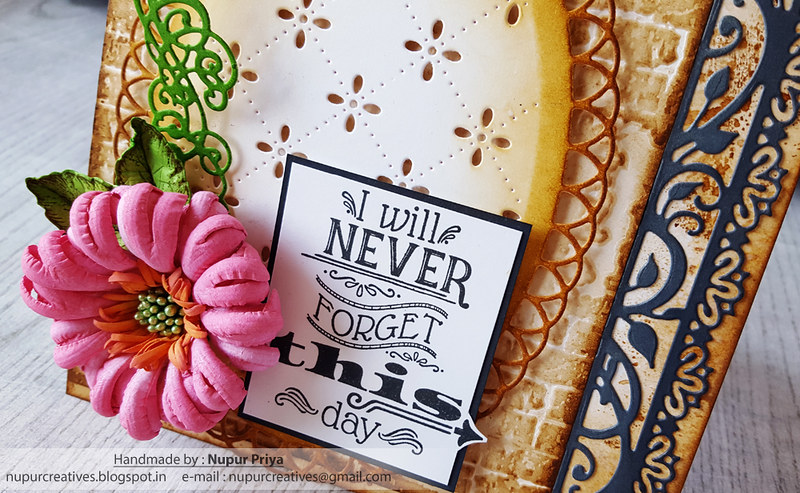
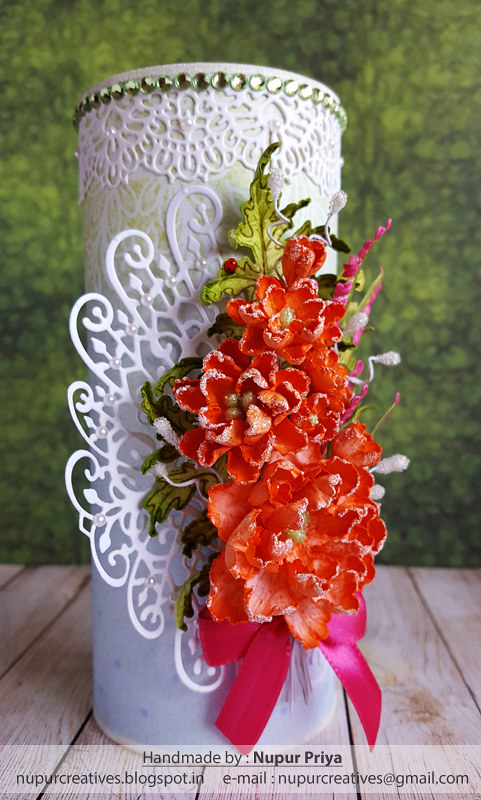
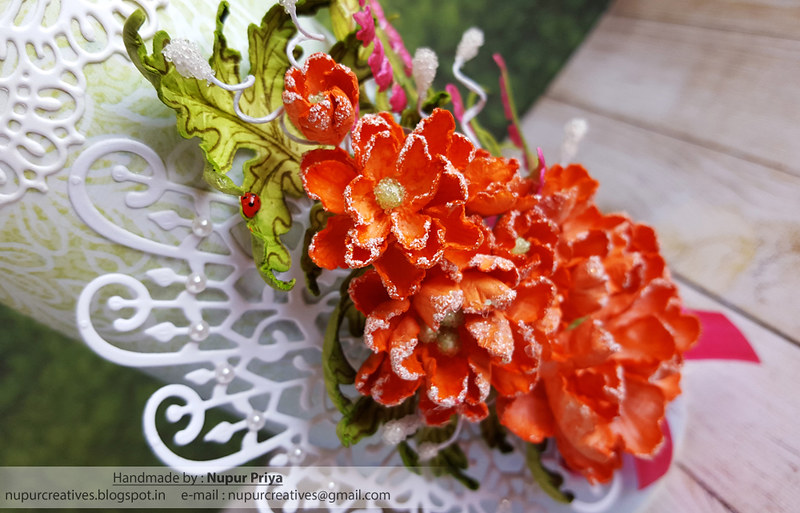
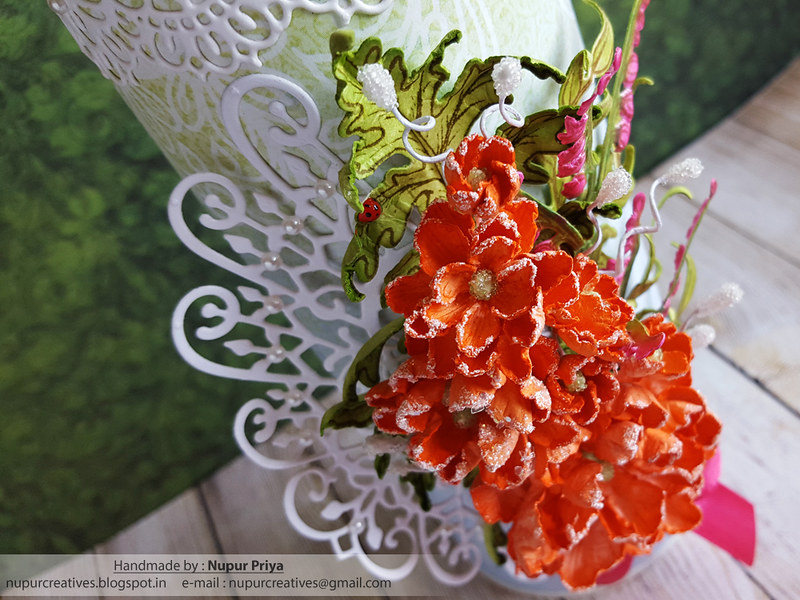
Stamp the flowers from Botanical Rose Cling Stamp Set using Tiger Lily Archival Ink  & die cut them using the matching dies from Botanical Rose Cling Stamp Set. Color them using the same ink & Stack and Store Daubers. Shape them using Floral Basics Shaping Mold & Deluxe Flower Shaping Kit. Add the green stamen from Pastel Bead Stamens-Medium to make the flower center.

Stamp the leaves & fillers from Delightful Daisies Cling Stamp Set & Rain Boots and Blossoms Cling Stamp Set using Coffee Archival Ink & die cut them using matching dies from  Delightful Daisy Die & Rain Boots and Blossoms Die. Color them using Leaf GreenLibrary Green & Vibrant Fuchsia Archival Inks & Stack and Store Daubers. Shape them using Deluxe Flower Shaping Kit. Arrange & adhere all the elements as shown. Curl a few white stamens from Pastel Bead Stamens and add them to the flower arrangement. Make few ladybugs with Ebony Black & Red Berry Nuvo Crystal Drops and add them to the flower arrangement. Tie a bow on the flower stems. Add some rhinestones & pearls to the die cuts to add finishing touch.


Hope you like this altered project...
Thank you for visiting today... :)
Nupur
Disclosure : Compensated affiliate links used when possible  at NO additional cost to you.. Thank you! 

Wednesday 24 January 2018

Never Forget...

Hello friends & welcome to Heartfelt Wednesday...
Read till the end for the list of products used & instructions for this card...

20180116_144840

20180116_145517

Heartfelt Creations Products: 
HCPC 3545 Open Leaf Cling Stamp Set
HCPC-3691 Enchanted Mum Cling Stamp Set
HCPC-3813 Today's Quotes Stamp Set
HCD1-736 Classic Leaf Die
HCD2-751 Cut Mat Create 2A Die
HCD1-768 Enchanted Mum Die
HCD1-776 Eyelet Oval Die
HCD1-7161 Sweetheart Borders Die
HCS1-457-1 Pastel Pearl Stamens-Small
Coffee Archival Ink
HCPP3-452 12 x 12 Cardstock Pack of 25 - White
159723 Designer Dries Clear Adhesive
352854 Metal Tip for Adhesive Bottles
PIN6 Glue Tip Pins
D120601 Darice Adhesive Foam Strips
DDOTS Double Dots 100pc. -3D Foam Circles
HCST2-406 Flower Shaping Essentials
STP1-421 Stylus Handle
STP1-420 Molding Mat
HCST1-401 Deluxe Flower Shaping Kit
HCDA2-450 Stack and Store Daubers-Pack of 30
173842 Scor-Pal Measuring & Scoring Board
368771 Scor-Tool
D110305 Stamp Mat Pad
359848 Spellbinders Tool N' One
411231 5pc. Acrylic Block Set

Other Products:

Picked Raspberry, Gathered Twigs, Mowed Lawn Distress ink, Picked Raspberry, Wild Honey & Black Soot Distress Oxide ink, Sizzix Tim Holtz  Bricked Embossing Folder

Instructions:

Take a 6" x 6" white card base & ink all the edges using Gathered Twigs Distress ink & Stack and Store Daubers. Splatter some of the same ink on it. Take a piece of 5 1/4" x 5" white cardstock & emboss it using Sizzix Tim Holtz  Bricked Embossing Folder. Take another piece of white cardstock & die cut it using Eyelet Oval Die. Ink both the pieces using Gathered Twigs Distress ink. Adhere these to the card base as shown using 3D Foam Circles.

Take a piece of white cardstock & die cut it using Sweetheart Borders Die. Cut the die in 2 pieces & use the thinner piece for this card. Ink this piece using Black Soot Distress ink & Distress Oxide ink. Adhere on the card base as shown.


Stamp the Enchanted Mum Cling Stamp Set on a piece of white cardstock using Picked Raspberry Distress ink & die cut using matching die from Enchanted Mum Die. Ink it using Picked Raspberry & Wild Honey Distress Oxide inks & Stack and Store Daubers. Shape them using Deluxe Flower Shaping Kit. Stamp the leaves from Open Leaf Cling Stamp Set on a piece of white cardstock using Coffee Archival Ink & die cut it using matching die from Classic Leaf Die. Die cut another piece of white cardstock using the swirls die from Cut Mat Create 2A Die. Ink this die cut & the leaf with Mowed Lawn Distress ink & Stack and Store Daubers. Shape the flower & leaves using Deluxe Flower Shaping Kit. Add some green stamens from Small Pastel Pearl Stamens to the flower center. 


Stamp the sentiment from Today's Quotes Stamp Set on a piece of white cardstock using Black Soot Distress Oxide ink. Trim the edges & Glue it on a slightly larger piece of  white cardstock inked with the same ink. Adhere it on the card front as shown using Darice Adhesive Foam Strips. Arrange & adhere the flower, leaves & swirl on the card front as shown.


Hope you like this card ...
Thank you for visiting today... :)
Nupur
Disclosure : Compensated affiliate links used when possible  at NO additional cost to you.. Thank you! 

Wednesday 17 January 2018

Fanciful Carnation

Hello friends & welcome to Heartfelt Wednesday...
Read till the end for the list of products used & instructions for this card...

20180109_163820

20180109_164202


Heartfelt Creations Products: 
HCPC-3808 Fanciful Carnation Cling Stamp Set
HCD1-7150 Window Box Elements Die
HCD1-7161 Sweetheart Borders Die
HCD1-7166 Fanciful Carnation Die
HCDP1-285 Camelia Carnation Paper Collection
159723 Designer Dries Clear Adhesive
D120601 Darice Adhesive Foam Strips


Other Products:
Mowed Lawn, Pine Needles & Black Soot Distress Inks, Worn Lipstick, Picked Raspberry & Black Soot Distress Oxide inks, Black Archival ink, watercolor & silver cardstock., Gansai Tambi Watercolors, Koi Waterbrush, Ebosser, Sizzix Tropical Paisley Embossing Folder, Spellbinders Romantic Rectangles die, pearls & rhinestones.

Project Instruction: 
Take a 6" x 6" white cardbase & ink it lightly with Mowed Lawn Distress ink & Stack and Store Daubers. Die cut a piece of silver cardstock using the largest die from Spellbinders Romantic Rectangles die & adhere it to the right side of the card front. Cut a piece of white cardstock to mat on the silver die cut piece. Emboss it using Sizzix Tropical Paisley Embossing Folder & ink it with Worn Lipstick & Picked Raspberry Distress Oxide inks using Stack and Store Daubers. Adhere it to the die cut. Die cut a piece of white cardstock using Sweetheart Borders Die, ink it with Black Soot Distress Ink & Distress Oxide ink & adhere it to the embossed piece.

Cut a piece of pattern paper from Camelia Carnation Paper Collection & a slightly larger piece of white cardstock. Ink the white cardstock with Worn Lipstick & Picked Raspberry Distress Oxide inks using Stack and Store Daubers. Layer them & glue them down on the left side of the card front using Darice Adhesive Foam Strips. Darken the center of the pattern paper using Mowed Lawn & Pine Needles Distress Inks & Stack and Store Daubers.

Die cut a piece of white cardstock using the die from Window Box Elements Die & color it with the pearl color from Gansai Tambi watercolors. Stamp the carnation image from Fanciful Carnation Cling Stamp Set on a piece of watercolor cardstock using Black Archival ink. Color it in using Gansai Tambi watercolors & Koi Waterbrush. Die cut it using matching die from Fanciful Carnation Die. Adhere it to the die cut as shown. Adhere this down to the center of the pattern paper using Darice Adhesive Foam Strips.  Add some pearls & rhinestones to add finishing touches.


Hope you like this card...
Thank you for visiting today... :)
Nupur
Disclosure : Compensated affiliate links used when possible  at NO additional cost to you.. Thank you!