Wednesday 30 August 2017

Special Release

Hello friends & welcome to Heartfelt Wednesday...
We have a special surprise release today...
Layered Cards, Shadowboxes and the layered dies 
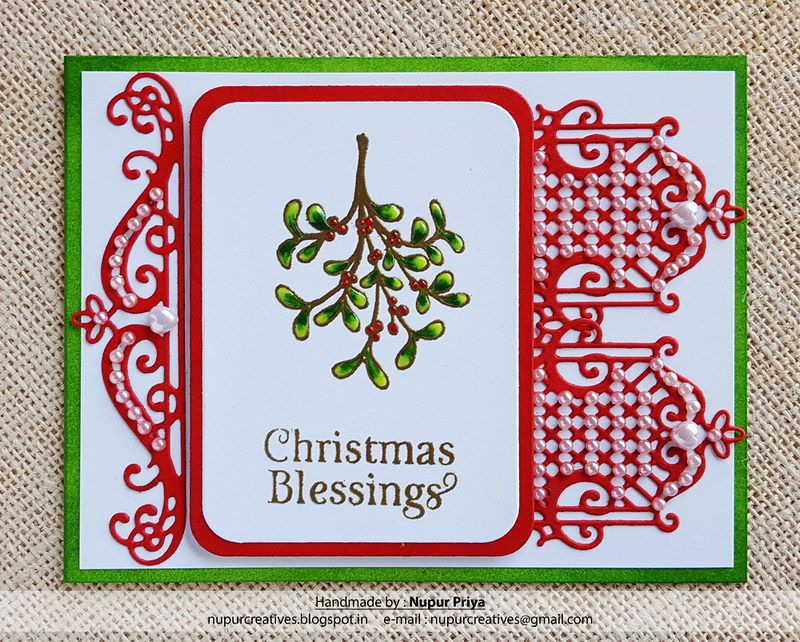
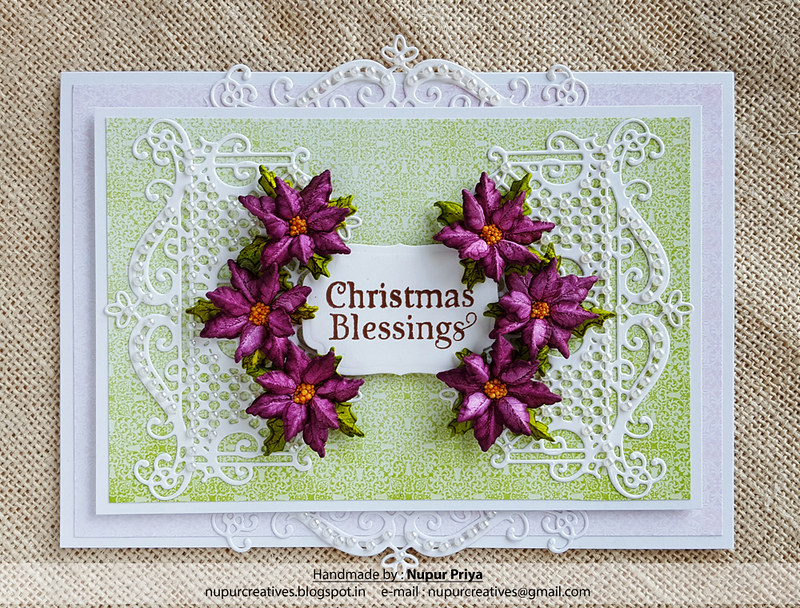
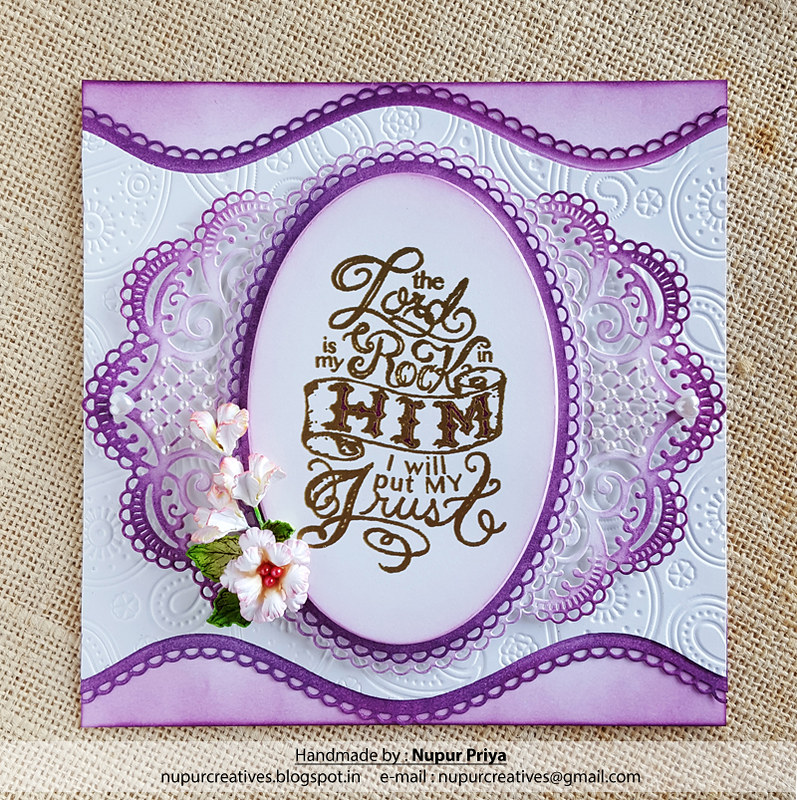
I have made a card for today's inspiration using Eyelet Oval and Basics Small Dies & Eyelet Oval and Basics Large Dies...
Stay with me till the end to see all the supply list & instructions for this card...

20170823_162825_001

20170823_162853

20170823_162916

20170823_162957


Heartfelt Creations Products: 

Other Products:
Seedless Preserve, Worn Lipstick, Squeezed Lemonade, Forest Moss & Mowed Lawn Distress inks, Versamark ink, Ranger Gold Embossing Powder, Ranger Heat-it Tool, Paisely Embossing Folder, Ebosser, Martha Stewart scoreboard, paint brush, white cardstock, Pick me Up, pollen, pearls & adhesive.

Project Instruction:
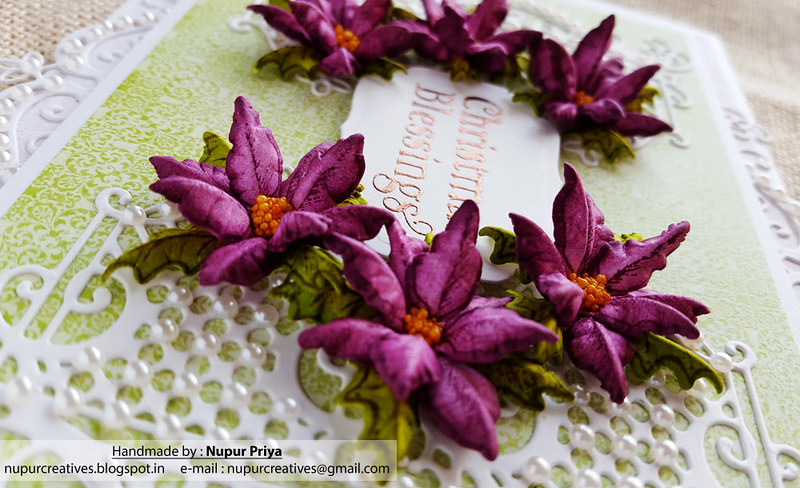
Take a 6" x 6" card base & ink it lightly with Seedless Preserve distress ink. Take 2 pieces of 6" x 6" &  6" x 5 3/4"  white cardstock & die cut the top & bottom edges using the dies from Classic Border Basics Die. Ink the die cut edges of the larger piece using Seedless Preserve distress ink. Emboss the smaller piece using paisely embossing folder. Layer & adhere both the pieces as shown on the card base.

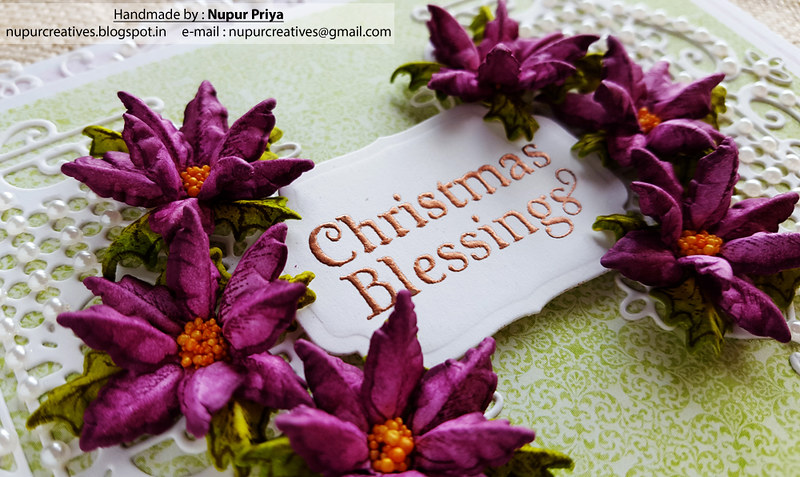
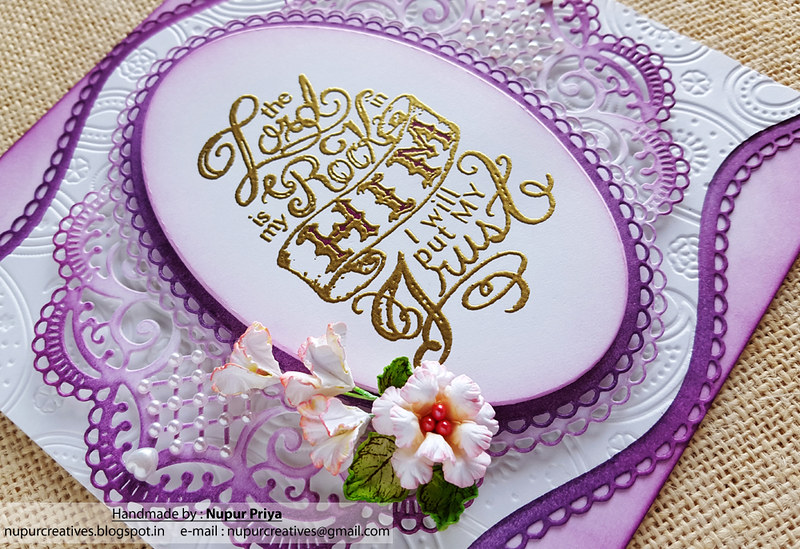
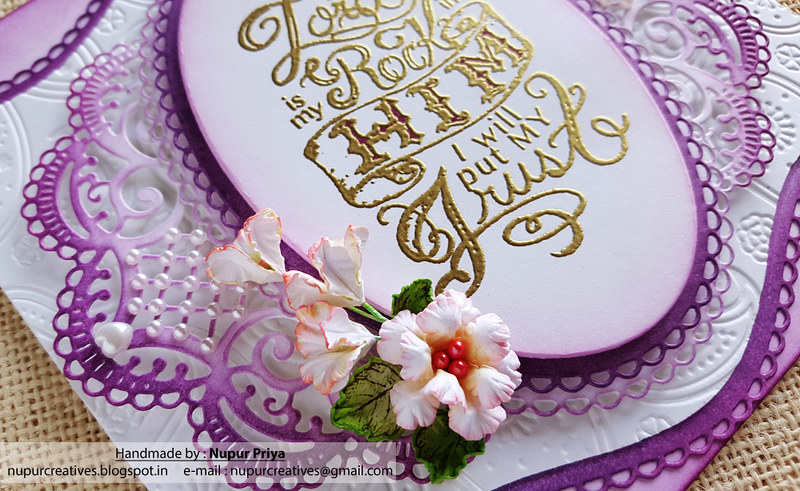
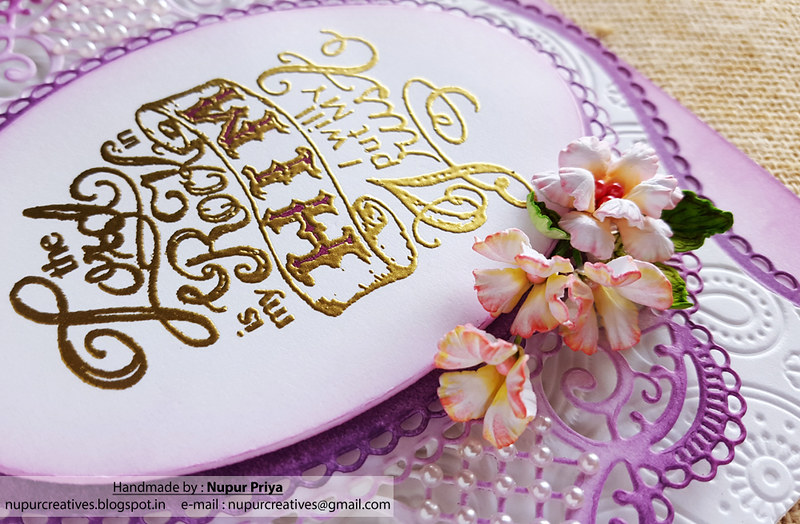
Die cut 2 eyelet ovals & a plain oval using white cardstock & the dies from Eyelet Oval and Basics Small Dies & Eyelet Oval and Basics Large Dies. Ink the larger eyelet oval & plain oval die cut lightly & the smaller eyelet oval die cut heavily using Seedless Preserve distress ink. Stamp the sentiment from  All Things are Possible Cling Stamp Set using Versamark ink & heat emboss it using Ranger Gold Embossing Powder & Ranger Heat-it Tool. Color the word 'HIM' with Seedless Preserve distress ink & a paint brush. Layer & adhere all the three pieces using foam adhesive.

Die cut 2 pieces of white cardstock using the decorative die from Festive Holiday Die. Ink them with Seedless Preserve distress ink. Glue them to both the sides of the oval arrangement & adhere them to the card front. 

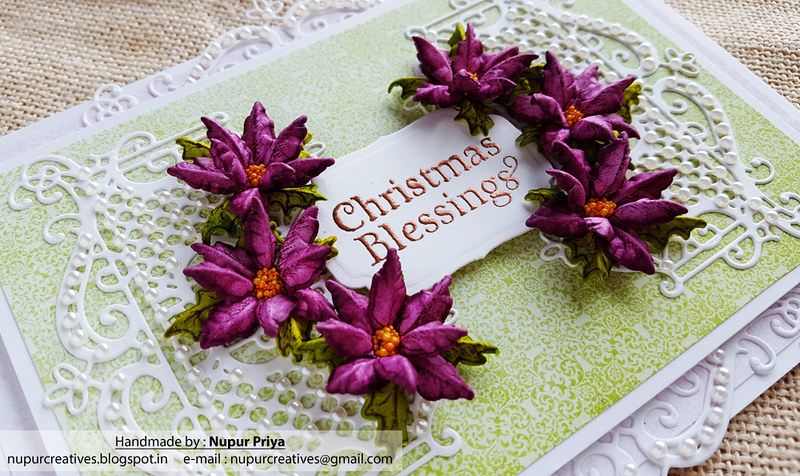
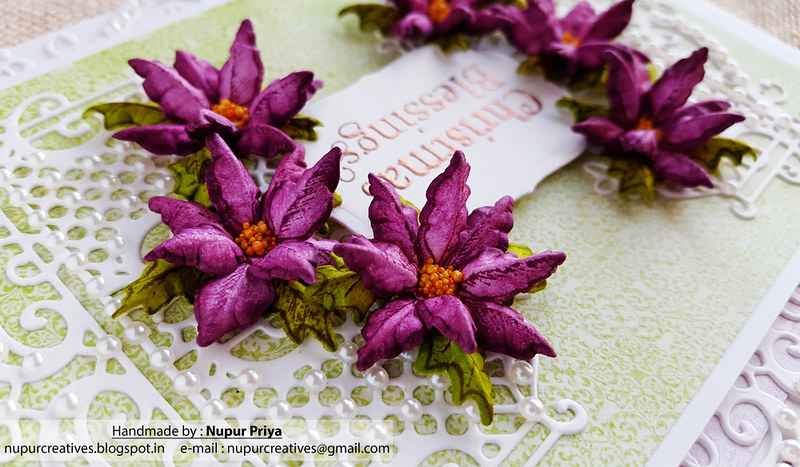
Stamp the flowers from Classic Rose Cling Stamp Set using Worn Lipstick Distress ink & die cut using matching dies from Classic Rose Die. Ink them using Worn Lipstick & Squeezed lemonade Distress ink. Stamp the leaves from Open Leaf Cling Stamp Set using Forest Moss Distress Ink, die cut them using matching dies from Classic Leaf Die & ink them using Mowed Lawn Distress ink. Shape the flowers & leaves using Deluxe Flower Shaping Kit. Add pollens to the flower centers. Arrange & adhere them on the card as shown. Add some pearls using Pick me Up  to the die cuts for finishing touch.

 Hope you like this card...
Thank you for visiting today... :)


Nupur
Disclosure : Compensated affiliate links used when possible  at NO additional cost to you.. Thank you! 

Christmas Blessings

Hello friends & welcome to Heartfelt Wednesday...
I have made another Christmas card for today's inspiration...
Stay with me till the end to see all the supply list & instructions for this card...

20170816_152741_001

20170816_152855

20170816_152757

Heartfelt Creations Products: 
HCPC -3795 Window Box Fillers Cling Stamp Set
HCPC -3796 Winter's Eve Cling Stamp Set
HCD2-749 Cut Mat Create 1A Die
HCD2-750 Cut Mat Create 1B Die
HCD1-7150 Window Box Elements Die
NU667 Nuvo Crystal Drops - Red Berry
NU663 Nuvo Crystal Drops - Woodland Green

Other Products:
Candied Apple, Fired Brick & Mowed Lawn Distress inks, Versamark ink, Gloss Apple Green Nuvo Crystal DropsPick me Up, Ranger Gold Embossing Powder, Ranger Heat-it Tool, Ebosser, Martha Stewart scoreboard, white cardstock, pearls & adhesive.

Project Instruction:
Take a 4 1/4" x 5 1/2" card base & ink the edges with mowed Lawn Distress ink. Take a piece of 4" x 5 1/4" white cardstock & glue it to the card base.

Stamp the image from Window Box Fillers Cling Stamp Set & the sentiment from Winter's Eve Cling Stamp Set on a piece of white cardstock as shown using Versamark Ink. Heat emboss it using Ranger Gold Embossing Powder & Ranger Heat-it Tool. Die cut this stamped panel using the die from HCD2-750 Cut Mat Create 1B Die set. Fill the leaves & berries using Nuvo Crystal Drops in Red BerryWoodland Green & Apple Green.

Die cut another piece of white cardstock using the die from Cut Mat Create 1A Die. Ink this piece with Candied Apple & Fired Brick Distress inks. Glue the two pieces together. Adhere this to the card front with foam adhesive as shown. 

Die cut 2 pieces for white cardstock using the decorative dies from Window Box Elements Die. Ink them with Candied Apple & Fired Brick Distress inks & adhere this to the above piece as shown. Add some pearls using Pick me Up to the die cuts for finishing touch.

 Hope you like this card...
Thank you for visiting today... :)
Nupur
Disclosure : Compensated affiliate links used when possible  at NO additional cost to you.. Thank you! 

Wednesday 16 August 2017

Joy To The World

Hello friends & welcome to Heartfelt Wednesday...
I have made a window card for today's inspiration...
Stay with me till the end to see all the supply list & instructions for this card...
20170808_163234

20170808_163345

20170808_163352

20170808_163417

Heartfelt Creations Products: 

Other Products:
Hickory Smoke Distress ink,Black Archival ink, Gansai Tambi Watercolors, Koi Waterbrush, Ebosser, Martha Stewart scoreboard, white & watercolor cardstock, pearls & adhesive.

Project Instruction:
Cut a 4 3/4" x 6 3/4" piece of pattern paper from Winter's Eve Paper Collection. Adhere it to a 5" x 7" white card base. Die cut a rectangle in the centre of the card front using the middle die from Window Frame Die .

Stamp the fireplace image from Winter's Eve Cling Stamp Set with black archival ink on a piece of watercolor cardstock & color it using Gansai Tambi Watercolors & Koi Waterbrush. Trim the edges around the image & adhere it to the inside of the card so that it is aligned with the  window on the card front.

Stamp the window from Window Frame Cling Stamp Set with black archival ink on a piece of white cardstock & die cut it using matching dies from Window Frame Die . Ink it lightly with Hickory Smoke distress ink. Die cut 1 more piece of the window & adhere them together. Align it with the window hole on the card front & glue it down. 

Die cut 2 pieces of both the decorative dies from Window Box Elements Die. Adhere the similar die cuts together to make a thicker piece. Take the die cut that will be on the sides of the window & cut it lengthwise. Adhere all the 3 resulting pieces as shown.

Die cut 1 more piece of the ornamental die that was used on the sides of the window & trin the sides to get the straight edges as shown. Fussy cut a piece of pattern paper from Winter's Eve Paper Collection to layer behind the die cut piece. Cut the sentiment from the same paper collection & adhere it on a slightly larger piece of white cardstock. Adhere this to the die cut using foam adhesive. Adhere down this piece below the window on the card front. Add some pearls to the die cuts for finishing touch.


 Hope you like this card...
Thank you for visiting today... :)
Nupur
Disclosure : Compensated affiliate links used when possible  at NO additional cost to you.. Thank you! 

Wednesday 9 August 2017

Christmas Blessings

Hello friends & welcome to Heartfelt Wednesday ...
Today we are debuting 

Celebrate the more simple side of the holiday season, and add a touch of nostalgia and wonder to all of your holiday themed greeting cards, scrapbook layouts and altered art pieces with the new Winter’s Eve Collection by Heartfelt Creations. Reminisce Christmas blessings from years gone by with a tranquil collection featuring an array of illustrations bringing back memories of silent nights by candlelight, choir voices resonating from the little church in the wildwood, woodland creatures foraging for food beneath the glistening snow, windows illuminated with the soft glow of a warming fireplace, and beautifully decorated Christmas trees ready to engage the imagination and excitement of little boys and girls eager to see what lies beneath them on Christmas morning! A charming and peaceful paper collection delivering a color palette of icy blues, pine greens, poinsettia pinks, berry reds and frosty whites filled with decorative elements including delicate swirls, subtle checks, bold stripes, dainty florals and lace like accents will whisk you away to a peaceful winter wonderland overwhelming your heart with the comfort and joy of the season! Three wintry themed cling stamp sets along with coordinating dies bring a further touch of simplicity to the season with bouquets of petite flowers and foliage, an old fashioned sled and a window frame with dimensional box ideal for creating warm and inviting scenes featuring a beautifully illustrated candle arrangement, Christmas tree or glowing fireplace. Three intricate and ornamental dies lend themselves beautifully to creating breathtaking decorative die cuts for accenting all of your winter wishes. Come along with us as we set the scene for a tranquil winter’s eve and a happy holiday season!

I have made a card using the beautiful dies from this collection along with the papers & sentiment stamp. The poinsettias are from Celebrate the Season  Collection from last year. Stay till the end for supply list & project instructions...

20170802_154736

20170802_154816

20170802_154939

20170802_155110

20170802_155136


Heartfelt Creations Products: 
HCST1-401 Deluxe Flower Shaping Kit
ANC852 Bright Ideas Prills - ManGo

Other Products:
Seedless Preserve, Forest Moss & Mowed Lawn Distress inks, Versamark ink, Wow Metallic Copper Embossing Powder, Ranger Heat-it Tool, Spellbinders Labels 4 die, Ebosser, Martha Stewart scoreboard, white cardstock, pearls & adhesive.

Project Instruction:
Cut a 4 3/4" x 6 3/4" & 4" x 6" pieces of pattern papers from  Winter's Eve Paper Collection. Adhere them on a 5" x 7" white card base & 4 1/4" x 6 1/4" white cardstock.

Die cut 4 pieces of white cardstock using the border die & 2 pieces of white cardstock using the ornamental die from Window Box Elements Die. Cut the ornamental diecuts in half. Arrange the die cuts as shown & adhere to the card front.

Stamp the sentiment from Winter's Eve Cling Stamp Set on a piece of white cardstock using Versamark ink & use Wow Metallic Copper Embossing Powder & Ranger Heat-it Tool to heat emboss it. Die cut this piece using Spellbinders Labels 4 die. Adhere it in the middle of the card front using foam adhesive.

Stamp the poinsettia images from Celebrate the Season Cling Stamp Set with seedless preserve distress ink & the leaf with forest moss distress ink. Ink the flowers with same ink & the leaves with Forest Moss Distress ink . Die cut them using the matching dies from Celebrate the Season Die. Shape them using Deluxe Flower Shaping Kit & add ManGo from Bright Ideas Prills to the flower centers. Arrange & adhere everything as shown. Add some pearls to the die cuts for finishing touch.


 Hope you like this card...
Thank you for visiting today... :)
Nupur
Disclosure : Compensated affiliate links used when possible  at NO additional cost to you.. Thank you! 

Wednesday 2 August 2017

Love, Joy & Peace

Hello friends & welcome to Heartfelt Wednesday...
I have made another Christmas card with the new Festive Holly collection for today's inspiration...
Stay with me till the end to see all the supply list & instructions for this card...

20170726_113429


20170726_113501

Heartfelt Creations Products: 
HCD1-7146 Festive Holiday Die
HCDP1-280 Festive Holly Paper Collection

Other Products: 
Gathered Twigs Distress ink, Ebosser, Martha Stewart scoreboard, white cardstock, pearls  & adhesive.

Project Instruction: 
Take a 4 3/4" x 6 3/4" white cardstock & ink it with Gathered Twigs Distress ink. Adhere it on a 5" x 7" white card base. Take another piece of 4 1/2" x 6 1/2" white cardstock & ink it lightly with Gathered Twigs Distress ink. Stamp the image from Holly Berry Jingle Cling Stamp Set with the same ink several times to fill the whole background. Adhere it on the card front.

Die cut 6 pieces of white cardstock using Festive Holiday Die. Stack 3 pieces & glue them together to create 2 final pieces. Adhere it on the card front as shown. 

Cut out a sentiment panel from the Festive Holly Paper Collection and adhere it on a slightly larger white cardstock. Glue this to the center of the card with some foam adhesive. Add some pearls to the die cut to add finishing touch to the card.


 Hope you like this card...
Thank you for visiting today... :)

Nupur
Disclosure : Compensated affiliate links used when possible  at NO additional cost to you.. Thank you!