Hello friends and welcome to Heartfelt wednesday...
Sorry for being MIA.. again!
I was busy with my baby sister's wedding and returned to my hometown recently...
But I will try to be regular in posting from now on... provided my little one cooperates... She is too active now exploring her surroundings and when she sees a button she has to press it and guess which button was within her reach???? My CPU's and mouse and keyboard! So it's nearly impossible for me to work while she is awake! Either she switches off my PC without warning or presses any key while I am happily typing away...Sooooo I have to re-do everything!
Now my CPU sits on top of my table out of her reach still she manages to distract me but atleast now she can't reach the wires, plugs and sockets.
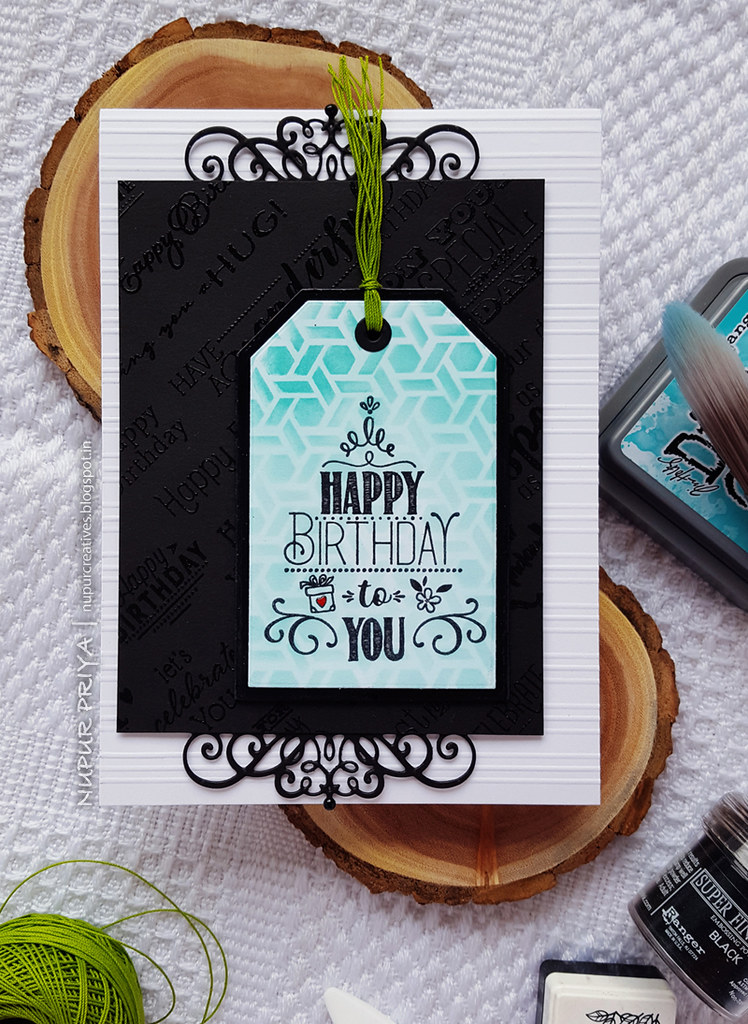
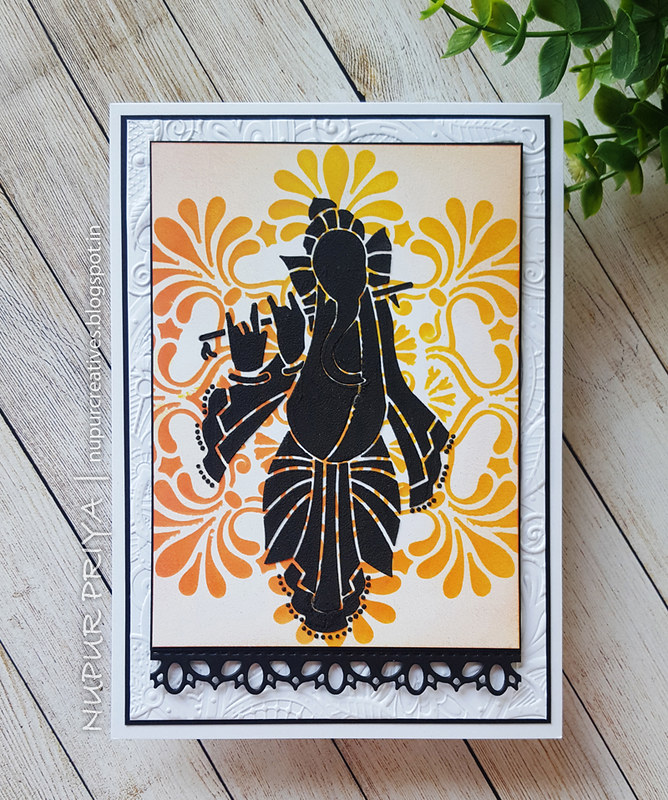
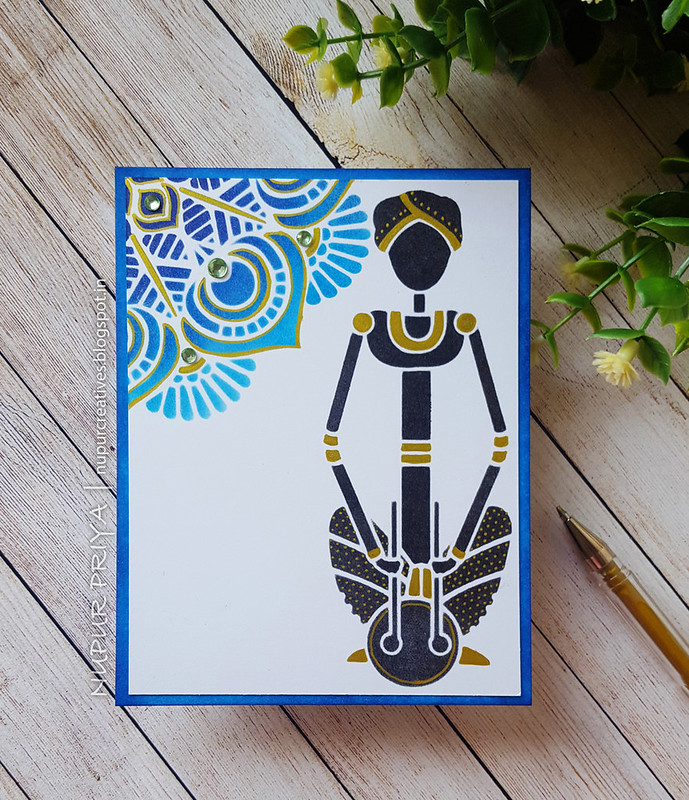
Now enough of my chit-chat... lets move on to my card for today.
Keep reading for the list of supplies and full instructions for this card.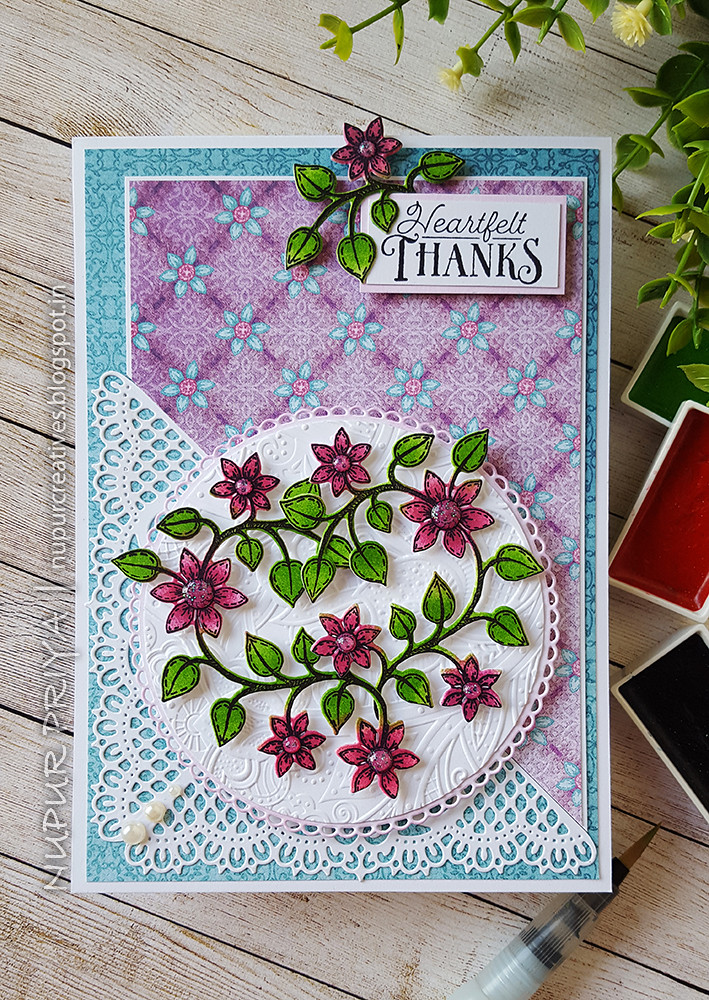
Heartfelt creations Products:
HCPC-3846 Thank You Sentiments Cling Stamp Set
HCPC-3853 Patchwork Daisy Border Cling Stamp Set
HCD1-754 Eyelet Circle and Basics Small Dies
HCD1-7155 Circle Basics Large Dies
HCD1-7209 Patchwork Daisy Border Die
HCD1-7214 Ornate Pocket Accents Die
HCDP1-296 Patchwork Daisy Paper Collection
HCPC-3846 Thank You Sentiments Cling Stamp Set
HCPC-3853 Patchwork Daisy Border Cling Stamp Set
HCD1-754 Eyelet Circle and Basics Small Dies
HCD1-7155 Circle Basics Large Dies
HCD1-7209 Patchwork Daisy Border Die
HCD1-7214 Ornate Pocket Accents Die
HCDP1-296 Patchwork Daisy Paper Collection
HCPP3-452 12 x 12 Cardstock Pack of 25 - White
RACP468 Ranger Archival Ink Pad - Jet Black
352854 Metal Tip for Adhesive Bottles
RACP468 Ranger Archival Ink Pad - Jet Black
352854 Metal Tip for Adhesive Bottles
159723 Designer Dries Clear Adhesive
173842 Scor-Pal Measuring & Scoring Board
359848 Spellbinders Tool N' One
HCDA2-450 Stack and Store Daubers-Pack of 30
DDOTS Double Dots 100pc. -3D Foam Circles
Other products:
Mowed Lawn, Picked Raspberry and Seedless Preserve Distress inks, Crafter's Companion Zen Garden 3D Embossing folder, White Blizzard Nuvo Glitter Drops and pearls.
Instructions:
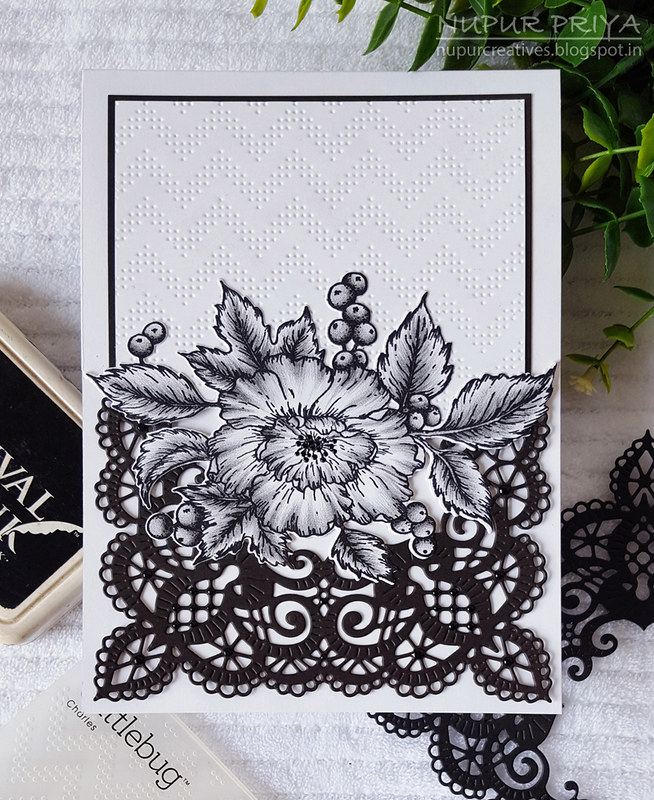
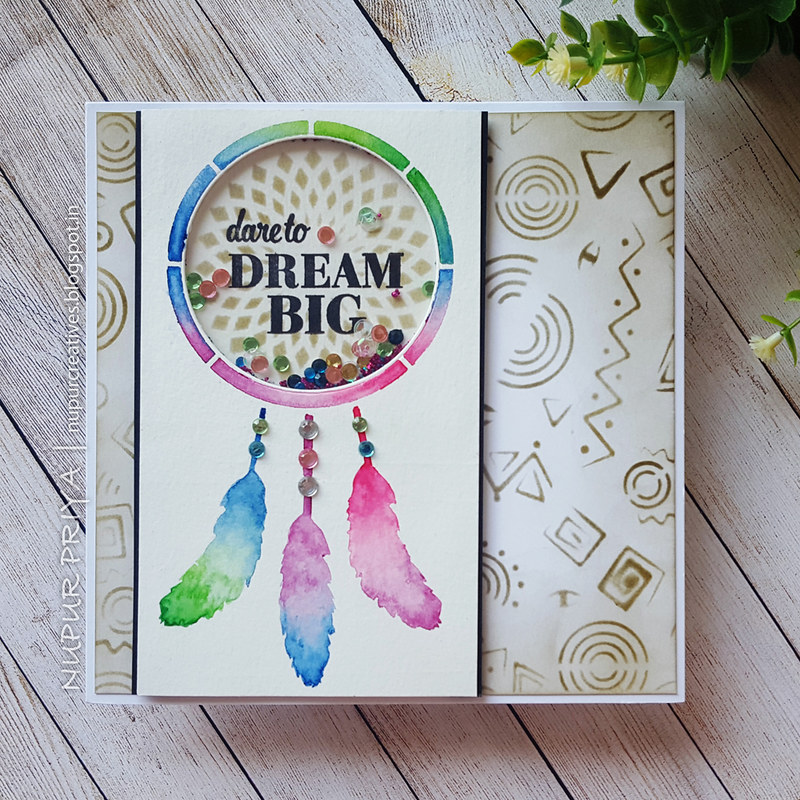
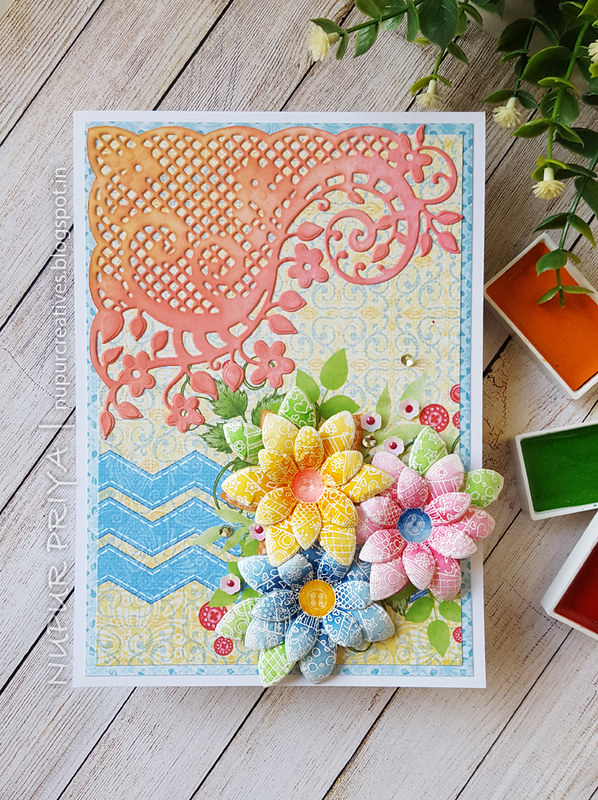
Die cut a piece of white cardstock using the decorative triangle die from Ornate Pocket Accents Die then rotate the die 90 degree and cut the cardstock again so that the final cut resembles a bigger triangle. Trim away the extra cardstock.
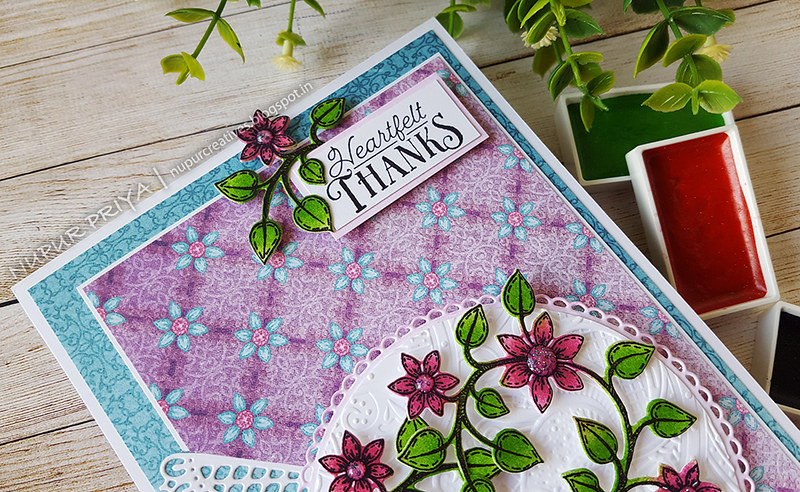
Cut a piece of 4 3/4" x 6 3/4" piece of pattern paper from Patchwork Daisy Paper Collection and adhere it to a 5" x 6" white card base. Cut another piece of 4 1/4" x 6 1/4" pattern paper from the same paper collection and adhere it on a slightly bigger white cardstock. Cut the bottom left corner so that it fits the triangle die cut as shown and adhere both the pieces on the card base.
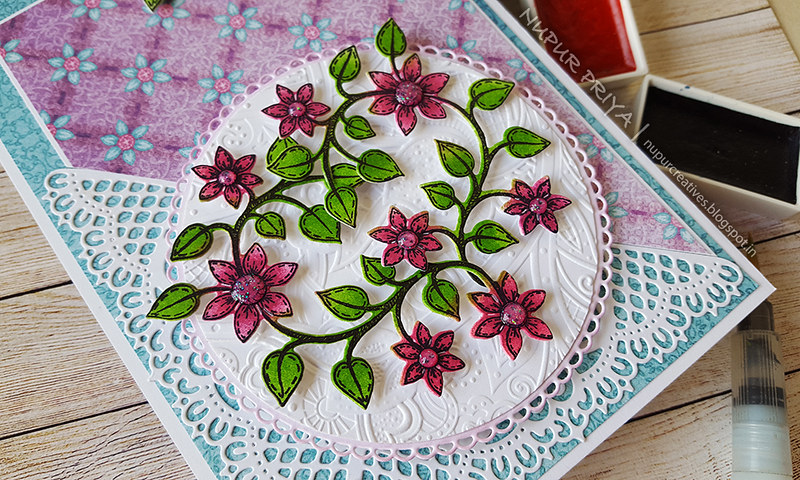
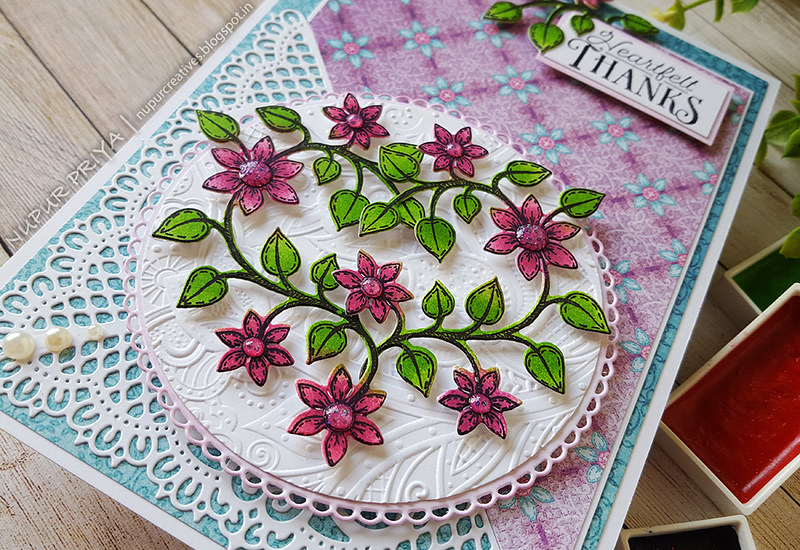
Die cut 2 pieces of white cardstocks using the Eyelet Circle and Basics Small Dies and Circle Basics Large Dies. Ink the eyelet die cut lightly using seedless preserve distress ink using Stack and Store Daubers and emboss the smaller circle die cut using Crafter's Companion Zen Garden 3D Embossing folder. Adhere them on the card front using 3D Foam Circles as shown.
Stamp the sentiment from Thank You Sentiments Cling Stamp Set on a piece of white cardstock using Jet Black Archival Ink. Trim the piece around the sentiment and adhere it on a slightly bigger piece of white cardstock inked with seedless preserve distress ink and adhere them on the top right corner of the card 3D Foam Circles.
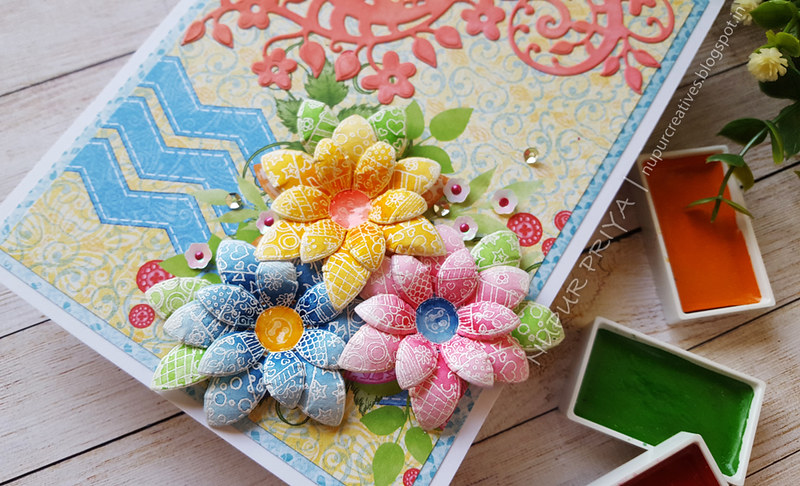
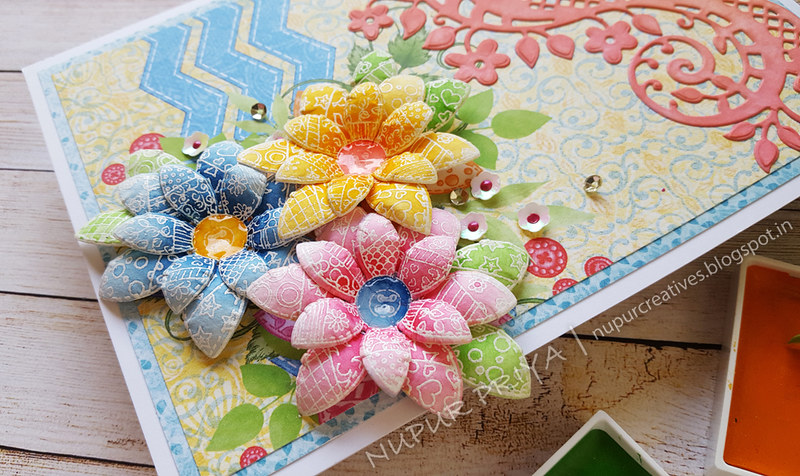
Stamp the images from Patchwork Daisy Border Cling Stamp Set on a piece of white cardstock using Jet Black Archival Ink. Ink the images with Mowed Lawn, Picked Raspberry and Seedless Preserve Distress inks using Stack and Store Daubers. Die cut using the matching dies from Patchwork Daisy Border Die and adhere them on the card as shown using 3D Foam Circles.
Add drops of White Blizzard Nuvo Glitter Drops to the flower centers and few pearls to add finishing touch.
173842 Scor-Pal Measuring & Scoring Board
359848 Spellbinders Tool N' One
HCDA2-450 Stack and Store Daubers-Pack of 30
DDOTS Double Dots 100pc. -3D Foam Circles
Other products:
Mowed Lawn, Picked Raspberry and Seedless Preserve Distress inks, Crafter's Companion Zen Garden 3D Embossing folder, White Blizzard Nuvo Glitter Drops and pearls.
Instructions:
Die cut a piece of white cardstock using the decorative triangle die from Ornate Pocket Accents Die then rotate the die 90 degree and cut the cardstock again so that the final cut resembles a bigger triangle. Trim away the extra cardstock.
Cut a piece of 4 3/4" x 6 3/4" piece of pattern paper from Patchwork Daisy Paper Collection and adhere it to a 5" x 6" white card base. Cut another piece of 4 1/4" x 6 1/4" pattern paper from the same paper collection and adhere it on a slightly bigger white cardstock. Cut the bottom left corner so that it fits the triangle die cut as shown and adhere both the pieces on the card base.
Die cut 2 pieces of white cardstocks using the Eyelet Circle and Basics Small Dies and Circle Basics Large Dies. Ink the eyelet die cut lightly using seedless preserve distress ink using Stack and Store Daubers and emboss the smaller circle die cut using Crafter's Companion Zen Garden 3D Embossing folder. Adhere them on the card front using 3D Foam Circles as shown.
Stamp the sentiment from Thank You Sentiments Cling Stamp Set on a piece of white cardstock using Jet Black Archival Ink. Trim the piece around the sentiment and adhere it on a slightly bigger piece of white cardstock inked with seedless preserve distress ink and adhere them on the top right corner of the card 3D Foam Circles.
Stamp the images from Patchwork Daisy Border Cling Stamp Set on a piece of white cardstock using Jet Black Archival Ink. Ink the images with Mowed Lawn, Picked Raspberry and Seedless Preserve Distress inks using Stack and Store Daubers. Die cut using the matching dies from Patchwork Daisy Border Die and adhere them on the card as shown using 3D Foam Circles.
Add drops of White Blizzard Nuvo Glitter Drops to the flower centers and few pearls to add finishing touch.
Hope you like it...
Thank you for visiting today... :)