Showing posts with label Love. Show all posts

Friday, 17 January 2020

Purple Love Swans Card

Hello Friends and welcome to Heartfelt inspiration post...

Heartfelt Creations have opened the Design Team VOTING for the next DT term. I love working with Heartfelt Creations it is the best design team and I would like to continue my journey with them and I need your help. If you like my work then please vote for me and 4 more DT members by clicking on THIS link.
Thank you so much!

From today I will be posting few cards that I missed earlier...

If you follow Heartfelt Creations blog then you might have seen today's card and few other cards that I will be posting in the coming weeks...
This card was created using the Calla Lily Collection that was released in December 2019. This is a beautiful image and I love the sparkling swans so I added lots of clear glitter on them so they shine and sparkle and look gorgeous in real life. They add so much glamour to this simple card!

Love Swans_Nupur Priya_01

Love Swans_Nupur Priya_03

Love Swans_Nupur Priya_02

Heartfelt Creations Products:
HCPC-3847 Celebrate Love Sentiments Cling Stamp Set

HCPC-3898 Feathery Swan Cling Stamp Set
HCD1-7162 Eyelet Hearts Die
HCD1-7276 Feathery Swan Die
HCPP1-438-2 Paper Pack of 10 - White
HCGP1-488 Luxe Gold Cardstock
359760 Embossing Powder - Gold
352854 Metal Tip for Adhesive Bottles
159723 Designer Dries Clear Adhesive
D120601 Darice Adhesive Foam Strips
3D1844 3-D Crystal Lacquer
RAHT Heat It Craft Tool
HCDA2-450 Stack and Store Daubers-Pack of 30

Other Products: 
Black Soot, Seedless Preserve, Carved Pumpkin, Mustard Seed Distress inks, Versamark ink, watercolor cardstock, transparent glitter, Dew drops, Craft Treat Mandal Stencil and Crafter's Companion 3D Embossing Folder - Ornate Lace

Instructions: 
Lightly ink the edges of a 4 1/4" x 5 1/2" white card base with Seedless Preserve Distress ink. Emboss a 4" x 5 1/4" white cardstock using Ornate Lace  Crafter's Companion 3D Embossing Folder and adhere it on the card base using Darice Adhesive Foam Strips.

Die cut a piece of 
 Luxe Gold Cardstock using the largest Eyelet Hearts Die. Adhere it on the card base as shown  using Darice Adhesive Foam Strips. Trace the inner edge of the die on a piece of white cardstock and fussy cut the traced heart. Ink this heart using Seedless Preserve Distress ink and Craft Treat Mandal Stencil then adhere it on the card base using Darice Adhesive Foam Strips.

Stamp the swan image from 
Feathery Swan Cling Stamp Set on a piece of watercolor cardstock using Versamark ink and heat emboss using Heat It Craft Tool and Gold Embossing Powder. Color the image using Black soot, Seedless Preserve, Carved Pumpkin, Mustard Seed Distress inks. Die cut the image using the matching die from Feathery Swan Die. Die cut 4 more pieces of white cardstock using the same die, stack and adhere them all together to make a thicker piece. Adhere it on the Heart piece as shown. Use Stack and Store Daubers to apply a thin layer of Designer Dries Clear Adhesive on the swans and sprinkle it with transparent glitter. Apply 2 or 3 layers of 3-D Crystal Lacquer on the beak and feathers of the swan using Metal Tip for Adhesive Bottles. Let the layers dry completely before applying the next coat.

Stamp the sentiment from Celebrate Love Sentiments Cling Stamp Set on a strip if white cardstock using Versamark ink and heat emboss using Heat It Craft Tool and Gold Embossing Powder. Trim it to 4" width and adhere it on a slightly wider strip of 
 Luxe Gold Cardstock. Adhere it on the card front below the heart and swans using Darice Adhesive Foam Strips. Adhere few Clear Dew Drops around the swans for finishing touch.


Hope you like it...

Thank you for visiting today... :)
Nupur
Disclosure : Compensated affiliate links used when possible  at NO additional cost to you.. Thank you! 

Wednesday, 20 February 2019

No Line Coloring + Voting Help

Hello and welcome to Heartfelt Wednesday 

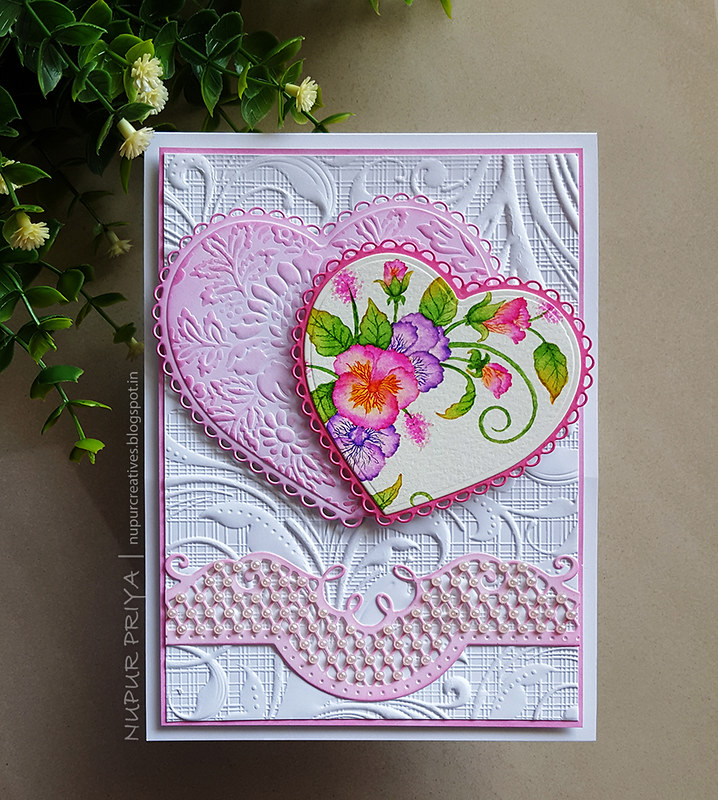
February is the month of love and so today I am here to share a love theme card with you all...
I love the traditional pinks and reds when it comes to love cards so the card is pretty pink with white.
But before we move on to the card I have a small request...
As some of you might know that Heartfelt Creations DT call is going on... and that also means that the current team will also undergo the voting process before continuing with the next term... and so I need your help so that I can continue for another year... So if you like my work then please click on the link below and vote for me along with 4 more designers. Thank you all for the support :)
Design Team Voting

And if you want to join the DT then there is still time to apply for the Heartfelt Creations DT Call
(the deadline is 27th Feb 2019)

Coming back to my card for today...read till the end for the full supply list and instructions for this card

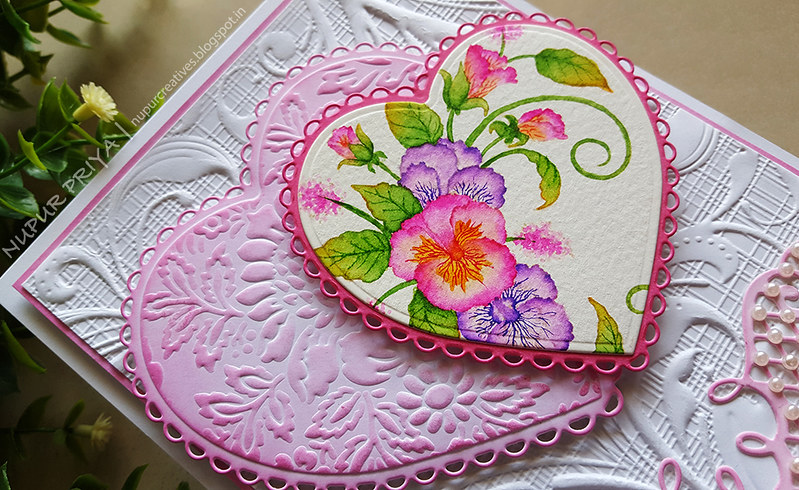
No Line coloring Pansy Hearts Card_Nupur Creatives_1

No Line coloring Pansy Hearts Card_Nupur Creatives_2

Heartfelt Creations Products:
HCPC-3864 Delicate Pansy Spray Cling Stamp Set
HCD1-7162 Eyelet Hearts Die
HCD1-7212 Petite Pocket Accents Die
Zig Clean Color Real Brush Markers
HCDA2-450 Stack and Store Daubers-Pack of 30
359848 Spellbinders Tool N' One
411231 5pc. Acrylic Block Set
HCPP3-452 12 x 12 Cardstock Pack of 25 - White
D120601 Darice Adhesive Foam Strips

Other Products:

Antique Linen Distress ink, Picked Raspberry Distress Oxide ink, Spellbinders Tan Embossing Mat, Crafter's Companion Regency Swirls 3D Embossing Folder, Cuttlebug  Anna Griffin  Juliet Damask Embossing Folder, watercolor cardstock and pearls.

Instructions:

Emboss a piece of 4 1/2" x 6 1/2" piece of white cardstock using Crafter's Companion Regency Swirls 3D Embossing Folder and glue it to a slightly bigger piece of white cardstock inked lightly with Picked Raspberry Distress Oxide ink. Adhere it to a white cardbase using Darice Adhesive Foam Strips.

Stamp the image from Delicate Pansy Spray Cling Stamp Set on a piece of watercolor cardstock using Antique Linen Distress ink and color it using Zig Clean Color Real Brush Markers. Die cut it using the heart die from Eyelet Hearts Die.


Die cut 2 pieces of white cardstock using the 2 largest eyelet heart die from Eyelet Hearts Die. Ink the smaller one with Picked Raspberry Distress Oxide ink with heavy pressure to get a darker shade. Adhere the colored image from previous step on this die cut.


Open the Cuttlebug Anna Griffin Juliet Damask Embossing Folder and put the bigger eyelet heart die cut face down on one side of the embossing folder without taking it out of the die and put the Spellbinders Tan Embossing Mat on top then run it through the die cutting machine to emboss the design on the die cut. Now ink the die cut with Picked Raspberry Distress Oxide ink lightly. Adhere both the heart pieces to the card front as shown using Darice Adhesive Foam Strips.


Die cut a piece of white cardstock using the die from Petite Pocket Accents Die. Ink it lightly with Picked Raspberry Distress Oxide ink, trim it down to 4 1/2" and glue it to the card front as shown. Add few pearls to the die cut to add finishing touch.


Hope you like it...

Thank you for visiting today... :)
Nupur
Disclosure : Compensated affiliate links used when possible  at NO additional cost to you.. Thank you! 

Wednesday, 7 February 2018

Blooming Love

Hello friends & welcome to Heartfelt Wednesday...
Before we go on to my project for today I have a request...
Heartfelt Creations is having a DT Call for 2018-19 team.
And this means that they need you to vote for the current DT members who get to stay on the team for another year... So if you like my work & would like me to stay on the team for 1 more year then please do vote for me and 4 more designers by clicking on the link HEREVoting ends on February 9th, 2018.

Now moving on to my project for today... 

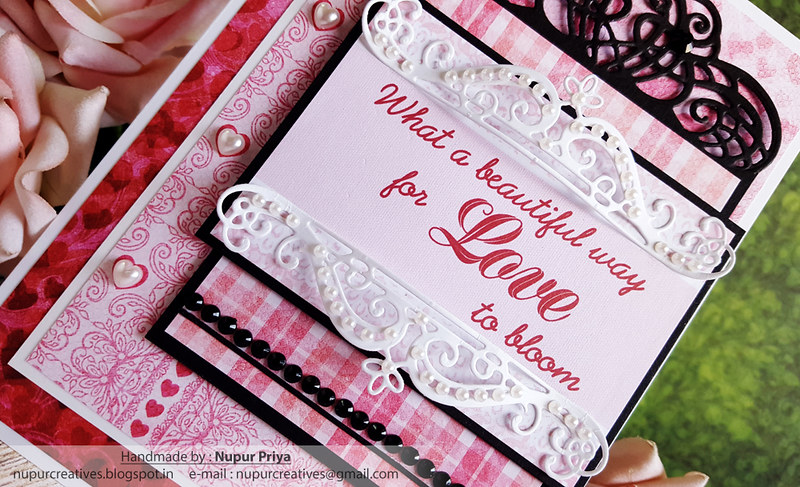
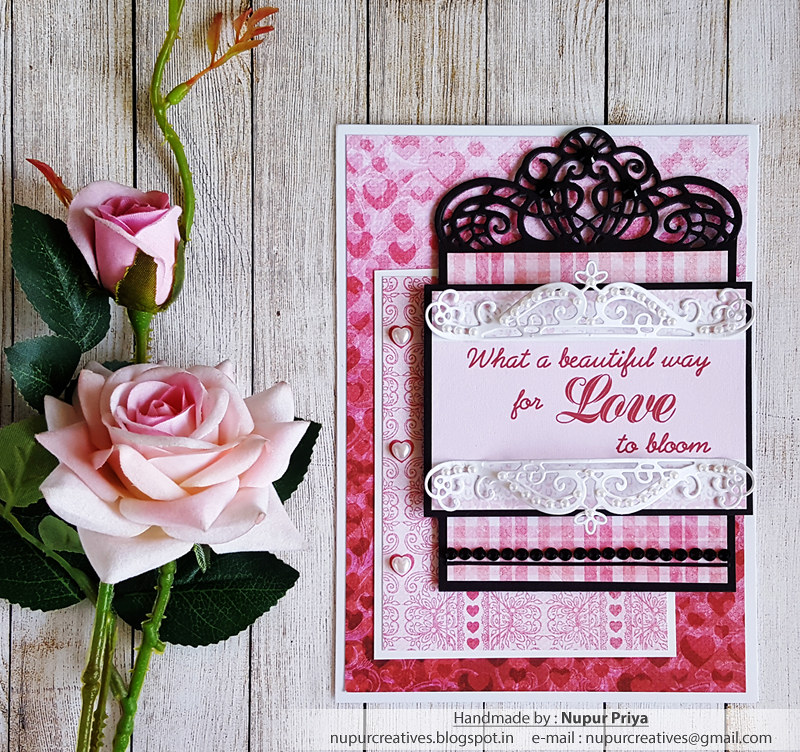
Valentines day is fast approaching & I have a simple last minute card idea for you today...
This card needs only pattern papers, few die cuts & pearls...
Read till the end for the list of products used & instructions for this altered box...

20180130_162928 - Copy

20180130_165232

Heartfelt Creations Products: 
HCDP1-284 Heartfelt Love Paper Collection
HCD1-780 Ornate Borders and Pockets Die
HCD1-7150 Window Box Elements Die
173842 Scor-Pal Measuring & Scoring Board
368771 Scor-Tool
359848 Spellbinders Tool N' One
31510 Funnel Tray
HCPP3-452 12 x 12 Cardstock Pack of 25 - White
HCPP1-438-1 Paper Pack of 10 - Black
159723 Designer Dries Clear Adhesive
352854 Metal Tip for Adhesive Bottles
PIN6 Glue Tip Pins
D120601 Darice Adhesive Foam Strips

Other Products:
Ebosser, Pearls & Rhinestones.

Instructions:

Cut a piece of 4 3/4" x 6 3/4" piece of pattern paper from Heartfelt Love Paper Collection & adhere it to a 5" x 6" white cardbase. Cut another piece of  3 1/4" x 4 1/2" pattern paper from the same paper collection & adhere it on 3 1/2" x 4 3/4" white cardstock.  Adhere it on the card front.

Die cut a piece of 5 1/2" x 3 3/4" black cardstock using Ornate Borders and Pockets Die to make a tag. Cut a piece of slightly smaller pattern paper from Heartfelt Love Paper Collection and glue it to the tag. Adhere this tag to the card front using Darice Adhesive Foam Strips. Cut a sentiment piece from the same paper collection & adhere it on a slightly bigger piece of black cardstock. Adhere it on the tag using Darice Adhesive Foam Strips. Die cut 2 pieces of white cardstock using Window Box Elements Die. curve & adhere them as shown to frame the sentiment. Add some pearls & rhinestones to add finishing touches.


Hope you like this card...
Thank you for visiting today... :)
Nupur
Disclosure : Compensated affiliate links used when possible  at NO additional cost to you.. Thank you! 

Wednesday, 6 December 2017

Black white and red love card

Hello friends & welcome to Heartfelt Wednesday...
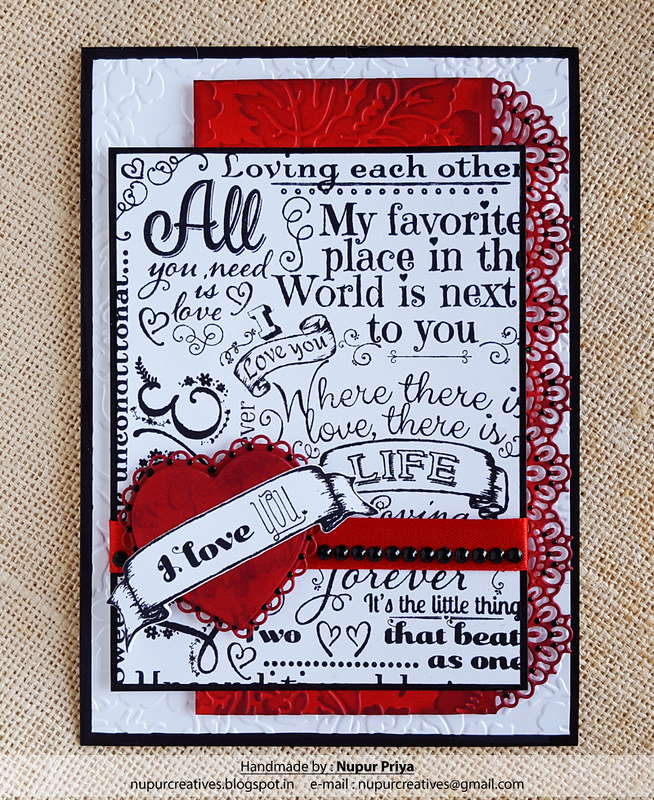
I have made a card using the Heartfelt Love Collection for today's inspiration...
Read till the end for the list of products used & instructions for this card...
20170906_161934

20170906_161948


20170906_161957_001


Heartfelt Creations Products: 
HCPC-3803 Banners Of Love Stamp Set
HCPC-3804 Heartfelt Love Sentiments Stamp Set
HCPC-3805 Forever Love Background Stamp Set
HCD1-7160 Banners Of Love Die
HCD1-7161 Sweetheart Borders Die
HCD1-7162 Eyelet Hearts Die
HCPP3-452 12 x 12 Cardstock Pack of 25 - White
HCPP1-438-1 Paper Pack of 10 - Black
HCDA2-450 Stack and Store Daubers-Pack of 30
173842 Scor-Pal Measuring & Scoring Board
368771 Scor-Tool
D110305 Stamp Mat Pad
411231 5pc. Acrylic Block Set
NU650 Nuvo Crystal Drops - Ebony Black
159723 Designer Dries Clear Adhesive
352854 Metal Tip for Adhesive Bottles
D120601 Darice Adhesive Foam Strips
DDOTS Double Dots 100pc. -3D Foam Circles

Other Products:
Fired Brick & Aged Mahogany Distress ink, Black Archival Ink, Mini MISTI, Ebosser, Cuttlebug Anna Griffin Embossing Folder Poppy, Pick me Up , Red Satin Ribbon & black rhinestones.


Project Instruction: 

Emboss a piece of 4 3/4" x 6 3/4" white cardstock using Cuttlebug Anna Griffin Poppy Embossing Folder. Adhere it to a 5" x 7" black cardbase. 


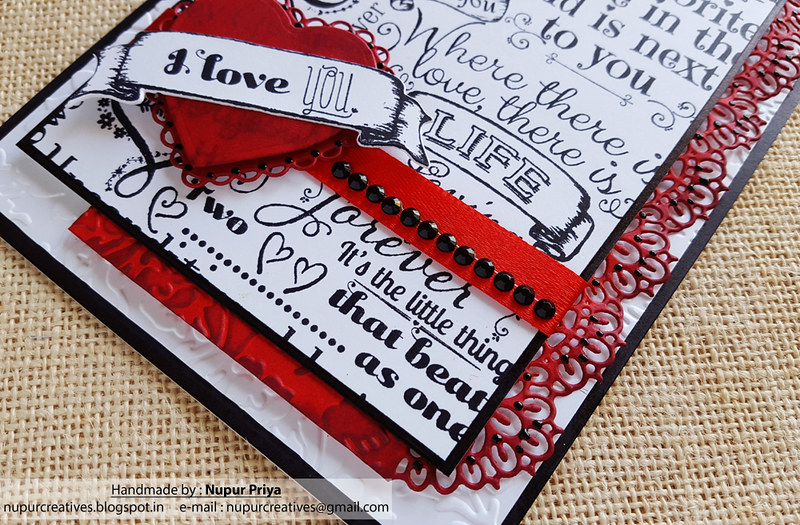
Take a piece of 4" x 6 1/4" red cardstock & die cut one of the long edges using Sweetheart Borders Die. Emboss the rest of the cardstock using the same embossing folder. Ink it using Stack and Store Daubers, Fired Brick & Aged Mahogany Distress inks. Adhere it to the cardbase aligning it to the right side as shown using Darice Adhesive Foam Strips.

Stamp the Forever Love Background Stamp on a 4" x 5 1/4" white cardstock using Black Archival ink & adhere it on a slightly larger black cardstock. Wrap a red satin ribbon around the bottom of this cardstock. Adhere this to the card base as shown using Darice Adhesive Foam Strips.

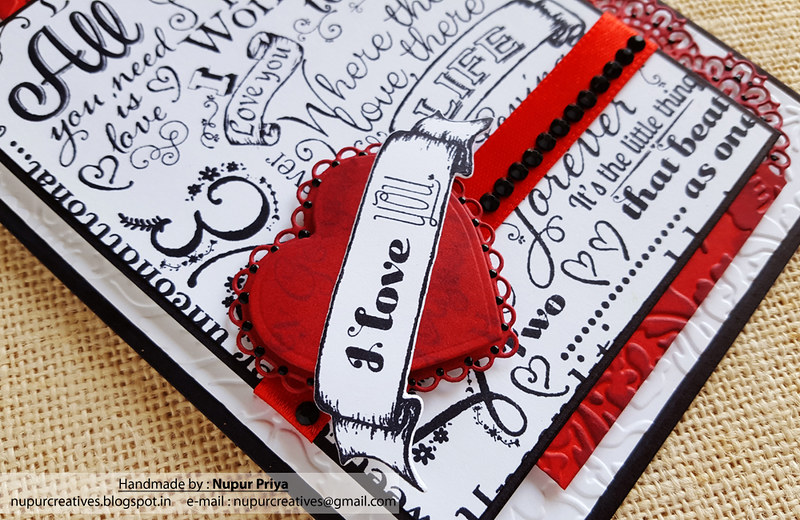
Die cut 2 pieces of red cardstock using Eyelet Hearts Die. Stamp the sentiment from Heartfelt Love Sentiments Stamp Set using Aged Mahogany Distress ink several times on the smaller heart. Adhere them together & then on the card base on the ribbon using using Double Dots 3D Foam Circles. 

Stamp the banner & sentiment from Banners Of Love Stamp Set & Heartfelt Love Sentiments Stamp Set on a piece of white cardstock using Mini MISTI. Die cut the stamped banner using matching die from Banners Of Love Die. Adhere it on the heart using Designer Dries Clear Adhesive. 

 Add some black rhinestones on the ribbon using Pick me Up & Ebony Black Nuvo Crystal Drops to the die cuts for finishing touch.


Hope you like this card...

Thank you for visiting today... :)
Nupur
Disclosure : Compensated affiliate links used when possible  at NO additional cost to you.. Thank you! 

Wednesday, 8 November 2017

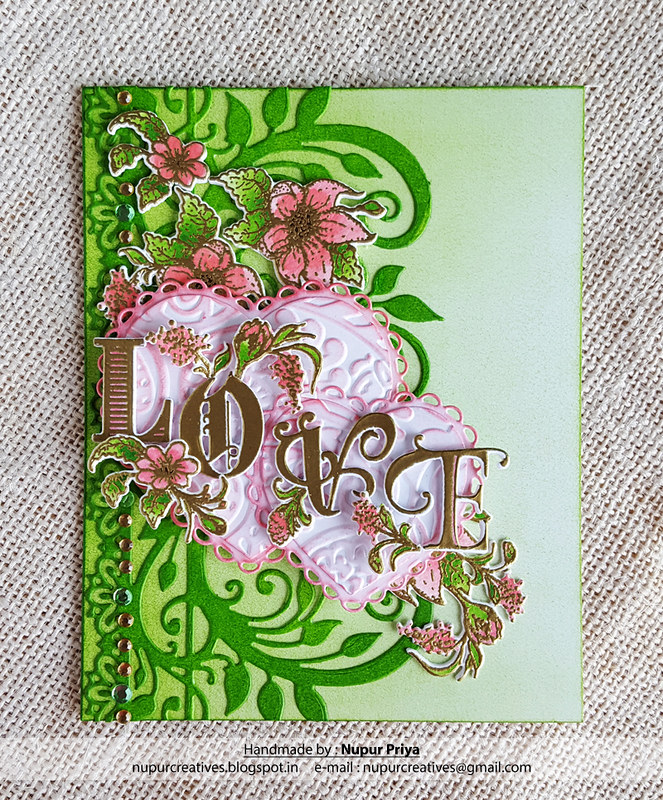
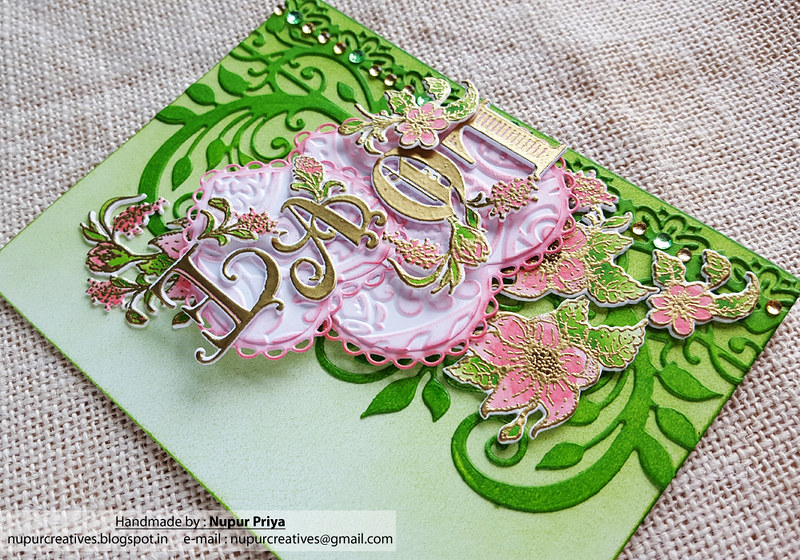
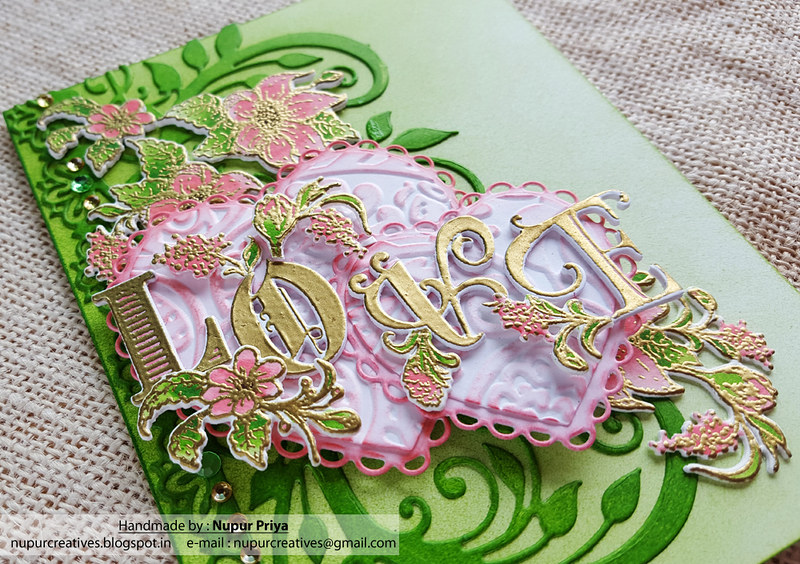
Golden Love

Hello friends & welcome to Heartfelt Wednesday...
Today is the release day of a brand new collection:

Heartfelt Love Collection
Are you ready to change the world one paper craft at a time? Spread love and encouragement wherever you go with the new Heartfelt Love Collection by Heartfelt Creations! Filled with uplifting sentiments for all occasions, you will find that this assembling of heartwarming papers, cling stamp sets and die cuts will allow you to brighten the days of friends, loved ones and those you meet along the road of life needing a little pick me up or celebrating a special day! What better way to spread smiles than through one of a kind creative projects and handmade art from the heart! The amazing assembling of decorative papers in this love themed compilation has been created of bits and pieces featuring many previously released collections and will coordinate perfectly with many of the stamp and die combinations and decorative papers from past releases already residing in your craft room. The stunning color palette incorporates every color imaginable…from deep reds, pretty pinks, lush lilacs, to chocolate browns, sky blues and gorgeous greens, while beautiful eye catching backgrounds are filled with bold stripes, zig zag chevrons, delicate hearts, petite polka dots and dainty florals. Three lovely cling stamp sets filled with images of decorative banners, beautiful carnation like florals, and a wide assortment of love sentiments are ideal for use on cards, scrapbook layouts or altered art pieces. Two delicately patterned die cuts resembling elegant eyelet lace are ideal to bring a soft look perfect for adding a dreamy and romantic feel to any paper crafting project! Lastly, an adorable gift box die rounds out this love themed collection and creates quaint treat boxes ideal for quick packaging and makes a charming way to let those in your life know how special they are. So come alongside and join us as we share love, joy, and encouragement with everyone we meet through crafty passions one paper craft at a time!

This is a beautiful collection & I have made a card using the stamps & dies from this collection...
Read till the end for the list of products used & instructions for this card...

20170728_132036

20170728_132208

20170728_132244

Heartfelt Creations Products: 
HCPC-3803 Banners Of Love Stamp Set
HCD1-7160 Banners Of Love Die
HCD1-7161 Sweetheart Borders Die
HCD1-7162 Eyelet Hearts Die
Other Products:
Mowed Lawn & Worn Lipstick Distress inks, Versamark Ink, Sizzix Tropical Paisley Embossing Folder, Koi Waterbrush, Ebosser, watercolor cardstock, Clarity Stencil BrushesPick me Up & rhinestones.
Project Instruction:
Take a 4 1/4" x 5 1/2" white card base & ink it with Mowed Lawn Distress ink using Clarity Stencil Brush. Keep the ink application heavy on the left side & light on the right side to get an ombre effect.

Die cut a piece of white cardstock using the border die from Sweetheart Borders Die & ink it with Mowed Lawn Distress ink using Stack and Store Daubers. Adhere this to the card front on the left side. 

Stamp the LOVE & flower images from Banners Of Love Stamp Set with Versamark Ink on watercolor cardstock & heat emboss using Gold Embossing Powder & Ranger Heat-it-tool. Die cut them using matching dies from Banners Of Love Die. Die cut few more pieces of white cardstock using the same dies. Color in the images using Mowed Lawn & Worn Lipstick Distress ink pads & Koi Waterbrush.

Die cut 2 eyelet hearts & 2 plain hearts of different sizes from white cardstock using Eyelet Hearts Die. Emboss the plain hearts using Sizzix Tropical Paisley Embossing Folder. Ink all the 4 heart die cuts lightly with Worn Lipstick Distress inks & Stack and Store Daubers

Cut apart the floral images. Stack the similar die cuts to make faux chipboards.  Arrange & adhere all the images & hearts as shown using foam adhesive where necessary. Add some rhinestones to the die cuts using Pick me Up for finishing touch.


Hope you like this card...
Thank you for visiting today... :)
Nupur
Disclosure : Compensated affiliate links used when possible  at NO additional cost to you.. Thank you!