Wednesday 24 May 2017

Mosaic Florals

Hello friends & welcome to Heartfelt Wednesday...
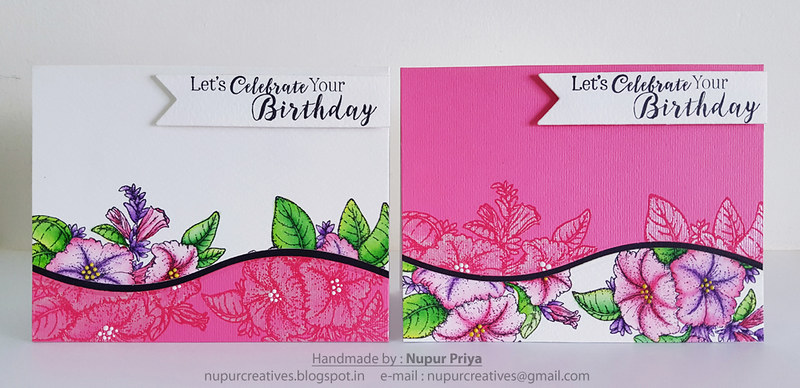
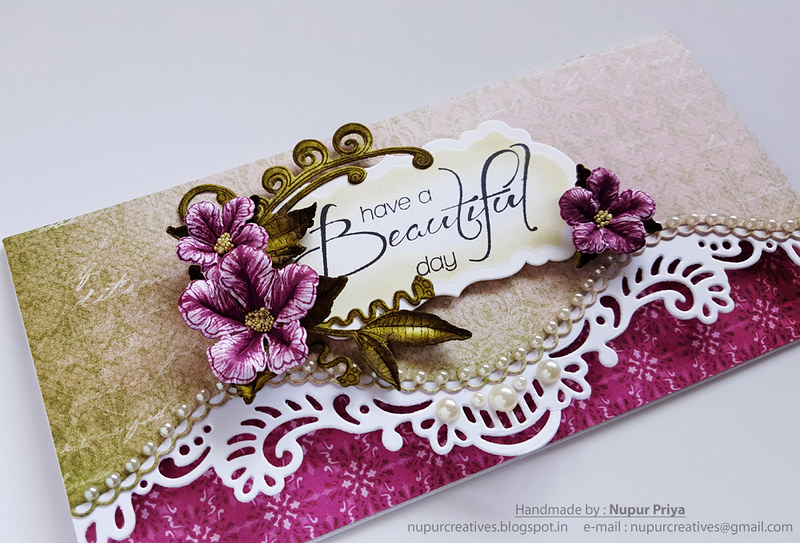
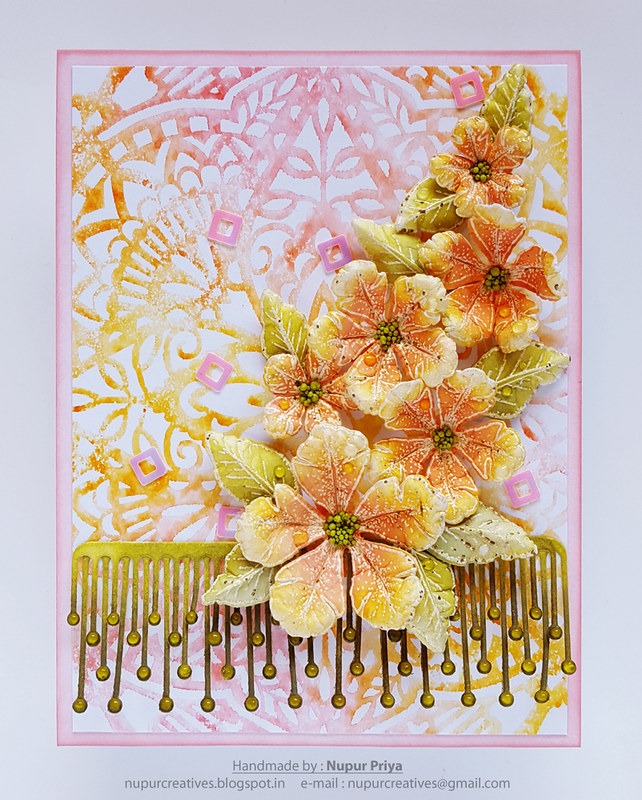
I have made a floral card for today's inspiration...
Stay with me till the end to see all the supply list & instructions for this card...
20170520_123300

20170520_123333

20170520_123417

20170520_123427

20170520_123440


Heartfelt Creations Products Used:
HCD1-7140 Large Classic Petunia Die
ANC850 Bright Ideas Prills - Ribbit
HCDA2-450 Stack and Store Daubers

Other Products: 
Worn Lipstick, Spiced Marmalade & Peeled Paint Distress Oxide Inks, Black Versafine Ink, Versamark Ink, Ranger Heat-it Tool, Hero Arts Glorious Petal Stencil, Ebosser, Martha Stewart scoreboard, white cardstock, Morning Dew Nuvo drops,  sequins & adhesive.

Project Instruction: 
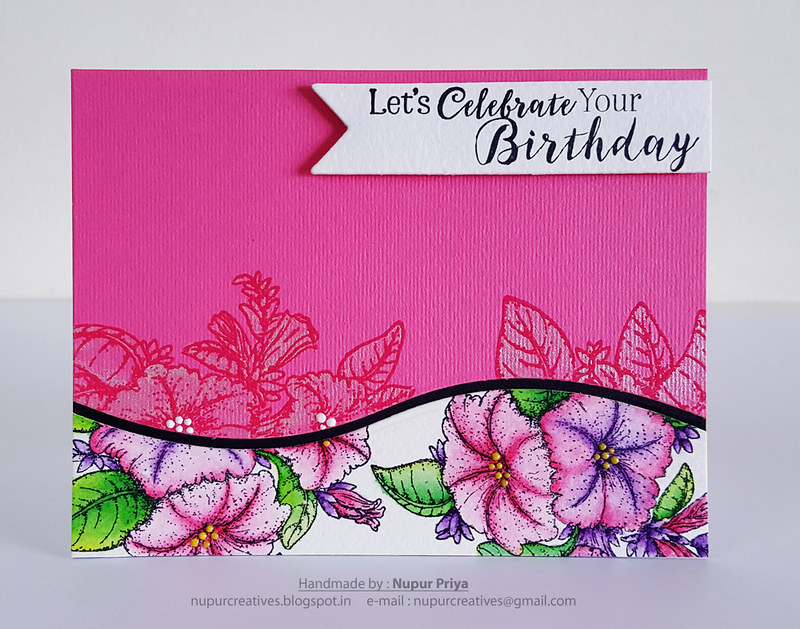
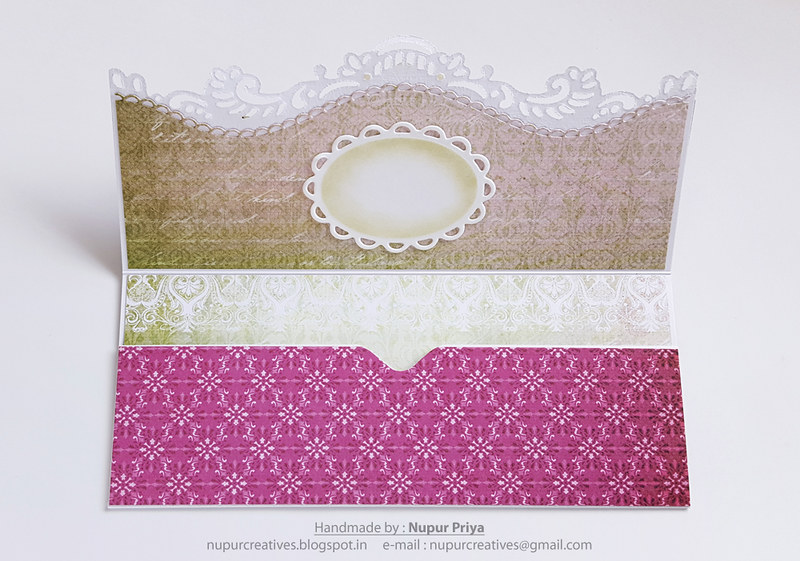
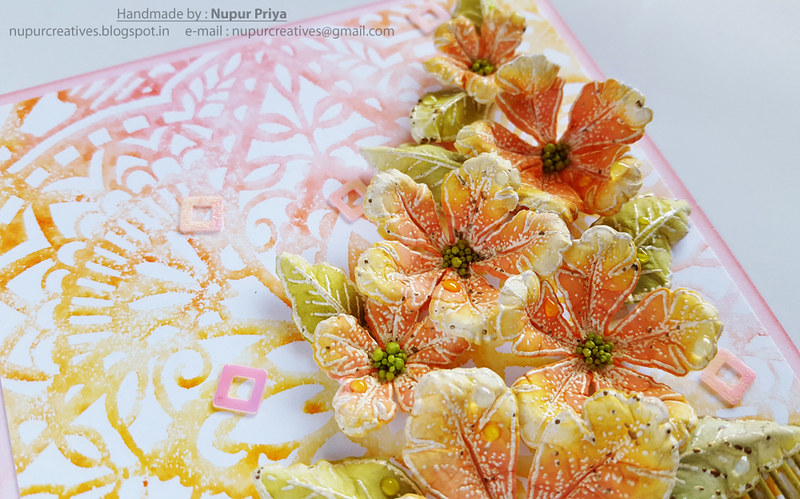
Take a 4 1/4" x 5 1/2" white card base & ink the edges lightly with Worn Lipstick Distress Oxide Ink. Take the Hero Arts Glorious Petal Stencil & apply Worn Lipstick & Spiced Marmalade Distress Oxide Inks on it, spritz lightly with water & put it on a 4" x 5 1/4" white cardstock to transfer the ink. Adhere it on the card base.

Die cut 2 pieces of each size of flower centers from Small Classic Petunia Cling Stamp Set from white cardstock. ink them with Peeled Paint Distress Oxide Ink. Adhere the smaller size on top of larger piece so that the spokes of smaller piece are in the gap between the spokes of larger piece. Adhere them a little above the bottom edge of the card. add tiny drops of Morning Dew Nuvo drops on the rounded ends as shown.

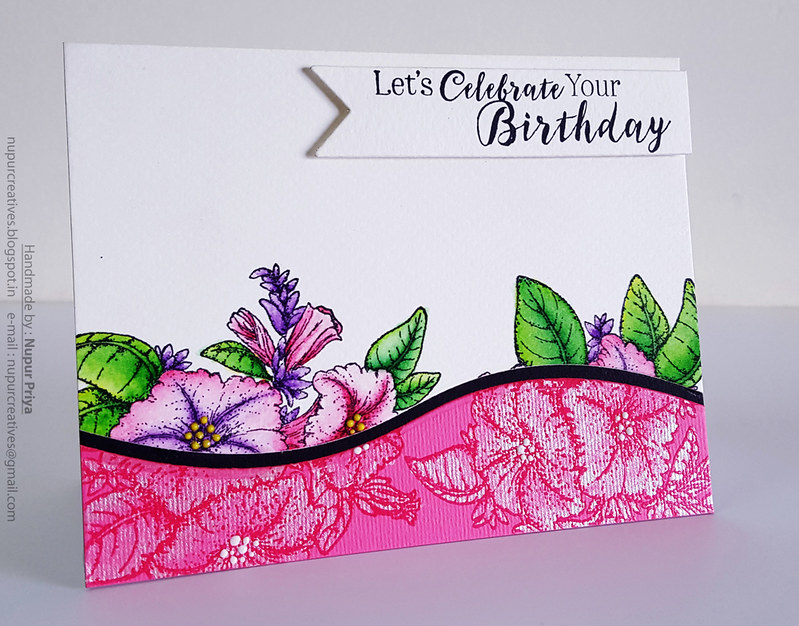
Stamp the flowers & leaves from Small Classic Petunia Cling Stamp Set & Large Classic Petunia Cling Stamp Set using Versamark ink & heat emboss using anger Heat-it Tool & Aged Ivory Embossing Enamel. Die cut them using matching dies from Small Classic Petunia Die &  Large Classic Petunia Die. Use the Stack and Store Daubers, Worn Lipstick, Spiced Marmalade & Peeled Paint Distress Oxide Inks to color the flower & leaves. Shape them using Deluxe Flower Shaping Kit. Add a little Ribbit Prills from Bright Ideas  collection to the flower centers. Decorate the card with the flowers & leaves as shown. Add some sequins on the background & Morning Dew Nuvo drops on the flowers & leaves to add finishing touch to the card.


 Hope you like this card...
Thank you for visiting today... :)
Nupur
Disclosure : Compensated affiliate links used when possible  at NO additional cost to you.. Thank you! 

Wednesday 17 May 2017

Let's Celebrate

Hello friends & welcome to Heartfelt Wednesday... 
I have a technique based card to showcase today that was inspired by Jennifer McGuire...
Stay with me till the end to see all the supply list & instructions for this card...
20170513_140552

20170513_140258

20170513_140103

20170513_140145_001

Heartfelt Creations Products Used:
HCPC-3785  Small Classic Petunia Cling Stamp Set
HCPC-3787  Classic Petunia Bouquet Cling Stamp Set
HCD1-761 Everyday Heroes Die
HCD1-7120 Fleur Border Basics Die
NU651 Nuvo Crystal Drops - Gloss White
NU650 Nuvo Crystal Drops - Dandelion Yellow


Other Products:
Gansai Tambi Watercolors, Koi Waterbrush, Black Archival ink, Versamark Ink, Zing Clear Embossing Powder, Ranger Heat-it Tool, Ebosser, Martha Stewart scoreboard, MISTI, pink, black, white & watercolor cardstock & adhesive.

Project Instruction:
Take 4 1/4" x 5 1/2" one piece each of pink & watercolor cardstock. Stamp the image from Classic Petunia Bouquet Cling Stamp Set twice on the bottom edge of both pieces using MISTI or any other stamp positioner tool so that both the images are on the exact place on both cardstock pieces. Use Black Archival ink to stamp on watercolor cardstock & Versamark Ink, Zing Clear Embossing Powder & Ranger Heat-it Tool to stamp & heat emboss on pink cardstock. Color them using Gansai Tambi Watercolors & Koi Waterbrush. Die cut a sliver from both the cardstocks on exact place through the stamped image using Fleur Border Basics Die. Take two 4 1/4" x 5 1/2" pieces of black cardstock and adhere one piece of pink & one piece of watercolor cardstock on both the black pieces as shown in the image leaving the black border in the middle. Add few drops of Gloss White & Dandelion Yellow Nuvo Crystal Drops to the flower centers. Adhere the complete pieces on 4 1/4" x 5 1/2" card base.

Stamp the sentiments from Small Classic Petunia Cling Stamp Set on watercolor cardstock using masking technique & MISTI or any other stamp positioner tool & Black Archival ink to create the new sentiment. Die cut this sentiment using the die from Everyday Heroes Die to create the sentiment banner. Adhere it to the card with foam adhesive as shown.

 Hope you like this card...
Thank you for visiting today... :)
Nupur
Disclosure : Compensated affiliate links used when possible  at NO additional cost to you.. Thank you! 

Wednesday 10 May 2017

Classic Petunia

Hello friends & welcome to Heartfelt Wednesday... Today is the new release day & this month's release is :

Classic Petunia Collection

Move on over spring, and let summer begin…the new Classic Petunia Collection by Heartfelt Creations has arrived!  No flower signifies summer more than the large trumpet shaped blossom of the gentle petunia!  Surround yourself with memories of wandering through greenhouses filled to the brim with a multitude of varieties in every color, from solids to variegated, compact to blanketing and of course those showy hanging baskets and container gardens spilling over with these heat loving flowers! The becomingly illustrated cling stamp sets found within this collection will have you planning your very own garden themed paper crafts filled with trailing petunias, bountiful bouquets and lavish petunia filled hanging baskets.  Three sizes of coordinating stamp and petal die cuts will allow you to recreate the ever popular petunia, making it easy to cut and shape the perfect blossom in the ideal size and color necessary for any project from handmade cards, scrapbook layouts and even altered art pieces.   A beautiful selection of premade card panels and scrapbook pages filled with illustrations of graceful petunias in hanging baskets, classic terra cotta pots and pretty garden scenes showcasing elegant petunia draped wishing wells and white washed garden benches allow for ease in creating any garden variety creations.  Filled with classic petunia pinks and deep purples along with pretty leaf like greens, the delicately patterned papers in this charming paper collection will transport you to your favorite garden plot!  So join with us as we usher in the summer season with the tender flowers of the new Classic Petunia Collection….no fertilizing, deadheading or watering required!  We promise!

I have made a money envelope using this collection...
20170506_115144

20170506_115127

20170506_115214

Heartfelt Creations Products Used:
HCPC 3474 Heartfelt Expressions Cling Stamp Set
HCPC-3783 Tropical Paradise Cling Stamp Set
HCPC-3785  Small Classic Petunia Cling Stamp Set
HCD1-7118 Delicate Border Basics Die
HCD1-7119 Classic Border Basics Die
HCD1-7137 Tropical Paradise Die
HCD1-7139  Small Classic Petunia Die
HCDP1-278  Classic Petunia Paper Collection
ANC850 Spring Bling Prills - Lemon Chiffon
HCDA2-450 Stack and Store Daubers
HCST1-401 Deluxe Flower Shaping Kit

Other Products:
Seedless Preserve & Forest Moss Distress Inks, Black Archival Ink, Ebosser, Martha Stewart scoreboard, WRMK Envelope Punch Board, Spellbinders Lacey Ovals Die, Spellbinders Labels & tag die, white cardstock, pearls & adhesive.

Project Instruction:
Take a 8 1/2" x 8" white cardstock & score at 3 14" & 6 1/2". Rotate 90 degree & score at 1/2" & 8". Cut off the 1/2" flap on both sides on the 1st & 2nd equal sections. Punch the notch in the center of the edge of the 7" x 2" section of cardstock using WRMK Envelope Punch Board. Fold & glue the 1/2" flap on both sides of this section to make the pocket as shown. Die cut the top edge of the cardstock with Delicate Border Basics Die. Decorate the envelope with papers from Classic Petunia Paper Collection & Classic Border Basics Die.

Die cut a piece of white cardstock with Spellbinders Lacey Ovals Die, ink lightly with Forest moss distress ink using Stack and Store Daubers & adhere to the inside of the top flap as shown. Die cut another piece of white cardstock with Spellbinders Labels & tag Die & ink lightly with Forest moss distress ink using Stack and Store Daubers. Stamp the sentiment from Heartfelt Expressions Cling Stamp Set with black archival ink & adhere to the outside of the top flap as shown.

Stamp & ink the flowers from Small Classic Petunia Cling Stamp Set using Seedless Preserve distress ink & die cut using matching dies from Small Classic Petunia Die. Stamp & ink the leaves from Tropical Paradise Cling Stamp Set & Small Classic Petunia Cling Stamp Set using Forest Moss Distress Ink & die cut using matching dies from Tropical Paradise Die & Small Classic Petunia Die. Shape these using Deluxe Flower Shaping Kit. Add a little Lemon Chiffon Prills from Spring Bling collection to the flower centers. Decorate the envelope with the flowers & leaves as shown. Add some pearls to add finishing touch to the envelope.


Hope you like this card...
Thank you for visiting today... :)

Nupur

Wednesday 3 May 2017

Aloha

Hello friends & welcome to Heartfelt Wednesday...
I have made another Flamingo card for today's inspiration ...
20170429_162303

20170429_162339

Heartfelt Creations Products Used:
HCD1-7120 Fleur Border Basics Die
HCD1-7138 Tropical Parrots Die
HCDP1-277 Tropical Paradise Paper Collection

Other Products:
Carved Pumpkin & Picked Raspberry Distress Inks,Ebosser, Martha Stewart scoreboard, Memory Box Rhapsody Stencil, Spellbinders Majestic Labels Twenty-Five Die, Clarity Brushes, white cardstock, pearls, rhinestones & adhesive.

Project Instruction:
Cut a 6" x 6" piece of pattern paper from Tropical Paradise Paper Collection & adhere it to a same size card base. Die cut the border of a 5" x 6" piece of white cardstock with Fleur Border Basics Die & score at every 1/4" using Martha Stewart scoreboard. Ink this pice using Memory Box Rhapsody Stencil, Carved Pumpkin & Picked Raspberry Distress Inks & Clarity Brushes. Adhere to the top of card base with foam adhesive. Decorate the border with pearls.

Die cut a piece of white cardstock with Spellbinders Majestic Labels Twenty-Five Die & adhere to the card front as shown. Die cut a piece of pattern paper from Tropical Paradise Paper Collection using the smaller die from the same set & adhere it to the previous die cut using foam adhesive. Die cut the word Aloha using white cardstock & Tropical Parrots Die. Adhere it to the bottom right of the card. Add some rhinestones & pearls to add finishing touch to the card.


Hope you like this card...
Thank you for visiting today... :)

Nupur