
Hello friends and welcome to another day of inspiration..
Today I have a card that has Courtyard Elegance Die as the hero.
I have used only 1 die set to create this card. The outer bigger dies were used for creating the mat and dry embossing. The smaller pieces were used to create a faux stained glass effect.
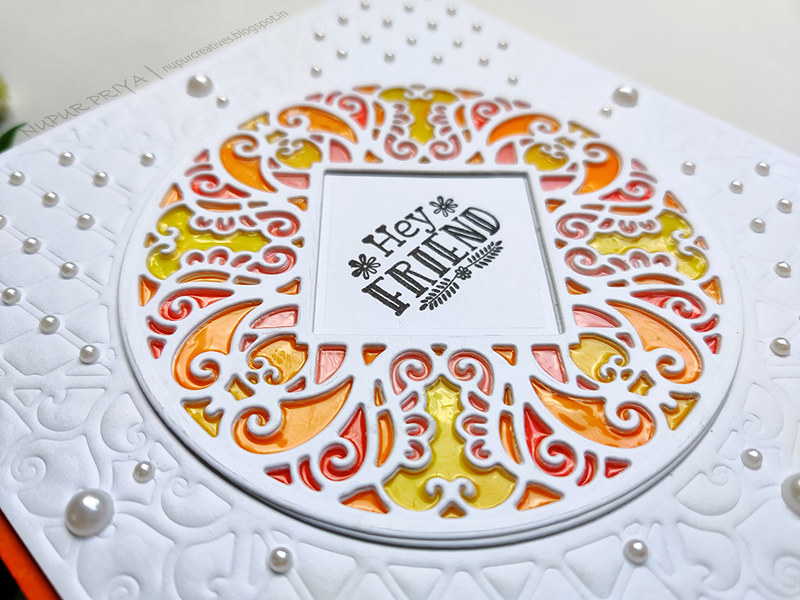
The stained glass effect looks so cool in real life!
All the coloring was done using Zig Clean Color Real Brush Markers. This color combination is out of my comfort zone and to be honest it took me few tries and to get it to a point where I liked it. I actually wanted to use all the colors of the rainbow but halfway through I thought it looked too busy in this small design so I only used the red, orange, yellow and light pink.
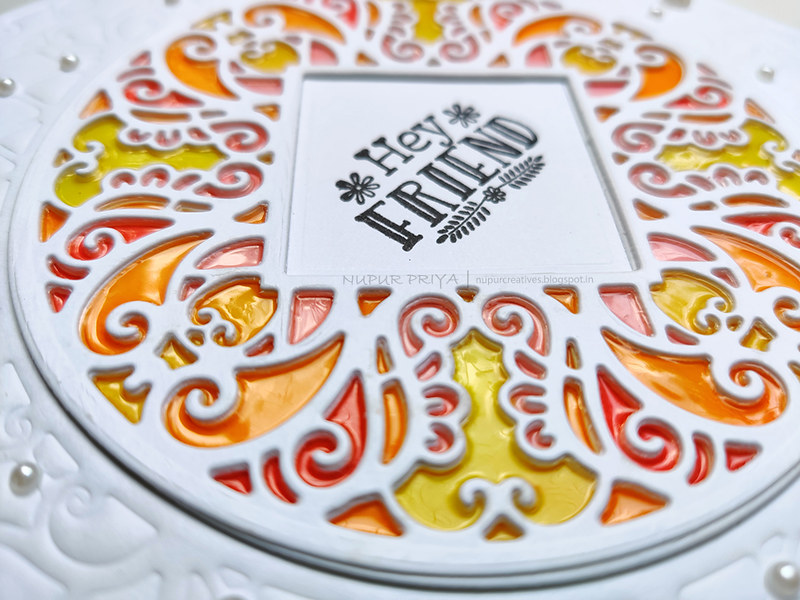
I have used 3-D Crystal Lacquer for the glassy bits (scroll down for the close-up) I use it with Metal Tip for Adhesive Bottles which helps me in getting in the nooks and crannies and also helps in getting finer lines. It dries hard and non-tacky so even if I stack more cards on top it won't stick to them!
I also added white pearls to spruce up the dry embossing.
Read till the end for full supply list and instructions for this card...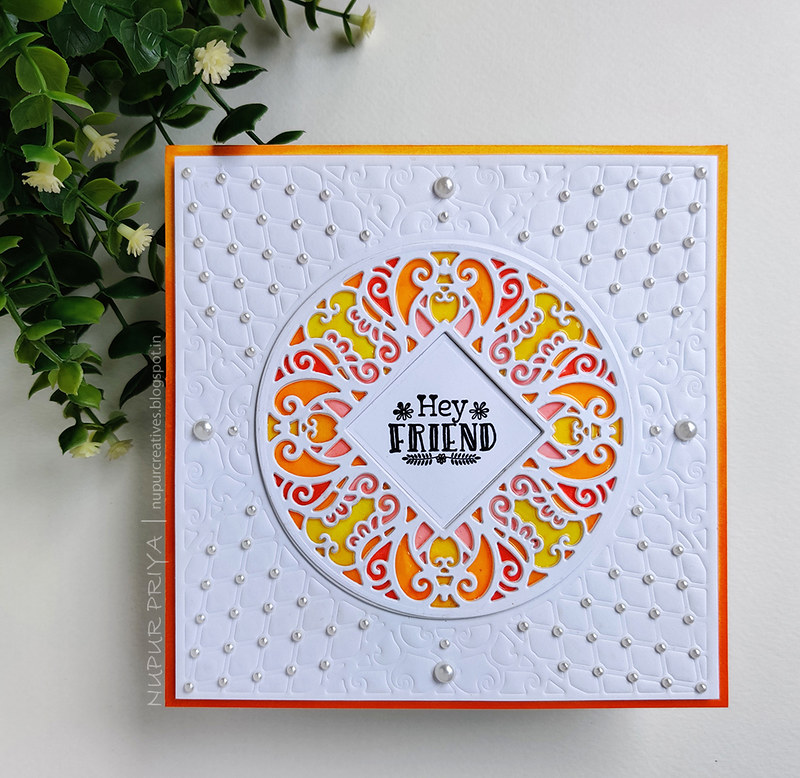
Heartfelt Creations Products :
HCPC-3844 For My Friend Sentiments Cling Stamp Set
HCD1-7283 Courtyard Elegance Die
HCPP1-438-2 Paper Pack of 10 - White
Zig Clean Color Real Brush Markers
RACP468 Ranger Archival Ink Pad - Jet Black
359848 Spellbinders Tool N' One
411231 5pc. Acrylic Block Set
352854 Metal Tip for Adhesive Bottles
159723 Designer Dries Clear Adhesive
D120601 Darice Adhesive Foam Strips
3D1844 3-D Crystal Lacquer
Other Products :
Pearls and Spellbinders Tan Embossing Mat
Instructions :
Die cut 4 pieces of white cardstock using the 2 circle and 1 small square dies from Courtyard Elegance Die. Stack and adhere them together to make a thicker piece.
Die cut a piece of white cardstock using the 2nd largest square die from the same die set. Emboss this piece of cardstock using the 4 middle size dies from the same set and Spellbinders Tan Embossing Mat. Stamp the sentiment from For My Friend Sentiments Cling Stamp Set in the middle of the square as shown using Jet Black Archival Ink Pad. Color the design inside the circle die using shades of yellow, orange, pink and red from Zig Clean Color Real Brush Markers. Align and adhere the circle die cut piece we made earlier on the colored piece. Fill in the colored parts of the die cut with 2 coats of 3-D Crystal Lacquer. Let the 1st layer dry before applying the 2nd layer.
Color the edges of a 6" x 6" white card base with the shades of light and dark orange from Zig Clean Color Real Brush Markers that was used to color in the circle to create an ombre look. Adhere the embossed piece on the card base using Darice Adhesive Foam Strips. Adhere pearls on the embossed areas to add finishing touch.
Hope you like it...
Today I have a card that has Courtyard Elegance Die as the hero.
I have used only 1 die set to create this card. The outer bigger dies were used for creating the mat and dry embossing. The smaller pieces were used to create a faux stained glass effect.
The stained glass effect looks so cool in real life!
All the coloring was done using Zig Clean Color Real Brush Markers. This color combination is out of my comfort zone and to be honest it took me few tries and to get it to a point where I liked it. I actually wanted to use all the colors of the rainbow but halfway through I thought it looked too busy in this small design so I only used the red, orange, yellow and light pink.
I have used 3-D Crystal Lacquer for the glassy bits (scroll down for the close-up) I use it with Metal Tip for Adhesive Bottles which helps me in getting in the nooks and crannies and also helps in getting finer lines. It dries hard and non-tacky so even if I stack more cards on top it won't stick to them!
I also added white pearls to spruce up the dry embossing.
Read till the end for full supply list and instructions for this card...
Heartfelt Creations Products :
HCPC-3844 For My Friend Sentiments Cling Stamp Set
HCD1-7283 Courtyard Elegance Die
HCPP1-438-2 Paper Pack of 10 - White
Zig Clean Color Real Brush Markers
RACP468 Ranger Archival Ink Pad - Jet Black
359848 Spellbinders Tool N' One
411231 5pc. Acrylic Block Set
352854 Metal Tip for Adhesive Bottles
159723 Designer Dries Clear Adhesive
D120601 Darice Adhesive Foam Strips
3D1844 3-D Crystal Lacquer
Other Products :
Pearls and Spellbinders Tan Embossing Mat
Instructions :
Die cut 4 pieces of white cardstock using the 2 circle and 1 small square dies from Courtyard Elegance Die. Stack and adhere them together to make a thicker piece.
Die cut a piece of white cardstock using the 2nd largest square die from the same die set. Emboss this piece of cardstock using the 4 middle size dies from the same set and Spellbinders Tan Embossing Mat. Stamp the sentiment from For My Friend Sentiments Cling Stamp Set in the middle of the square as shown using Jet Black Archival Ink Pad. Color the design inside the circle die using shades of yellow, orange, pink and red from Zig Clean Color Real Brush Markers. Align and adhere the circle die cut piece we made earlier on the colored piece. Fill in the colored parts of the die cut with 2 coats of 3-D Crystal Lacquer. Let the 1st layer dry before applying the 2nd layer.
Color the edges of a 6" x 6" white card base with the shades of light and dark orange from Zig Clean Color Real Brush Markers that was used to color in the circle to create an ombre look. Adhere the embossed piece on the card base using Darice Adhesive Foam Strips. Adhere pearls on the embossed areas to add finishing touch.
Hope you like it...
Thank you for visiting today... :)

No comments :
Post a Comment
Hi thanks for dropping by and having a look at my blog. Your comments are much appreciated. Hugs. Nupur...