
Hello and welcome to my blog
Have you ever tried to diecut a piece of cardstock and it shifted during cutting that resulted in a die cut with a part cut off? If your answer is 'Yes' and you are going to throw it in the trash then I would suggest that you don't have to do that! With a little creativity you can still use that die cut and no one will ever know that it got messed up during the die cutting process.
This happens to me many times and I am going to show you how to use it
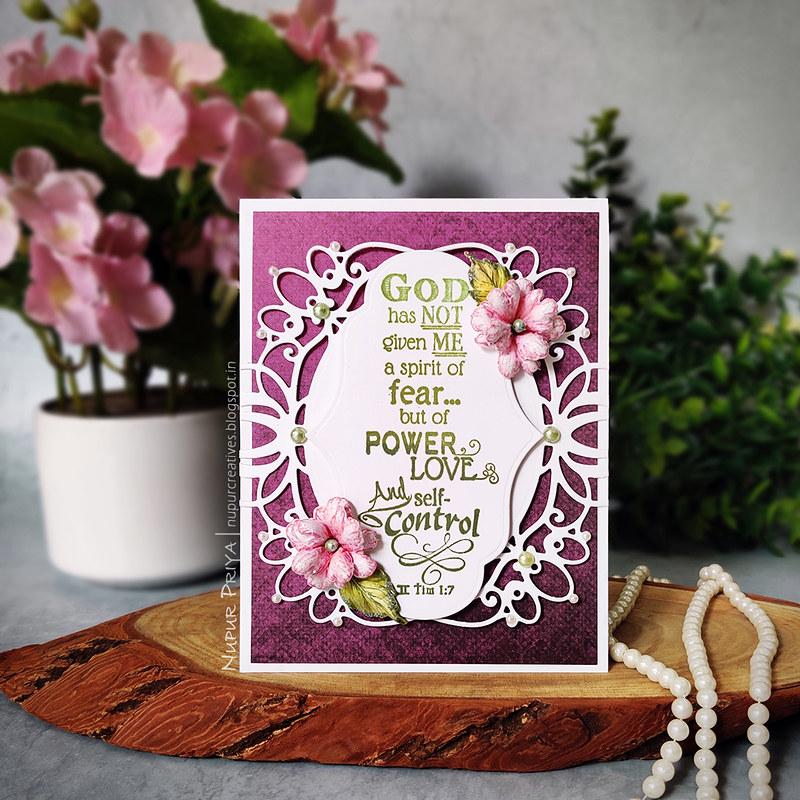
Below is the card made with a the die cut on that was missing a small portion as a result of cardstock shifting during the die cutting. I trimmed off the center and glued the remaining 2 pieces together. Adhered it on the card base and covered the joint with another die cut. The excess die cut hanging off the edge on the side was trimmed off. I had positioned the die cut so that the already missing part on 1 side was hanging off the edge. So I got a new die cut shape and I was also able to salvage the die cut.
Read till the end for the instructions and full list of supplies.
Heartfelt Creations Products :
HCPC-3814 Words Of Encouragement Stamp Set
HCPC-3819 Small Sweet Peony Cling Stamp Set
HCPC-3842 Oakberry Lane Blossoms Cling Stamp Set
HCD1-7173 Small Sweet Peony Die
HCD1-7200 Oakberry Lane Blossoms Die
HCD2-7306 Decorative Circle Frames Die
HCD2-7309 Elaborate Oval Frames Die
HCDP1-2113 Wild Rose Paper Collection
HCPP1-438-2 Paper Pack of 10 - White
HCPP1-475 Deluxe Flower Shaping Paper - Pack of 50
RACP524 Ranger Archival Ink Pad - Vibrant Fuchsia
RACP531 Ranger Archival Ink Pad - Vivid Chartreuse
RACP482 Ranger Archival Ink Pad - Olive
RACP436 Ranger Archival Ink Pad - Leaf Green
HCST1-401 Deluxe Flower Shaping Kit
Transparent Glitter, pearls and MISTI.
HCFB1-469 3D Blossoms Shaping Mold
359848 Spellbinders Tool N' One
HCDA2-450 Stack and Store Daubers-Pack of 30
352854 Metal Tip for Adhesive Bottles
159723 Designer Dries Clear Adhesive
D120601 Darice Adhesive Foam Strips
HCS1-459-2 Assorted Pearl Stamens-Medium
RLHS100 Hydra Sponges
Other Products :
MISTI, transparent glitter and pearls.
Instructions :
Card Base : Cut a piece of 4" x 5 1/4" pattern paper from Wild Rose Paper Collection and adhere it on a 4 1/4" x 5 1/2" white card base. Die cut a piece of white cardstock using the die from Decorative Circle Frames Die. Cut away 1 1/4" from the middle and join the 2 bigger pieces in the middle. Adhere it to the card front using Darice Adhesive Foam Strips. Trim off the excess die cut hanging from the edge on both sides and adhere the edges to the card front using Designer Dries Clear Adhesive.
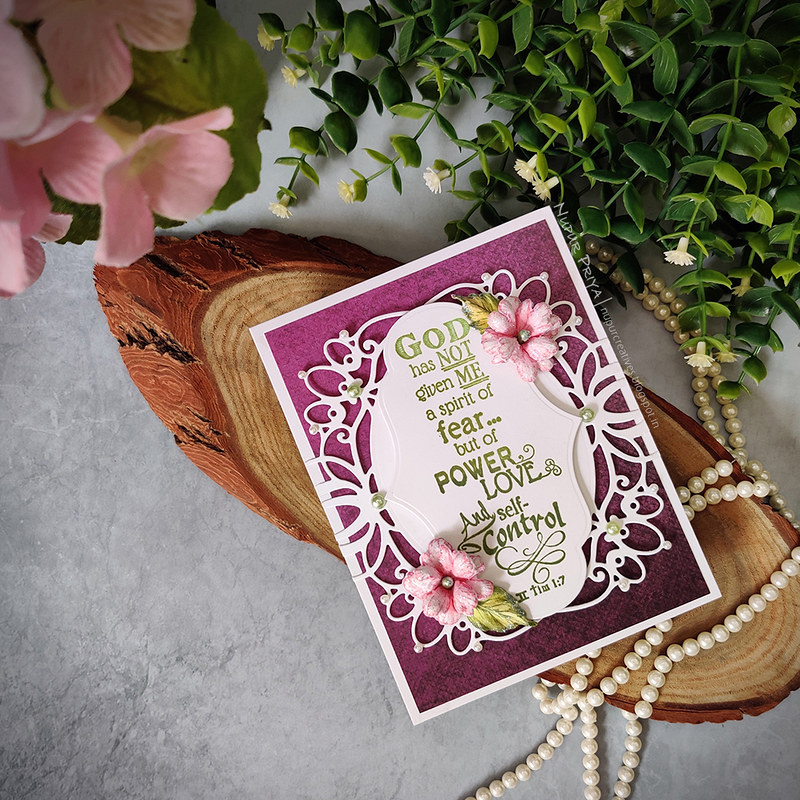
Sentiment : Stamp the sentiment from Words Of Encouragement Stamp Set on a piece of white cardstock with Vivid Chartreuse, Leaf Green and Olive Archival Ink using MISTI to get an ombre look. Die cut this piece using the die from Elaborate Oval Frames Die and adhere it on the card front as shown using Darice Adhesive Foam Strips.
Flowers : Stamp the flowers from Small Sweet Peony Cling Stamp Set on a piece of Deluxe Flower Shaping Paper with Vibrant Fuchsia Archival Ink and ink it using the same ink. Die cut them using the matching dies from Small Sweet Peony Die and shape using Deluxe Flower Shaping Kit. Add a green stamen from Medium Assorted Pearl Stamens to the flower centers.
Leaves : Stamp the leaves from Oakberry Lane Blossoms Cling Stamp Set on a piece of Deluxe Flower Shaping Paper with Olive Archival Ink Pad and color it with Leaf Green Archival Ink Pad. Die cut the leaves using matching dies from Oakberry Lane Blossoms Die and shape them using 3D Blossoms Shaping Mold.
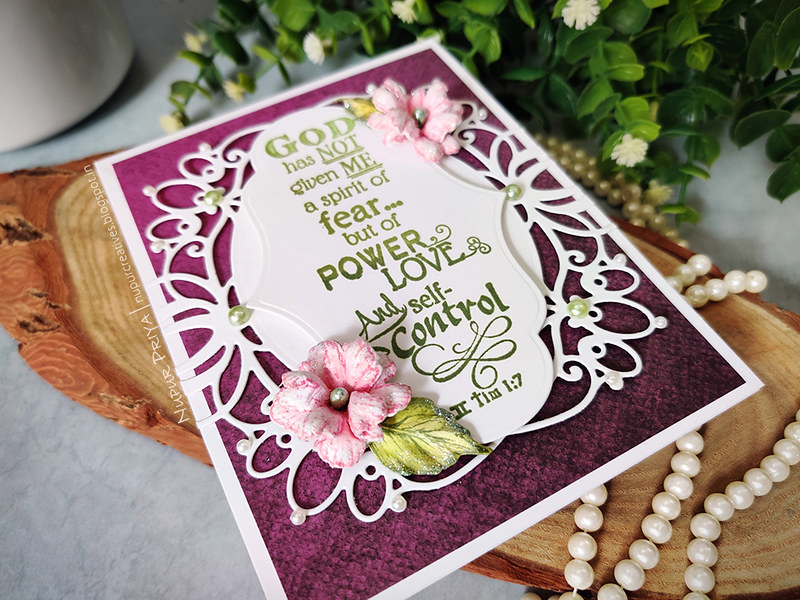
Apply Designer Dries Clear Adhesive on the flowers and leaves using Hydra Sponges and sprinle transpaernt glue. Arrange and adhere all the flowers and leaves on the card as shown. Add pearls to the die cut for finishing touch.
Hope you like it...
Have you ever tried to diecut a piece of cardstock and it shifted during cutting that resulted in a die cut with a part cut off? If your answer is 'Yes' and you are going to throw it in the trash then I would suggest that you don't have to do that! With a little creativity you can still use that die cut and no one will ever know that it got messed up during the die cutting process.
This happens to me many times and I am going to show you how to use it
Below is the card made with a the die cut on that was missing a small portion as a result of cardstock shifting during the die cutting. I trimmed off the center and glued the remaining 2 pieces together. Adhered it on the card base and covered the joint with another die cut. The excess die cut hanging off the edge on the side was trimmed off. I had positioned the die cut so that the already missing part on 1 side was hanging off the edge. So I got a new die cut shape and I was also able to salvage the die cut.
Read till the end for the instructions and full list of supplies.
Heartfelt Creations Products :
HCPC-3814 Words Of Encouragement Stamp Set
HCPC-3819 Small Sweet Peony Cling Stamp Set
HCPC-3842 Oakberry Lane Blossoms Cling Stamp Set
HCD1-7173 Small Sweet Peony Die
HCD1-7200 Oakberry Lane Blossoms Die
HCD2-7306 Decorative Circle Frames Die
HCD2-7309 Elaborate Oval Frames Die
HCDP1-2113 Wild Rose Paper Collection
HCPP1-438-2 Paper Pack of 10 - White
HCPP1-475 Deluxe Flower Shaping Paper - Pack of 50
RACP524 Ranger Archival Ink Pad - Vibrant Fuchsia
RACP531 Ranger Archival Ink Pad - Vivid Chartreuse
RACP482 Ranger Archival Ink Pad - Olive
RACP436 Ranger Archival Ink Pad - Leaf Green
HCST1-401 Deluxe Flower Shaping Kit
Transparent Glitter, pearls and MISTI.
HCFB1-469 3D Blossoms Shaping Mold
359848 Spellbinders Tool N' One
HCDA2-450 Stack and Store Daubers-Pack of 30
352854 Metal Tip for Adhesive Bottles
159723 Designer Dries Clear Adhesive
D120601 Darice Adhesive Foam Strips
HCS1-459-2 Assorted Pearl Stamens-Medium
RLHS100 Hydra Sponges
Other Products :
MISTI, transparent glitter and pearls.
Instructions :
Card Base : Cut a piece of 4" x 5 1/4" pattern paper from Wild Rose Paper Collection and adhere it on a 4 1/4" x 5 1/2" white card base. Die cut a piece of white cardstock using the die from Decorative Circle Frames Die. Cut away 1 1/4" from the middle and join the 2 bigger pieces in the middle. Adhere it to the card front using Darice Adhesive Foam Strips. Trim off the excess die cut hanging from the edge on both sides and adhere the edges to the card front using Designer Dries Clear Adhesive.
Sentiment : Stamp the sentiment from Words Of Encouragement Stamp Set on a piece of white cardstock with Vivid Chartreuse, Leaf Green and Olive Archival Ink using MISTI to get an ombre look. Die cut this piece using the die from Elaborate Oval Frames Die and adhere it on the card front as shown using Darice Adhesive Foam Strips.
Flowers : Stamp the flowers from Small Sweet Peony Cling Stamp Set on a piece of Deluxe Flower Shaping Paper with Vibrant Fuchsia Archival Ink and ink it using the same ink. Die cut them using the matching dies from Small Sweet Peony Die and shape using Deluxe Flower Shaping Kit. Add a green stamen from Medium Assorted Pearl Stamens to the flower centers.
Leaves : Stamp the leaves from Oakberry Lane Blossoms Cling Stamp Set on a piece of Deluxe Flower Shaping Paper with Olive Archival Ink Pad and color it with Leaf Green Archival Ink Pad. Die cut the leaves using matching dies from Oakberry Lane Blossoms Die and shape them using 3D Blossoms Shaping Mold.
Apply Designer Dries Clear Adhesive on the flowers and leaves using Hydra Sponges and sprinle transpaernt glue. Arrange and adhere all the flowers and leaves on the card as shown. Add pearls to the die cut for finishing touch.
Hope you like it...
Thank you for visiting today... :)

Another gorgeous creation Nupur and the sentiment is perfect for these times.
ReplyDeleteThank you... it is one of my favorite sentiments :)
ReplyDelete