Thursday, 6 August 2020

Sending You A Hug

Hello and welcome to my blog
Today I am sharing another card made from Heartfelt Creations Products
I really like how it turned out. 
This is a gate fold card with a pretty floral belly band
The gates of this gate fold card are made with die cuts which give it a very elegant and delicate look.
Read till the end to know about the supply list and the instructions for this card.
Sending You a Hug_Nupur Priya_01

Sending You a Hug_Nupur Priya_02

Sending You a Hug_Nupur Priya_03

Sending You a Hug_Nupur Priya_04
Heartfelt Creations Products:
HCPC-3855 Floral Fashionista Cling Stamp Set
HCPC-3845 Just For You Sentiments Cling Stamp Set
HCPC-3842 Oakberry Lane Blossoms Cling Stamp Set
HCD2-7309 Elaborate Oval Frames Die
HCD2-7306 Decorative Circle Frames Die
HCD1-7283 Courtyard Elegance Die
HCD1-7215 Floral Fashionista Die
HCD1-7202 Album Tags and Accents Die
HCD1-7200 Oakberry Lane Blossoms Die
HCDP1-2116 Tender Moments Paper Collection 
HCPP1-438-2 Paper Pack of 10 - White 
HCPP1-475 Deluxe Flower Shaping Paper - Pack of 50
18002 Rajni Chawla's Vellum Flowerite
HCFB1-469 3D Blossoms Shaping Mold
HCST1-401 Deluxe Flower Shaping Kit
HCDA2-450 Stack and Store Daubers-Pack of 30
RAHT Heat It Craft Tool
359848 Spellbinders Tool N' One
411231 5pc. Acrylic Block Set
RACP992 Ranger Archival Ink Pad - Garden Patina
RACP436 Ranger Archival Ink Pad - Leaf Green
RACP524 Ranger Archival Ink Pad - Vibrant Fuchsia
RACP468 Ranger Archival Ink Pad - Jet Black
352854 Metal Tip for Adhesive Bottles
159723 Designer Dries Clear Adhesive

NU650 Nuvo Crystal Drops - Ebony Black
NU667 Nuvo Crystal Drops - Red Berry
ANC852 Bright Ideas Prills - Ribbit

HCS1-457-3 Pastel Bead Stamens-Medium

Other Products :

Hero Arts Unicorn White Pigment ink, WOW superfine white embossing powder, Cuttlebug Anna Griffin Juliet Damask embossing folder, double sided foam tape
 and rhinestones.

Instructions:

Card base:  Die cut 2 pieces of white cardstock using the dies from Decorative Circle Frames Die and Courtyard Elegance Die. Score both the die cuts in the middle and then trim them on one side, 1/2" from the score line. Adhere the 1/2" tab on a 4 1/2" x 6 1/2" piece of white cardstock to make a gate-fold card. Adhere a piece of 4 1/2" x 6 1/2" pattern paper from Tender Moments Paper Collection on the white cardstock. Adhere this piece on a 5" x 7" piece of white cardstock as shown.


Blue Flowers : Stamp the largest flowers from Oakberry Lane Blossoms Cling Stamp Set on a sheet of Deluxe Flower Shaping Paper with Garden Patina Archival Ink. Ink them with Leaf Green and Garden Patina Archival Ink using Stack and Store Daubers. Die cut all the flowers using the matching die from Oakberry Lane Blossoms Die. Use the 3D Blossoms Shaping Mold and Deluxe Flower Shaping Kit to shape the fowers. Add a big drop of Designer Dries Clear Adhesive to the flower center and pour Ribbit Prills on the glue, remove the excess and let it dry completely.

White Flowers : Stamp the flowers from Floral Fashionista Cling Stamp Set on a sheet of Rajni Chawla's Vellum Flowerite with Hero Arts Unicorn White pigment ink and heat emboss using White embossing powder and Heat It Craft Tool. Shape the flowers using Deluxe Flower Shaping Kit and add a pink stamen from Medium Pastel Bead Stamens to the flower centers.

Leaves : Stamp the leaves from Oakberry Lane Blossoms Cling Stamp Set several times on a sheet of Deluxe Flower Shaping Paper with  Leaf Green Archival Ink and die cut them using matching die from  Oakberry Lane Blossoms Die. Ink them using Leaf Green and Vibrant Fuchsia Archival Inks. Shape the leaves using 3D Blossoms Shaping Mold.

Belly Band : Die cut 2 pieces of white cardstock using the dies from Album Tags and Accents Die. Emboss the smaller die cut using the Cuttlebug Anna Griffin Juliet Damask embossing folder. Stamp the sentiment from Just For You Sentiments Cling Stamp Set with Jet Black Archival Ink Pad on a piece of white cardstock and die cut it using the oval die from Elaborate Oval Frames Die. Stack and adhere all the 3 die cuts as shown using double sided foam tape. 


Take a 3/4" x 10" strip of white cardstock and score it at 2 1/2" and slightly more than 7 1/2". Fold it on the score lines and adhere the sentiment panel we just created on the joint to create the belly band. Arrange and adhere all the flowers and leaves around the sentiment as shown. Add tiny ladybugs made with Ebony Black and Red Berry Nuvo Crystal Drops to the floral arrangement. Add few rhinestones on the die cuts and belly band to add finishing touch.


Hope you like it...
Thank you for visiting today... :)
Nupur
Disclosure : Compensated affiliate links used when possible  at NO additional cost to you.. Thank you! 

Wednesday, 5 August 2020

Blue Glittery Congratulations Card

Hello and welcome to Heartfelt Wednesday
How are you all doing? 
Today I will be sharing a floral ombre glittery card
Read till the end for all the supplies used and instructions for this card
Blue Congratulations_Nupur Priya_01

Blue Congratulations_Nupur Priya_02

Heartfelt Creations Products: 
HCPC-3842 Oakberry Lane Blossoms Cling Stamp Set
HCPC-3847 Celebrate Love Sentiments Cling Stamp Set
HCD1-7200 Oakberry Lane Blossoms Die
HCD1-7215 Floral Fashionista Die
HCD1-7263 Swirly Accent Spray Die
18002 Rajni Chawla's Vellum Flowerite
HCPP1-438-2 Paper Pack of 10 - White
HCPP1-475 Deluxe Flower Shaping Paper - Pack of 50
RACP436 Ranger Archival Ink Pad - Leaf Green
RACP005 Ranger Archival Ink Pad - Sunflower
RACP524 Ranger Archival Ink Pad - Vibrant Fuchsia
RACP482 Ranger Archival Ink Pad - Olive
RACP992 Ranger Archival Ink Pad - Garden Patina
RACP454 Ranger Archival Ink Pad - Manganese Blue
RLHS100 Hydra Sponges
HCDA2-450 Stack and Store Daubers-Pack of 30
HCFB1-469 3D Blossoms Shaping Mold
HCST1-401 Deluxe Flower Shaping Kit
DMCT4185 Groove Golf Tool Set
411231 5pc. Acrylic Block Set
RAHT Heat It Craft Tool
359848 Spellbinders Tool N' One
NU667 Nuvo Crystal Drops - Red Berry
NU650 Nuvo Crystal Drops - Ebony Black
352854 Metal Tip for Adhesive Bottles
159723 Designer Dries Clear Adhesive
3D1844 3-D Crystal Lacquer
HCS1-458-1 Bright Pearl Stamens-Small
HCS1-457-1 Pastel Pearl Stamens-Small

Other products:
Hero Arts unicorn White pigment ink, WOW white super fine embossing powder, transparent glitter, rhinestones and MISTI.

Instructions: 
Card Base : Ink the edges of 4 1/4" x 5 1/2" white card base with Manganese Blue and Garden Patina Archival Inks so the the corners are darker than the edge in the middle. Use Hydra Sponges along with Designer Dries Clear Adhesive to apply a thin layer of adhesive over the inked edges and sprinkle transparent glitter. Burnish the glitter with finger tips or bone folder once the glue dries and brush off the extra glitter.

Adhere another piece of  4" x 5 1/4" white cardstock on the inked card base. Die cut 2 pieces of white cardstock using the die from Swirly Accent Spray Die. Ink them with the same inks as shown in ombre style. Use the same steps to apply the glitter to these die cuts as we did for the card base and adhere them as shown.

Take the sentiment from Celebrate Love Sentiments Cling Stamp Set and use MISTI or any other stamp positioning tool to stamp the sentiment in the center of the card. To get the ombre look stamp the sentiment with Garden Patina Archival Ink first and then ink only the lower half of the sentiment stamp with Manganese Blue Archival Ink and stamp over the already stamped sentiment.

Blue flowers : Stamp the largest flowers from Oakberry Lane Blossoms Cling Stamp Set on a sheet of Deluxe Flower Shaping Paper with Garden Patina Archival Ink and ink them with the same ink using Stack and Store Daubers. Die cut all the flowers using the matching die from Oakberry Lane Blossoms Die. Shape them using the 3D Blossoms Shaping Mold and Deluxe Flower Shaping Kit. Add some pink and orange stamens Small Bright Pearl Stamens and Small Pastel Pearl Stamens to the flower centers.

White Vellum Flowers : Stamp the flowers from Floral Fashionista Cling Stamp Set on a sheet of Rajni Chawla's Vellum Flowerite with Hero Arts unicorn White pigment ink and heat emboss using WOW white super fine embossing powder and Heat It Craft Tool. Die cut all the flowers using the matching die from Floral Fashionista Die. Shape them using Deluxe Flower Shaping Kit and add a pink stamen from Pastel Bead Stamens to the flower centers and ink the white stems with  Leaf Green Archival Ink.

Leaves : Stamp the leaves from Oakberry Lane Blossoms Cling Stamp Set several times on a sheet of Deluxe Flower Shaping Paper with Olive Archival Ink and die cut them using matching die from  Oakberry Lane Blossoms Die. Ink them using Leaf Green, Sunflower and Vibrant Fuchsia Archival Inks. Shape the leaves using 3D Blossoms Shaping Mold.

Arrange and adhere the flowers and leaves as shown. Add a tiny ladybug made with Ebony Black and Red Berry Nuvo Crystal Drops to the floral arrangement. Add few rhinestones to the die cut for finishing touch.


Hope you like it...
Thank you for visiting today... :)
Nupur
Disclosure : Compensated affiliate links used when possible  at NO additional cost to you.. Thank you! 

Saturday, 4 July 2020

Pink Vellum Flowers Layout

Hello and welcome to my blog...
Today I am sharing a very special project with you all...
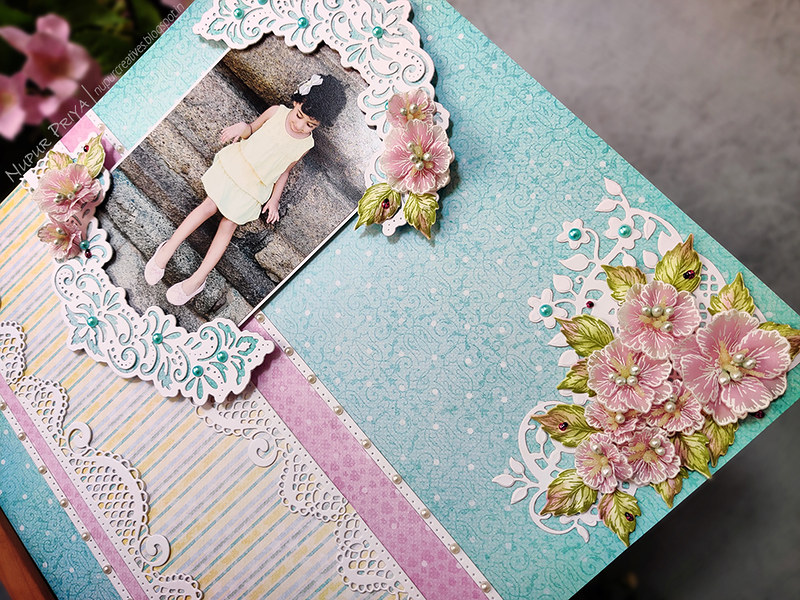
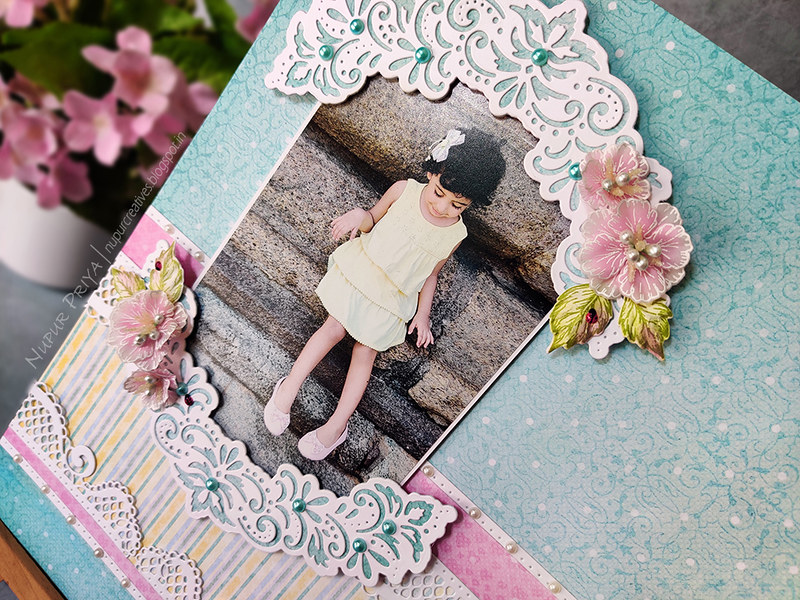
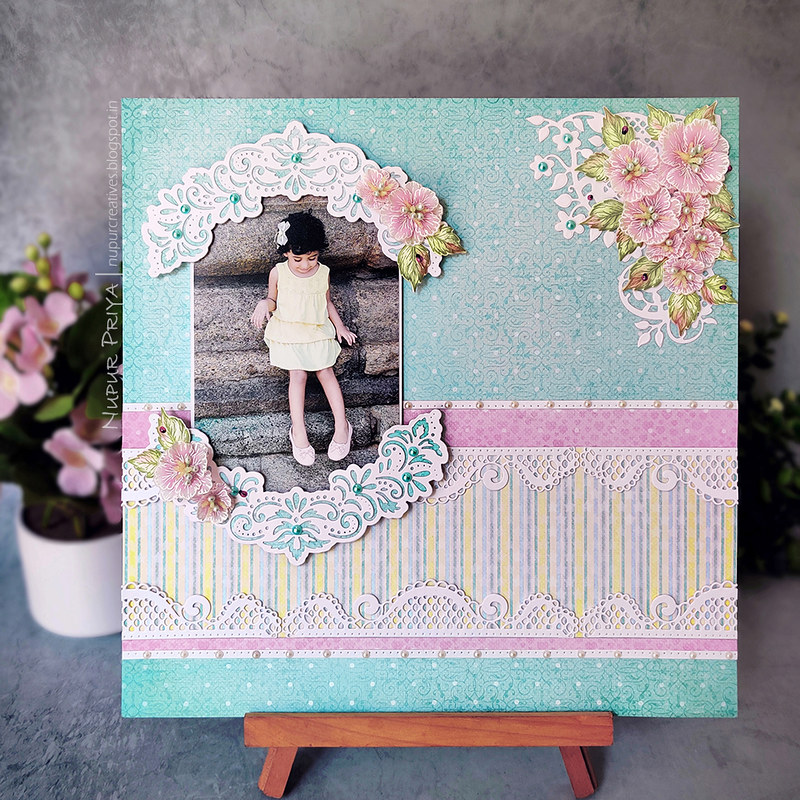
A layout that I created for my daughter's pic... The colors from Tender Moments Paper Collection  compliment this picture so beautifully and it looks even more pretty in real life!
My daughter was so happy with this layout :)

As usual you can find all the supply list and instructions for this card at the end.
Pink Vellum Flowers Layout_Nupur Priya_01

Pink Vellum Flowers Layout_Nupur Priya_02

Pink Vellum Flowers Layout_Nupur Priya_03

Pink Vellum Flowers Layout_Nupur Priya_04

Pink Vellum Flowers Layout_Nupur Priya_05

Pink Vellum Flowers Layout_Nupur Priya_06

Heartfelt Creations Products:
HCDP1-2116 Tender Moments Paper Collection
HCD1-7213 Elegant Pocket Accents Die
HCD1-7211 Decorative Pocket Accents Die
HCPC-3842 Oakberry Lane Blossoms Cling Stamp Set
HCD1-7200 Oakberry Lane Blossoms Die
HCD1-778 Fleur Borders and Pockets Die
HCPP1-438-2 Paper Pack of 10 - White
HCPP1-475 Deluxe Flower Shaping Paper - Pack of 50
18002 Rajni Chawla's Vellum Flowerite
NU650 Nuvo Crystal Drops - Ebony Black
NU667 Nuvo Crystal Drops - Red Berry
RACP436 Ranger Archival Ink Pad - Leaf Green
RACP524 Ranger Archival Ink Pad - Vibrant Fuchsia
HCS1-457-2 Pastel Pearl Stamens-Medium

HCS1-459-4 Rock Candy Stamens-Small
HCST1-401 Deluxe Flower Shaping Kit
DMCT4185 Groove Golf Tool Set
HCFB1-469 3D Blossoms Shaping Mold
359848 Spellbinders Tool N' One
411231 5pc. Acrylic Block Set
HCDA2-450 Stack and Store Daubers-Pack of 30
RAHT Heat It Craft Tool
352854 Metal Tip for Adhesive Bottles
159723 Designer Dries Clear Adhesive
3D1844 3-D Crystal Lacquer

Other Products:

Worn Lipstick Distress Oxide ink, Hero Arts Unicorn White Pigment ink, WOW superfine white embossing powder, double sided foam tape, 4" x 6" photograph, blue and white pearls.

Instructions:

Take the cardboard from the end on the paper packs and adhere the pattern paper from Tender Moments Paper Collection on it. Trim off the white strip at the top to make it 12" x 12". Cut a 3 1/2" strip of another striped pattern paper from the same set and adhere it on the bottom part of the layout as shown. Cut 1" and 1/2" strips from the pink pattern paper from the same set and adhere them on the top and bottom of the striped patterned paper.

Die cut 6 pieces of white cardstock using the die from Decorative Pocket Accents Die. Trim them along the slit so as to get 1 straight border and 1 decorative border from each piece. Adhere all the pieces as shown on the pink and striped patterned paper strips.


Die cut a piece of white cardstock using the die from  Fleur Borders and Pockets Die and adhere it to the top right corner as shown.


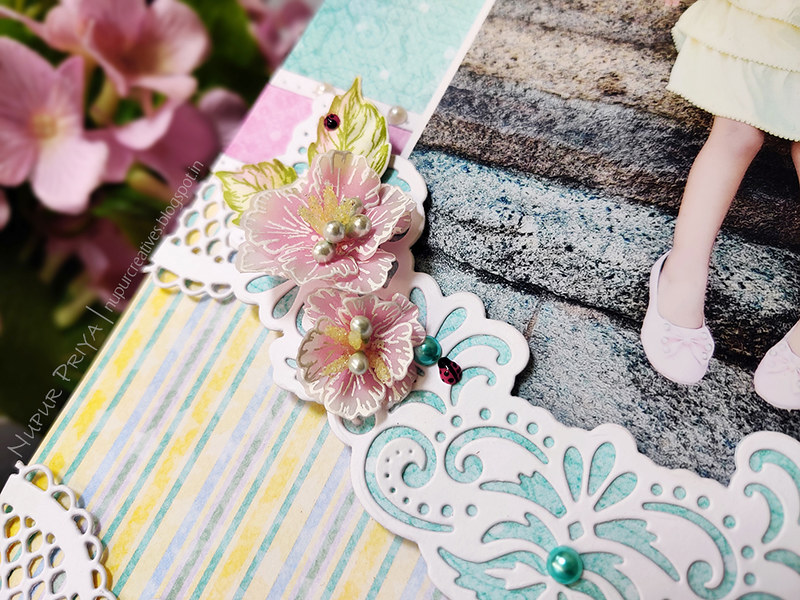
Adhere the 4" x 6" photograph on a slightly bigger piece of white cardstock. Die cut 2 pieces of white cardstock using the dies from Elegant Pocket Accents Die. Die cut 2 pieces of pattern paper using the border dies from the same set. Adhere the white die cut over the pattern paper die cut to make 2 pieces. Adhere them on the top and bottom of the photograph using double sided foam adhesive to frame it. Adhere this to the left side of the layout as shown again using double sided foam adhesive.


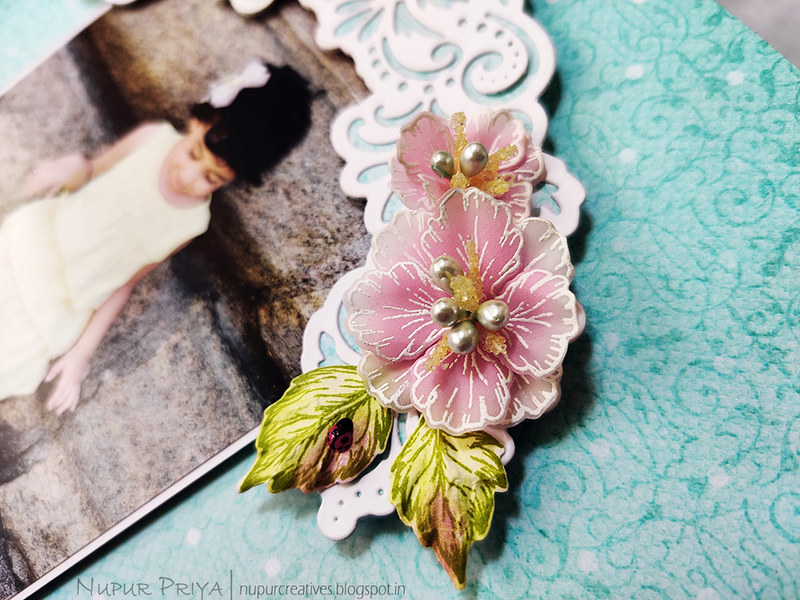
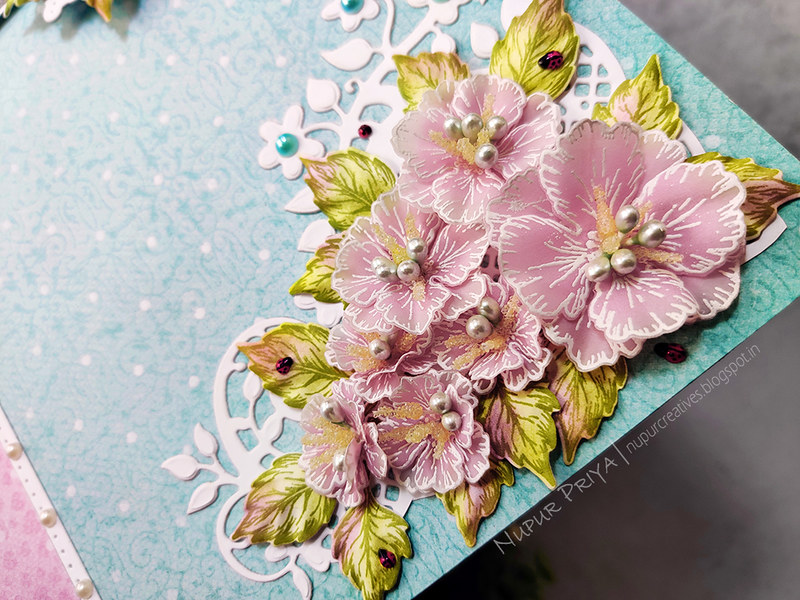
Flower : Stamp the flowers from Oakberry Lane Blossoms Cling Stamp Set and Floral Fashionista Cling Stamp Set on a sheet of Rajni Chawla's Vellum Flowerite with Hero Arts unicorn White pigment ink and heat emboss using White Embossing Powder and Heat It Craft Tool. Die cut all the flowers using the matching dies from Oakberry Lane Blossoms Die and Floral Fashionista Die.

Ink the Oakberry Lane flowers with Worn Lipstick Distress Oxide ink as shown using Stack and Store Daubers. Gently rub over the flowers with a piece of soft cloth in circular motion to remove any leftover ink on the white embossing and make it bright again. Shape them using the pointed edge of the Groove Golf Tool Set. Pinch the petals in the middle and then gently curve the edges outwards.

Now use the ball tool and the molding mat from Deluxe Flower Shaping Kit to do a circular motion in the flower center to cup the flowers. Add a drop of 3-D Crystal Lacquer to the flower center, place another flower petal on top and press with the ball tool. Poke a hole in the flower center using the pointed edge of the Groove Golf Tool Set.  Add a  bunch of medium Rock Candy Stamens and Pastel Pearl Stamens to the flower center and adhere them with 3-D Crystal Lacquer.

Leaves : Stamp the leaves from Oakberry Lane Blossoms Cling Stamp Set several times on a sheet of Deluxe Flower Shaping Paper with  Leaf Green Archival Ink 
and die cut them using matching die from  Oakberry Lane Blossoms Die. Ink them using Leaf Green and Vibrant Fuchsia Archival Inks. Shape the leaves using 3D Blossoms Shaping Mold.


Arrange and adhere the flowers and leaves as shown using  3-D Crystal Lacquer. Add tiny ladybugs made with Ebony Black and Red Berry Nuvo Crystal Drops to the floral arrangement. Add few pearls on the die cuts to add finishing touch.


Hope you like it...

Thank you for visiting today... :)
Nupur
Disclosure : Compensated affiliate links used when possible  at NO additional cost to you.. Thank you!