Showing posts with label Interactive card. Show all posts

Wednesday, 12 August 2020

Snow Globe Shaker Card

Hello and welcome to Heartfelt Creations inspiration post.
Today we are releasing the second Christmas collection for this year
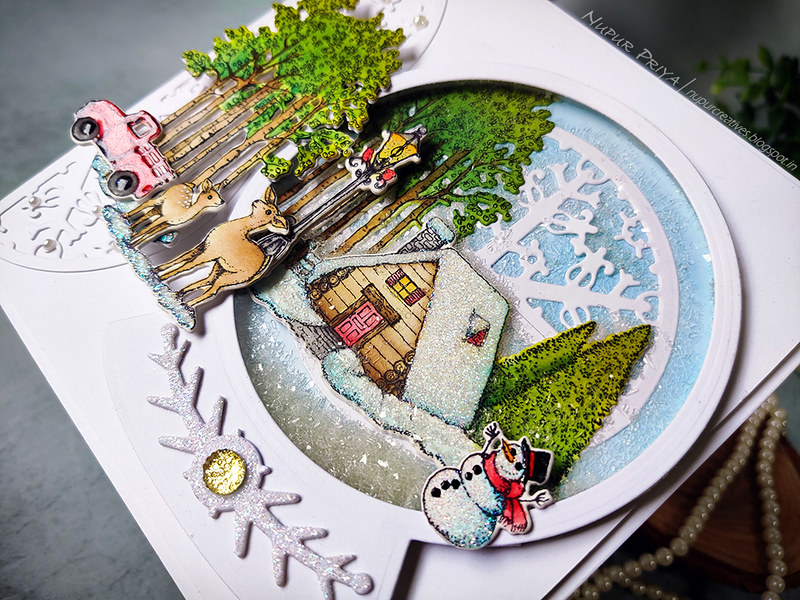
This collection has beautiful images with matching dies and a snow globe die too.
I have made a shaker card with this collection for today's inspiration.
All supplies used to make this card and the instructions can be found below the photographs.
Snow Globe Shaker Card_Nupur Priya_01

Snow Globe Shaker Card_Nupur Priya_02
HCPP1-438-2 Paper Pack of 10 - White
GBKK811B1 Clear Cardstock 8.5 x 11
RACP468 Ranger Archival Ink Pad - Jet Black
359848 Spellbinders Tool N' One
352854 Metal Tip for Adhesive Bottles
159723 Designer Dries Clear Adhesive
3D1844 3-D Crystal Lacquer
NU650 Nuvo Crystal Drops - Ebony Black

Other Products:
Twisted Citron, Mowed Lawn, Pine Needles, Gathered Twigs, Walnut Stain, Barn Door, Carved Pumpkin, Mustard Seed, Salty Ocean and Black Soot Distress inks, Canson Hot pressed watercolor cardstock, Sakura gelly roll white gel pen, transparent holographic glitter, Creative Expressions clear micro beads, Twinklets Diamond dust, painting brushes, Oval Makeup brush, pearls and rhinestones.

Instructions:
Die cut 2 decorative semi-circles using the dies from Festive Snowglobe Die and adhere them on one side of a 5 3/4" x 5 3/4" piece of white cardstock, slightly overlapping them in the center. Adhere this piece on a 6" x 6" card base.

Stamp the images from Festive Winterscapes Cling Stamp Set and Woodsy Winterscapes Cling Stamp Set on a piece of watercolor cardstock using Jet Black Archival Ink Pad and die cut them using the matching dies from Festive Winterscapes Die and Woodsy Winterscapes Die. Die cut 2-3 more pieces of each die cut, stack and adhere them together to create a thicker piece. Color in the images using Twisted Citron, Mowed Lawn, Pine Needles, Gathered Twigs, Walnut Stain, Barn Door, Carved Pumpkin, Mustard Seed, Salty Ocean and Black Soot Distress inks. Apply a layer of Designer Dries Clear Adhesive to the snow portions of the images and sprinkle the glitter. Add tiny drops of Ebony Black Nuvo Crystal Drops to the snowman's and deer's eyes and the snowman's buttons. Add a layer of 3-D Crystal Lacquer to the snowman's hat, lamp post and truck.

Die cut 1 solid white snow globe, 1 white snow globe frame and 1 transparent snow globe from white cardstock and Clear Cardstock using the dies from Festive Snowglobe Die. Ink the solid die cutlightly with Salty Ocean Distress ink. Die cut 2 decorative semi-circles using the dies from the same set and adhere them together in the center of the blue die cut as shown.

Arrange and adhere the cottage and tree images on the snow globe as shown and trim off the excess. Add a thin strip of foam adhesive around the outer edge of the snow globe to make a dam. Add a little Creative Expressions clear micro beads and Twinklets Diamond dust in the center. Adhere the clear snow globe die cut and the white snow globe frame die cut on top. 

Die cut 3 white pieces of the decorative piece for the bottom of the globe using the die from the same set. Stack and adhere them together to make a thicker piece. Apply a layer of Designer Dries Clear Adhesive to it and sprinkle the glitter. Adhere this piece on the base of the snow globe and add 1 rhinestone on the center of this piece. 

Adhere the shaker snow globe on the card base as shown and adhere the remaining colored images as shown using foam adhesive whenever required. Add few pearls on the die cut for finishing touch.


Hope you like it...
Thank you for visiting today... :)
Nupur
Disclosure : Compensated affiliate links used when possible  at NO additional cost to you.. Thank you! 

Thursday, 6 August 2020

Sending You A Hug

Hello and welcome to my blog
Today I am sharing another card made from Heartfelt Creations Products
I really like how it turned out. 
This is a gate fold card with a pretty floral belly band
The gates of this gate fold card are made with die cuts which give it a very elegant and delicate look.
Read till the end to know about the supply list and the instructions for this card.
Sending You a Hug_Nupur Priya_01

Sending You a Hug_Nupur Priya_02

Sending You a Hug_Nupur Priya_03

Sending You a Hug_Nupur Priya_04
Heartfelt Creations Products:
HCPC-3855 Floral Fashionista Cling Stamp Set
HCPC-3845 Just For You Sentiments Cling Stamp Set
HCPC-3842 Oakberry Lane Blossoms Cling Stamp Set
HCD2-7309 Elaborate Oval Frames Die
HCD2-7306 Decorative Circle Frames Die
HCD1-7283 Courtyard Elegance Die
HCD1-7215 Floral Fashionista Die
HCD1-7202 Album Tags and Accents Die
HCD1-7200 Oakberry Lane Blossoms Die
HCDP1-2116 Tender Moments Paper Collection 
HCPP1-438-2 Paper Pack of 10 - White 
HCPP1-475 Deluxe Flower Shaping Paper - Pack of 50
18002 Rajni Chawla's Vellum Flowerite
HCFB1-469 3D Blossoms Shaping Mold
HCST1-401 Deluxe Flower Shaping Kit
HCDA2-450 Stack and Store Daubers-Pack of 30
RAHT Heat It Craft Tool
359848 Spellbinders Tool N' One
411231 5pc. Acrylic Block Set
RACP992 Ranger Archival Ink Pad - Garden Patina
RACP436 Ranger Archival Ink Pad - Leaf Green
RACP524 Ranger Archival Ink Pad - Vibrant Fuchsia
RACP468 Ranger Archival Ink Pad - Jet Black
352854 Metal Tip for Adhesive Bottles
159723 Designer Dries Clear Adhesive

NU650 Nuvo Crystal Drops - Ebony Black
NU667 Nuvo Crystal Drops - Red Berry
ANC852 Bright Ideas Prills - Ribbit

HCS1-457-3 Pastel Bead Stamens-Medium

Other Products :

Hero Arts Unicorn White Pigment ink, WOW superfine white embossing powder, Cuttlebug Anna Griffin Juliet Damask embossing folder, double sided foam tape
 and rhinestones.

Instructions:

Card base:  Die cut 2 pieces of white cardstock using the dies from Decorative Circle Frames Die and Courtyard Elegance Die. Score both the die cuts in the middle and then trim them on one side, 1/2" from the score line. Adhere the 1/2" tab on a 4 1/2" x 6 1/2" piece of white cardstock to make a gate-fold card. Adhere a piece of 4 1/2" x 6 1/2" pattern paper from Tender Moments Paper Collection on the white cardstock. Adhere this piece on a 5" x 7" piece of white cardstock as shown.


Blue Flowers : Stamp the largest flowers from Oakberry Lane Blossoms Cling Stamp Set on a sheet of Deluxe Flower Shaping Paper with Garden Patina Archival InkInk them with Leaf Green and Garden Patina Archival Ink using Stack and Store Daubers. Die cut all the flowers using the matching die from Oakberry Lane Blossoms Die. Use the 3D Blossoms Shaping Mold and Deluxe Flower Shaping Kit to shape the fowers. Add a big drop of Designer Dries Clear Adhesive to the flower center and pour Ribbit Prills on the glue, remove the excess and let it dry completely.

White Flowers : Stamp the flowers from Floral Fashionista Cling Stamp Set on a sheet of Rajni Chawla's Vellum Flowerite with Hero Arts Unicorn White pigment ink and heat emboss using White embossing powder and Heat It Craft Tool. Shape the flowers using Deluxe Flower Shaping Kit and add a pink stamen from Medium Pastel Bead Stamens to the flower centers.

Leaves : Stamp the leaves from Oakberry Lane Blossoms Cling Stamp Set several times on a sheet of Deluxe Flower Shaping Paper with  Leaf Green Archival Ink and die cut them using matching die from  Oakberry Lane Blossoms Die. Ink them using Leaf Green and Vibrant Fuchsia Archival Inks. Shape the leaves using 3D Blossoms Shaping Mold.

Belly Band : Die cut 2 pieces of white cardstock using the dies from Album Tags and Accents Die. Emboss the smaller die cut using the Cuttlebug Anna Griffin Juliet Damask embossing folder. Stamp the sentiment from Just For You Sentiments Cling Stamp Set with Jet Black Archival Ink Pad on a piece of white cardstock and die cut it using the oval die from Elaborate Oval Frames Die. Stack and adhere all the 3 die cuts as shown using double sided foam tape. 


Take a 3/4" x 10" strip of white cardstock and score it at 2 1/2" and slightly more than 7 1/2". Fold it on the score lines and adhere the sentiment panel we just created on the joint to create the belly band. Arrange and adhere all the flowers and leaves around the sentiment as shown. Add tiny ladybugs made with Ebony Black and Red Berry Nuvo Crystal Drops to the floral arrangement. Add few rhinestones on the die cuts and belly band to add finishing touch.


Hope you like it...
Thank you for visiting today... :)
Nupur
Disclosure : Compensated affiliate links used when possible  at NO additional cost to you.. Thank you! 

Wednesday, 24 June 2020

Tender Moments Collection

Hello and welcome to my blog...
The much awaited and cutest collection is finally here... Woohooo

Tender Moments Collection

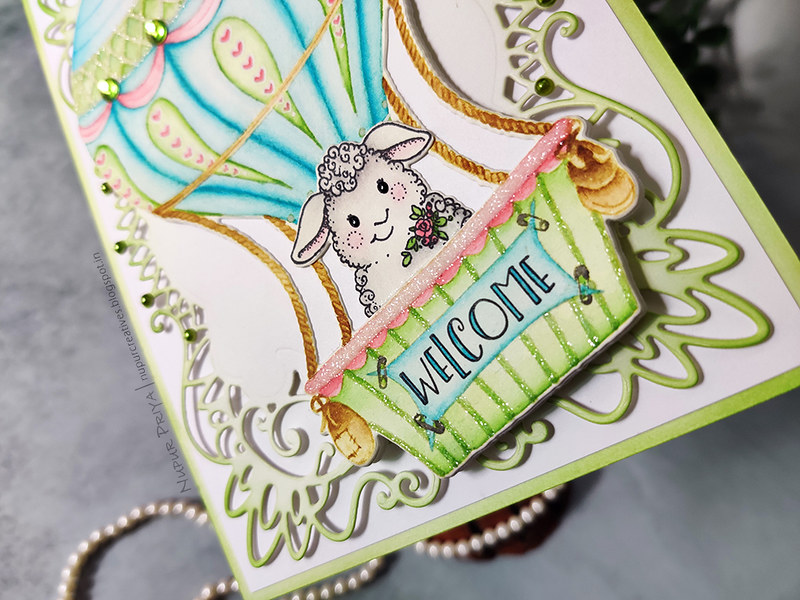
This is a super cute baby collection and it has cute little animals, hot air balloon and pretty rose swirls and sentiments... And it can be used for non-baby cards and projects too!
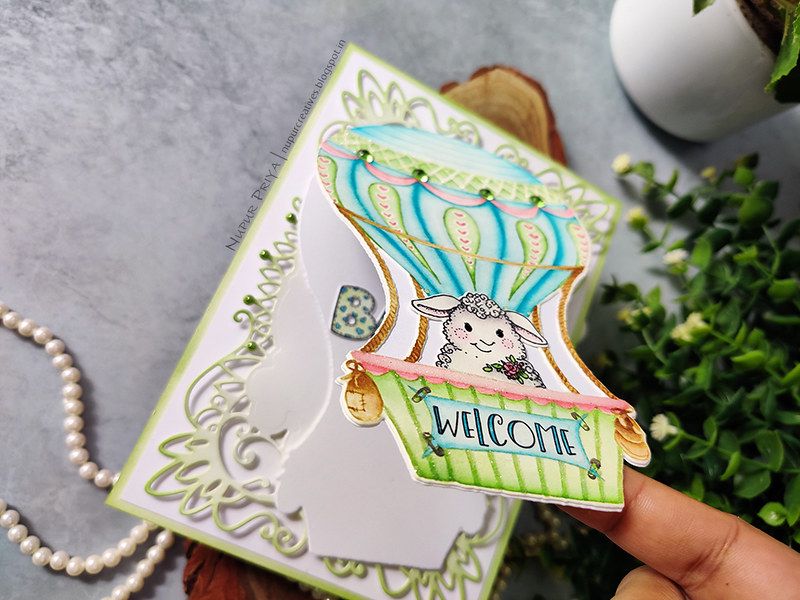
For today's card I have made slightly different type of card where the focal image lifts up to reveal the inside of the card where the personal message can be written. See the photographs below to see what I mean.
As usual you can find all the supplies used for this card listed below along with the instructions.

Also don't forget to check in tomorrow also for another cute card made with this collection...

Welcome baby_Nupur Priya_01

Welcome baby_Nupur Priya_02

Welcome baby_Nupur Priya_03

Welcome baby_Nupur Priya_04

Heartfelt Products:

HCPC-3914 Baby's Air Balloon Cling Stamp Set
HCPC-3915 Welcome Baby Cling Stamp Set
HCPC-3916 Baby's Friends Cling Stamp Set
HCD1-7299 Baby's Air Balloon Die
HCD1-7300 Welcome Baby Die
HCD1-7301 Baby's Friends Die
HCD2-7307 Royal Elegance Frames Die
HCPP1-438-2 Paper Pack of 10 - White
RACP468 Ranger Archival Ink Pad - Jet Black
RAHT Heat It Craft Tool
359848 Spellbinders Tool N' One
411231 5pc. Acrylic Block Set
NU650 Nuvo Crystal Drops - Ebony Black
352854 Metal Tip for Adhesive Bottles
159723 Designer Dries Clear Adhesive
D120601 Darice Adhesive Foam Strips
RLHS100 Hydra Sponges

Other Products: 

Antique Linen, Mermaid Lagoon, Gathered twigs, Walnut Stain, Black Soot, Worn Lipstick and Mowed Lawn Distress inks, Sakura Gelly Roll white gel pen, oval makeup blending brush, paint brush, watercolor cardstock, transparent glitter and pearls.

Instructions: 

Ink a piece of 5" x 7" white cardstock lightly with Mowed Lawn Distress ink. Adhere a 4 3/4" x 6 3/4" white cardstock on the inked piece. Die cut a piece of 5" x 7" white cardstock using the die from  Royal Elegance Frames Die and ink it lightly with Mowed Lawn distress ink. Adhere this piece on the 5" x 7" piece that we just created using Darice Adhesive Foam Strips.

Stamp the hot air balloon image from  Baby's Air Balloon Cling Stamp Set on a piece of watercolor cardstock with Antique Linen  Distress ink. Stamp the welcome stamp from the Welcome Baby Cling Stamp Set on the banner on the hot air balloon image with Jet Black Archival Ink. Color the image using Mermaid Lagoon, Gathered twigs, Walnut Stain, Black Soot, Worn Lipstick and Mowed Lawn Distress inks. Outline the hearts and the green diamonds strip across the top with Sakura Gelly Roll white gel pen. Die cut the image using matching dies from Baby's Air Balloon Die


Stamp the lamb from Baby's Friends Cling Stamp Set on a piece of watercolor cardstock with Jet Black Archival Ink. Die cut it using matching die from Baby's Friends Die and color it with Black Soot, Worn Lipstick and Mowed Lawn Distress inks. Add tiny drops of Ebony Black Nuvo Crystal Drops to the eyes of the lamb. Adhere it as shown on the hot air balloon. Use the Metal Tip along with Designer Dries Clear Adhesive to cover some details on the stamped and colored image and sprinkle transparent glitter.

Die cut a 6" x 4" top folding white card base using the outline die for the air balloon so that the top edge of the balloon is slightly above the hinge. Adhere the colored and die cut image on the front of the shaped card that we created. Adhere this the back of this shaped card on the Royal Elegance Frames Diecut as shown using Darice Adhesive Foam Strips.


Stamp the baby image from the Welcome Baby Cling Stamp Set on a piece of watercolor cardstock  with Jet Black Archival Ink. Color the image using Mermaid Lagoon and Mowed Lawn Distress inks. Die cut the image using the matching die from Welcome Baby Die. Adhere this inside the shaped card. Add pearls and rhinestones to the die cut and the hot air balloon to add finishing touch.

Hope you like it...

Thank you for visiting today... :)
Nupur
Disclosure : Compensated affiliate links used when possible  at NO additional cost to you.. Thank you! 

Wednesday, 11 March 2020

Wild Rose Shaker Card

Hello Friends and welcome to Heartfelt New Release Week
Today we are launching a gorgeous collection all of you have been waiting for

The Wild Rose Collection!

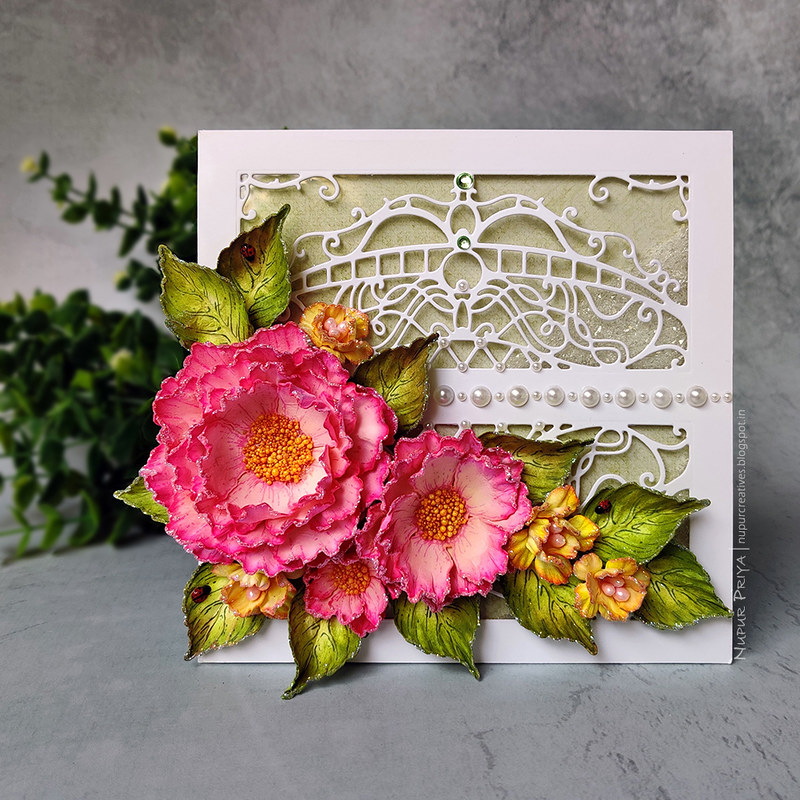
This collection has 2 floral stamp and die set along with the 3D molds and this has 7 sizes of flowers and the 3D molds make it so quick and east to shape the flowers... a must have for every crafter who likes to make handmade flowers. There is also a basket die set in this collection which can be used to make lots of different kinds and shapes of baskets and decorative accents. And the paper pack is simply beautiful.
This set has so much potential!
I had a lot of fun creating with this collection. For today I have created a sparkly shaker card with this collection.
All the supply list and the instructions for this card can be found at the end of this post.

Wild Rose Shaker Card_Nupur Priya_01

Wild Rose Shaker Card_Nupur Priya_02

Wild Rose Shaker Card_Nupur Priya_04

Heartfelt Creations Products:
HCPC-3906 Small Wild Rose Cling Stamp Set
HCPC-3907 Large Wild Rose Cling Stamp Set
HCD1-7282 Eyelet Royale Die
HCD1-7289 Small Wild Rose Die
HCD1-7290 Large Wild Rose Die
HCDP1-2113 Wild Rose Paper Collection
GBKK811B1 Clear Cardstock 8.5 x 11 
HCPP1-438-2 Paper Pack of 10 - White
HCPP1-475 Deluxe Flower Shaping Paper - Pack of 50
RACP436 Ranger Archival Ink Pad - Leaf Green
RACP005 Ranger Archival Ink Pad - Sunflower
RACP482 Ranger Archival Ink Pad - Olive
RACP524 Ranger Archival Ink Pad - Vibrant Fuchsia
HCFB1-486 Small 3D Wild Rose Shaping Mold
HCFB1-487 Large 3D Wild Rose Shaping Mold
HCST1-401 Deluxe Flower Shaping Kit
HCDA2-450 Stack and Store Daubers-Pack of 30
359848 Spellbinders Tool N' One
411231 5pc. Acrylic Block Set
ANC852 Bright Ideas Prills - Go ManGo
HCS1-457-2 Pastel Pearl Stamens-Medium
NU667 Nuvo Crystal Drops - Red Berry
NU650 Nuvo Crystal Drops - Ebony Black
352854 Metal Tip for Adhesive Bottles
159723 Designer Dries Clear Adhesive
D120601 Darice Adhesive Foam Strips

Other Products: 

Mustard Seed and Wild Honey Distress inks, Twinklets Diamond dust, Holographic glitter, pearls and rhinestones.

Instructions:

Adhere a 5 3/4" x 5 3/4" piece of pattern paper from Wild Rose Paper Collection on a 6" x 6" piece of white card base.
Take a 6" x 6" white cardstock and die cut it twice using the die from Eyelet Royale Die to make 2 windows as shown. Adhere a piece of 
Clear Cardstock behind the cardstock. Use Darice Adhesive Foam Strips to make 2 dams behind the 2 windows that we created taking care that there is no gap. Pour a little Twinklets Diamond dust on the card base in 2 places which will be in the middle of the windows and adhere the window panel securely to make the shaker window.


Stamp the flowers from Small Wild Rose Cling Stamp Set and Large Wild Rose Cling Stamp Set using Sunflower and Vibrant Fuchsia Archival Ink. Die cut them using the matching dies from Small Wild Rose Die and Large Wild Rose Die. Color the pink flowers with Vibrant Fuchsia Archival Ink and Mustard Seed distress ink. Color the yellow flowers with Mustard Seed and Wild Honey Distress inks.


Stamp the leaves from 
Large Wild Rose Cling Stamp Set several times on a sheet of Deluxe Flower Shaping Paper with Olive Archival Ink and die cut them using matching die from  Large Wild Rose Die. Ink them using Leaf GreenSunflower and Vibrant Fuchsia Archival Inks.


Shape all the flowers and leaves using Small 3D Wild Rose Shaping MoldLarge 3D Wild Rose Shaping Mold and Deluxe Flower Shaping Kit. Apply a little Designer Dries Clear Adhesive to the edges of flower petals and leaves and sprinkle holographic glitter to add sparkle. Add Go ManGo Prills to the pink flower centers and Pastel Pearl Stamens to the yellow flower centers. Arrange and adhere them as shown. Add few tiny ladybugs made with Ebony Black and Red Berry Nuvo Crystal Drops to the floral arrangement. Add few pearls and rhinestones to the card for finishing touch.

Hope you like it...

Thank you for visiting today... :)
Nupur
Disclosure : Compensated affiliate links used when possible  at NO additional cost to you.. Thank you!