Showing posts with label Money Envelopes. Show all posts

Saturday, 12 January 2019

Money Wrap with Tulip Time Collection

Hello friends and welcome to heartfelt inspiration...

This week Heartfelt Creations launched another gorgeous new collection:

Tulip Time Collection!

It’s time to shake off the wintertime blues and greet the spring season with the breathtaking Tulip Time Collection from Heartfelt Creations! Energize yourself with a beautifully hued paper collection filled with pastel pinks, pretty purples, sunny yellows and grassy greens…the ideal springtime colors for all of your spring themed paper craft creations! Graceful illustrations of delicate tulip bouquets, elegant flower pot arrangements, and colorful meadow like scenes garnish delicate backgrounds adorned in beautiful brocades, dainty lace like patterns and soft floral images, certain to put a spring in your step and a song in your heart! Rounding out this spring-inspired collection are three blossoming cling stamps sets displaying tender images of budding tulips, an assortment of flower pots ready to hold the first cuttings of the season, as well as a pretty picket fence ideal for building a cheerful garden scene! When paired with the coordinating dies, creating fresh and invigorating springtide embellishments for handmade greeting cards, scrapbook layouts and altered art pieces are accomplished quickly and with ease!  A fourth beautifully illustrated cling stamp set featuring breezy tulip petals in varying diameters, along with the coordinating dies and a customized Tulip Shaping Mold, will allow you to surround yourself with realistic replicas of the first flowers of spring! So, join us as we welcome the season of new beginnings with the Tulip Time Collection!

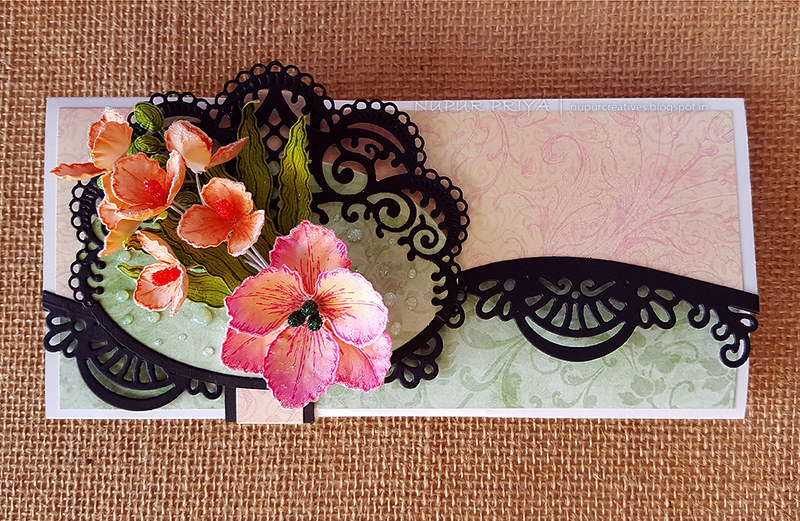
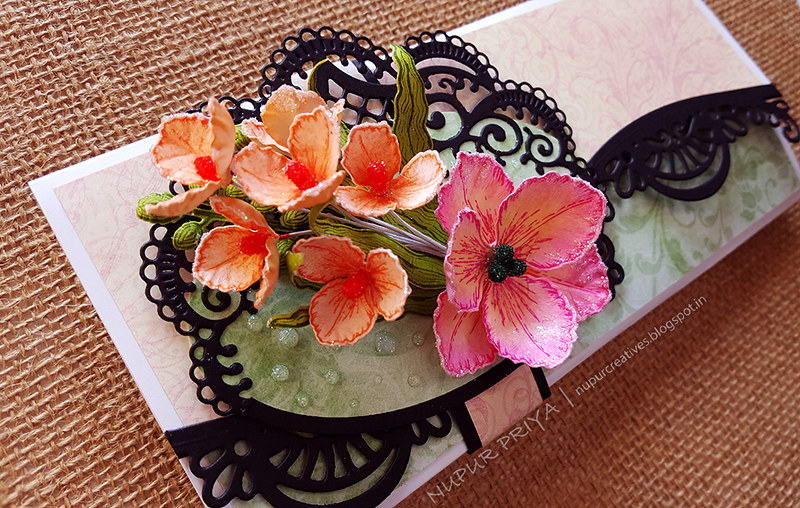
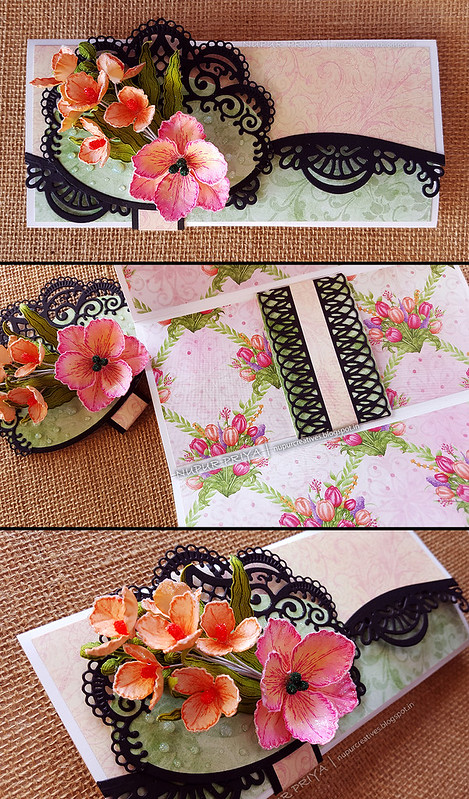
I have made a money wrap for today's inspirations... It can also be used for gift cards.
Read till the end for full supply list and instructions for this project...
20190103_092252
20190103_092252

20190103_092510

20190103_092427

20190103_092611


Heartfelt Creations Products:

HCPC-3858 Tulip Time Cling Stamp Set
HCPC-3860 Tulip Vase & Fillers Cling Stamp Set
HCD1-783 Border Essentials Die
HCD1-7120 Fleur Border Basics Die
HCD1-7121 Elegant Border Basics Die
HCD1-7146 Festive Holiday Die
HCD1-7156 Eyelet Oval and Basics Small Dies
HCD1-7157 Eyelet Oval and Basics Large Dies
HCD1-7210 Eyelet Border Basics Die
HCD1-7218 Tulip Time Die
HCD1-7220 Tulip Vase & Fillers Die
HCDP1-298 Tulip Time Paper Collection
HCPP3-452 12 x 12 Cardstock Pack of 25 - White
HCPP1-438-1 Paper Pack of 10 - Black
RACP487 Ranger Archival Ink Pad - Bright Tangelo
RACP524 Ranger Archival Ink Pad - Vibrant Fuchsia
RACP436 Ranger Archival Ink Pad - Leaf Green
RACP482 Ranger Archival Ink Pad - Olive
HCS1-458-3 Bright Bead Stamens-Medium
352854 Metal Tip for Adhesive Bottles
159723 Designer Dries Clear Adhesive
HCST1-401 Deluxe Flower Shaping Kit
HCFB1-472 3D Tulip Shaping Mold
173842 Scor-Pal Measuring & Scoring Board
HCDA2-450 Stack and Store Daubers-Pack of 30

Other Products:
Transparent Glitter and White Blizzard Nuvo Glitter Drops


Instructions: Take a 9" x 7 1/4" piece of white cardstock and score it at 3 1/4" and 6 1/2". Die cut the 2 1/2" flap using the border die from Fleur Border Basics Die. Decorate this piece using pattern paper from Tulip Time Paper Collection and black border die cuts made using dies from Elegant Border Basics DieElegant Border Basics Die and Eyelet Border Basics Die.

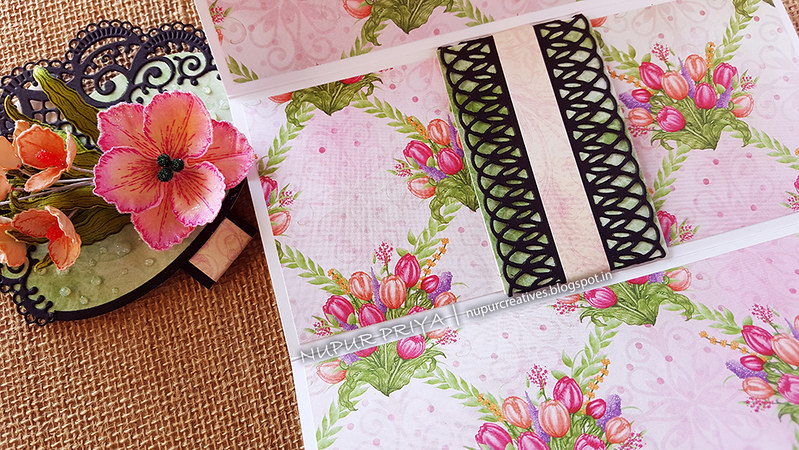
Die cut 2 pieces of black cardstock using the border die from Border Essentials Die. Take a 2" x 4" piece of white cardstock and score it at 1/2" on both sides. Decorate this piece using the border die cuts and pattern paper from Tulip Time Paper Collection. Adhere this piece on the middle section to create a belly band to insert cash or gift card.


Die cut a piece of black cardstock using the die from Festive Holiday Die.

Die cut one piece each of pattern paper, black and white cardstock using oval die from Eyelet Oval and Basics Small Dies. Take the black die cut and cut its center using a smaller die from Eyelet Oval and Basics Large Dies to create a thin frame. Take a 3/4 x 6 3/4" strip of black cardstock and 1/2" x 6 3/4" strip of pattern paper and layer them together. Score this strip at 2" and 5 3 /8". Fold it over and adhere the ends behind the oval pattern paper diecut. Adhere the white die cut behind the pattern paper to hide the raw edges to form the belly band. Adhere the black Festive Holiday Diecut on the pattern paper oval die cut as shown. Trim the black oval frame die cut so that the edges are flush with the ends of Festive Holiday Diecut.

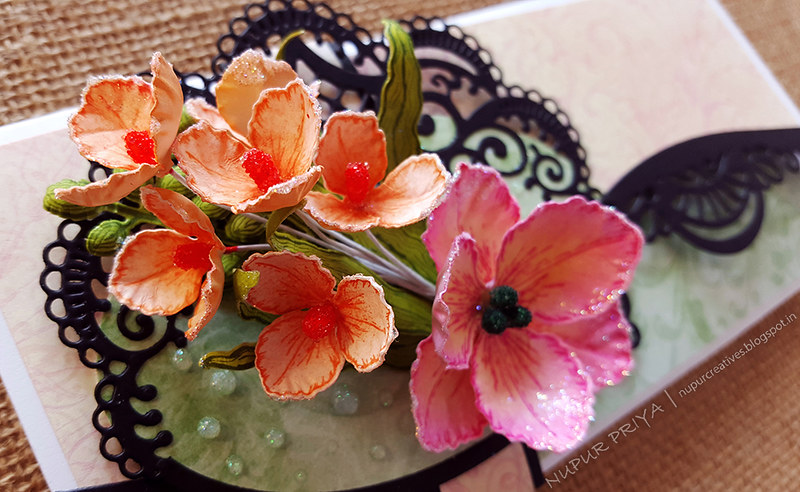
Stamp the flowers from Tulip Time Cling Stamp Set Bright Tangelo and Vibrant Fuchsia Archival Inks and ink them with the same inks using  Stack and Store Daubers. Die cut them using the matching dies from Tulip Time Die. Shape the flowers using 3D Tulip Shaping Mold and Deluxe Flower Shaping Kit. add red and green stamens from Bright Bead Stamens to the flower centers.


Stamp the leaves from Tulip Vase & Fillers Cling Stamp Set with Olive Archival Ink and color them using Leaf Green Archival Ink. Die cut them using matching dies from Tulip Vase & Fillers DieArrange and adhere the flowers and leaves as shown on the belly band. Apply a little Designer Dries Clear Adhesive to the flowers and dust them with transparent glitter. Add drops of White Blizzard Nuvo Glitter Drops around the flower arrangement to add finishing touch.


Hope you like it...

Thank you for visiting today... :)
Nupur
Disclosure : Compensated affiliate links used when possible  at NO additional cost to you.. Thank you! 

Wednesday, 10 May 2017

Classic Petunia

Hello friends & welcome to Heartfelt Wednesday... Today is the new release day & this month's release is :

Classic Petunia Collection

Move on over spring, and let summer begin…the new Classic Petunia Collection by Heartfelt Creations has arrived!  No flower signifies summer more than the large trumpet shaped blossom of the gentle petunia!  Surround yourself with memories of wandering through greenhouses filled to the brim with a multitude of varieties in every color, from solids to variegated, compact to blanketing and of course those showy hanging baskets and container gardens spilling over with these heat loving flowers! The becomingly illustrated cling stamp sets found within this collection will have you planning your very own garden themed paper crafts filled with trailing petunias, bountiful bouquets and lavish petunia filled hanging baskets.  Three sizes of coordinating stamp and petal die cuts will allow you to recreate the ever popular petunia, making it easy to cut and shape the perfect blossom in the ideal size and color necessary for any project from handmade cards, scrapbook layouts and even altered art pieces.   A beautiful selection of premade card panels and scrapbook pages filled with illustrations of graceful petunias in hanging baskets, classic terra cotta pots and pretty garden scenes showcasing elegant petunia draped wishing wells and white washed garden benches allow for ease in creating any garden variety creations.  Filled with classic petunia pinks and deep purples along with pretty leaf like greens, the delicately patterned papers in this charming paper collection will transport you to your favorite garden plot!  So join with us as we usher in the summer season with the tender flowers of the new Classic Petunia Collection….no fertilizing, deadheading or watering required!  We promise!

I have made a money envelope using this collection...
20170506_115144

20170506_115127

20170506_115214

Heartfelt Creations Products Used:
HCPC 3474 Heartfelt Expressions Cling Stamp Set
HCPC-3783 Tropical Paradise Cling Stamp Set
HCPC-3785  Small Classic Petunia Cling Stamp Set
HCD1-7118 Delicate Border Basics Die
HCD1-7119 Classic Border Basics Die
HCD1-7137 Tropical Paradise Die
HCD1-7139  Small Classic Petunia Die
HCDP1-278  Classic Petunia Paper Collection
ANC850 Spring Bling Prills - Lemon Chiffon
HCDA2-450 Stack and Store Daubers
HCST1-401 Deluxe Flower Shaping Kit

Other Products:
Seedless Preserve & Forest Moss Distress Inks, Black Archival Ink, Ebosser, Martha Stewart scoreboard, WRMK Envelope Punch Board, Spellbinders Lacey Ovals Die, Spellbinders Labels & tag die, white cardstock, pearls & adhesive.

Project Instruction:
Take a 8 1/2" x 8" white cardstock & score at 3 14" & 6 1/2". Rotate 90 degree & score at 1/2" & 8". Cut off the 1/2" flap on both sides on the 1st & 2nd equal sections. Punch the notch in the center of the edge of the 7" x 2" section of cardstock using WRMK Envelope Punch Board. Fold & glue the 1/2" flap on both sides of this section to make the pocket as shown. Die cut the top edge of the cardstock with Delicate Border Basics Die. Decorate the envelope with papers from Classic Petunia Paper Collection & Classic Border Basics Die.

Die cut a piece of white cardstock with Spellbinders Lacey Ovals Die, ink lightly with Forest moss distress ink using Stack and Store Daubers & adhere to the inside of the top flap as shown. Die cut another piece of white cardstock with Spellbinders Labels & tag Die & ink lightly with Forest moss distress ink using Stack and Store Daubers. Stamp the sentiment from Heartfelt Expressions Cling Stamp Set with black archival ink & adhere to the outside of the top flap as shown.

Stamp & ink the flowers from Small Classic Petunia Cling Stamp Set using Seedless Preserve distress ink & die cut using matching dies from Small Classic Petunia Die. Stamp & ink the leaves from Tropical Paradise Cling Stamp Set & Small Classic Petunia Cling Stamp Set using Forest Moss Distress Ink & die cut using matching dies from Tropical Paradise Die & Small Classic Petunia Die. Shape these using Deluxe Flower Shaping Kit. Add a little Lemon Chiffon Prills from Spring Bling collection to the flower centers. Decorate the envelope with the flowers & leaves as shown. Add some pearls to add finishing touch to the envelope.


Hope you like this card...
Thank you for visiting today... :)

Nupur

Wednesday, 11 September 2013

Distressed Envelopes

Hello friends,

I LOVE LOVE LOVE my distress inks.. 
So I got a little crazy after I saw Rajni aunty's post..
& made many backgrounds using distress ink techniques at one go...hehehe...
(For some of them I don't even remember the colour combinations used..)


I adhered these beauties to some coloured money envelopes..
These backgrounds turned out so beautiful that I didn't want to cover them..
So I used minimal embellishments to decorate them..
I used some stamping, heat embossing, glitter, pearls, rhinestones, diecuts & punched borders to jazz them up.. & turn them into these gorgeous envelopes..

1) Picked Raspberry & seedless preserves  2) Peacock Feathers & mustard Seed

1) Mustard Seed & Spiced Marmalade 2) Mustard Seed, Spiced Marmalade & fired brick

Mowed Lawn, Peeled paint, vintage photo/ walnut stain

1) Peacock feathers & worn lipstick   2)Peacock feathers, Seedless preserve, picked raspberry

Peacock feathers, Seedless preserve, picked raspberry

1) Seedless preserve, picked raspberry   2)picked raspberry

2)Peacock feathers, & mustard seed


Entering in :

Thank you for visiting