Showing posts with label Stamping. Show all posts

Wednesday, 30 September 2020

Sending You Birthday Love card

Hello friends and welcome to my blog
Today I am sharing a quick birthday card that can be made in less than 30 minutes.
Just die cutting, stamping, layering and adding a touch of glitter and gen stone.
This can even be made into a masculine card easily just by using some other color scheme like, blues, browns etc.
As usual the supply list and instructions can be found below the photographs.
Sending You Birthday Love card_Nupur Priya_01

Sending You Birthday Love card_Nupur Priya_02

Sending You Birthday Love card_Nupur Priya_03

Heartfelt Creations Products :
HCPC-3936 Ornate Just for You Cling Stamp Set
HCD1-7321 Ornate Just for You Die
HCDP1-2119 Summer's Garden Paper Collection
HCPP1-438-2 Paper Pack of 10 - White
RACP524 Ranger Archival Ink Pad - Vibrant Fuchsia
RACP399 Ranger Archival Ink Pad - Carnation Red
352854 Metal Tip for Adhesive Bottles
159723 Designer Dries Clear Adhesive

Other Products :
Tim holtz stamp platform, transparent glitter, foam adhesive and rhinestones.

Instructions : Cut a piece of 4 3/4" x 6 3/4" piece of pattern paper from Summer's Garden Paper Collection and adhere it on a 5" x 7" white cardbase. Draw lines with Designer Dries Clear Adhesive on the pattern paper and sprinkle transparent glitter on top. 

Die cut a piece of white cardstock using the largest die from Elaborate Oval Frames Die and adhere it on the card front using foam adhesive. Die cut a piece of pattern paper using the 2nd largest die from the same set and adhere it on the white die cut. 

Die cut a piece of white cardstock using the eyelet die from Album Tags and Accents Die and adhere it on the previous die cut using foam adhesive. Die cut a piece of pattern paper from the same paper pack using the 3rd largest die from Elaborate Oval Frames Die and adhere it on the eyelet die cut.

Stamp the Sentiment from  Ornate Just for You Cling Stamp Set on a piece of white cardstock using Tim holtz stamp platform, Vibrant Fuchsia and Carnation Red Archival Ink to get a gradient look. Die cut this sentiment using the matching die from Ornate Just for You Die. Die cut 1 more piece of white cardstock using the same die. Adhere them together and then adhere them on another die cut made with the layering die for this sentiment and white cardstock. Adhere this piece on the card front as shown using foam adhesive. Add few rhinestones to the die cut to add finishing touch.


Hope you like it...

Thank you for visiting today... :)
Nupur
Disclosure : Compensated affiliate links used when possible  at NO additional cost to you.. Thank you! 

Wednesday, 23 September 2020

Calla Lily and Special Sentiments Card

Hello friends and welcome to my blog!
Today Heartfelt Creations is releasing a Special Sentiments stamps and dies
There are some beautiful swirly sentiments that can be used as the center of the card. These sentiments have matching dies too along with layering dies.
I have paired this sentiment with Calla lily stamps from Feathery Swan Cling Stamp Set and watercolored them with Altenew watercolors. I recently purchased them and loved the quality and brightness of colors. Just touching them with damp brush is enough to get the colors reactivated! They blend beautifully and the colors are vibrant.
So without further ado lets move on to the card. You can find the full supply list and instructions for this card below the photographs.
Calla Lily Especially For You Card_Nupur Priya_01

Calla Lily Especially For You Card_Nupur Priya_02

Calla Lily Especially For You Card_Nupur Priya_03

HCPC-3934 Elegant Especially for You Cling Stamp Set
HCD1-7319 Elegant Especially for You Die
HCPC-3898 Feathery Swan Cling Stamp Set
HCD2-7192 Eyelet Lace Frames Die
HCPP1-438-2 Paper Pack of 10 - White
HCPP1-438-1 Paper Pack of 10 - Black
RACP468 Ranger Archival Ink Pad - Jet Black
HCDA2-450 Stack and Store Daubers-Pack of 30
411231 5pc. Acrylic Block Set
359848 Spellbinders Tool N' One


Crushed Olive, Mowed Lawn, Forest Moss, Dusty Concord and Seedless Preserve Distress inks, Altenew watercolors, foam adhesive, Brustro Watercolor cardstock and purple pearls.


Card Base: Die cut a piece of white cardstock using the die from Eyelet Lace Frames Die and ink it lightly with Dusty Concord and Seedless Preserve Distress inks. Adhere it on the lower portion of a 6" x 6" white card base as shown. Trim off the extra die cut.

Take a 5 1/4" x 4" piece of watercolor cardstock and stamp the lily image from Feathery Swan Cling Stamp Set repeatedly as shown using Jet Black Archival Ink. Color in the image with Altenew watercolors. Adhere this on a slightly bigger piece of black cardstock.

Take a 5 3/4" x 4 1/2" piece of white cardstock and ink the edges with Crushed Olive, Mowed Lawn and Forest Moss Distress inks. Adhere it on the card front as shown using foam adhesive. Adhere the calla lily panel on top of this using foam adhesive.

Stamp the sentiment from  Elegant Especially for You Cling Stamp Set on a piece of white cardstock using Dusty Concord and Seedless Preserve Distress inks. Die cut it using the matching die from  Elegant Especially for You Die. Die cut 3 more pieces of white cardstock using the same die and adhere all the four pieces together to make a thicker piece. Adhere this piece in the center of the calla lily image. Add few purple pearls to the die cut to add finishing touch.


Hope you like it...

Thank you for visiting today... :)
Nupur
Disclosure : Compensated affiliate links used when possible  at NO additional cost to you.. Thank you! 

Thursday, 19 September 2019

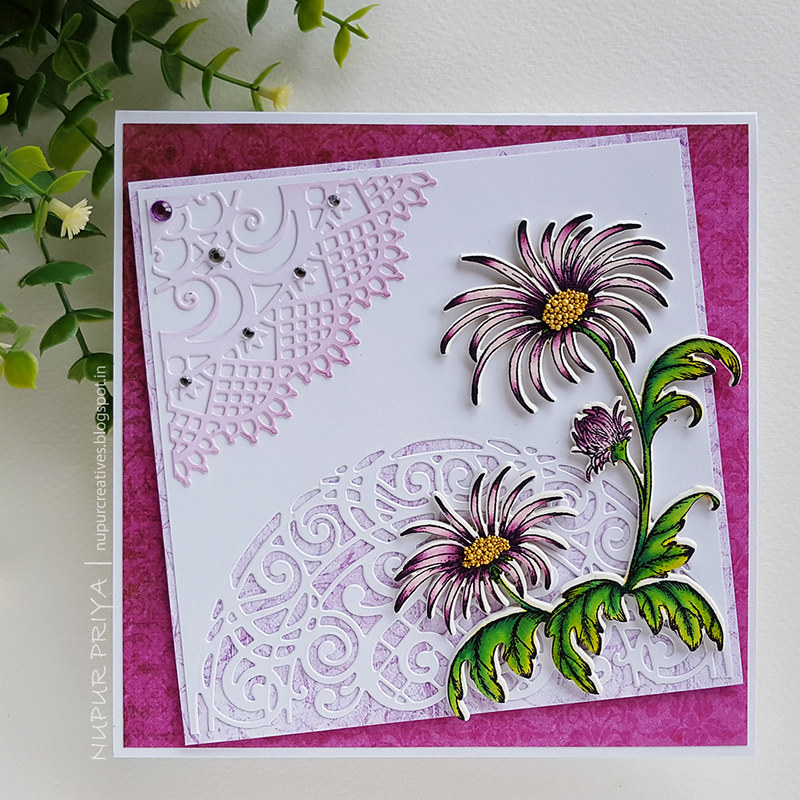
Purple Wild Aster Spray card

Hello and welcome...
Here is my card for today...
Read till the end for full supply list and instruction for this card...
Purple Wild Aster Card_Nupur Priya_02

Purple Wild Aster Card_Nupur Priya_01

Heartfelt Creations Products:
HCPC-3888 Wild Aster Spray Cling Stamp Set
HCD1-7245 Adorn It Pocket Accents Die
HCD1-7256 Heart of Joy Decorative Die
HCD1-7258 Wild Aster Spray Die
HCDP1-2106 Wild Aster Paper Collection
HCPP3-452 12 x 12 Cardstock Pack of 25 - White
RACP468 Ranger Archival Ink Pad - Jet Black
ANC850 Spring Bling Prills - Heart of Gold
359848 Spellbinders Tool N' One
HCDA2-450 Stack and Store Daubers-Pack of 30
411231 5pc. Acrylic Block Set
D120601 Darice Adhesive Foam Strips

Other Products: Spun Sugar, Seedless Preserve, Twisted Citron and Mowed Lawn Distress inks, paint brush, watercolor cardstock and silver and purple rhinestones.

Instructions: Cut a piece of 5 3/4" x 5 3/4" pattern paper from Wild Aster Paper Collection and adhere it on a 6" x 6" white card base. 

Take a 5" x 5" piece of white cardstock and cut the bottom edge using the die from Heart of Joy Decorative DieAdhere it on a 5 1/4" x 5 1/4" piece of  pattern paper from the same paper collection. Adhere this piece on the card front as shown using Darice Adhesive Foam Strips. Die cut a piece of white cardstock using the die from Adorn It Pocket Accents Die. Cut the sides as shown to convert it into a corner piece. Ink it lightly with Seedless Preserve distress ink and adhere it on the card front as shown.


Stamp the image from   Wild Aster Spray Cling Stamp Set on a piece of watercolor cardstock and color it using Spun Sugar, Seedless Preserve, Twisted Citron and Mowed Lawn Distress inks. Die cut it using matching die from  Wild Aster Spray Die. Die cut 4 more pieces of white cardstock using the same die. Stack and adhere all the die cuts together to make a thicker piece. Add a little  Heart of Gold Prills to the flower centers. Let it dry then adhere it on the card  front as shown. Add few rhinestones on the die cut to add finishing touch.


Hope you like it...

Thank you for visiting today... :)
Nupur
Disclosure : Compensated affiliate links used when possible  at NO additional cost to you.. Thank you! 

Sunday, 18 August 2019

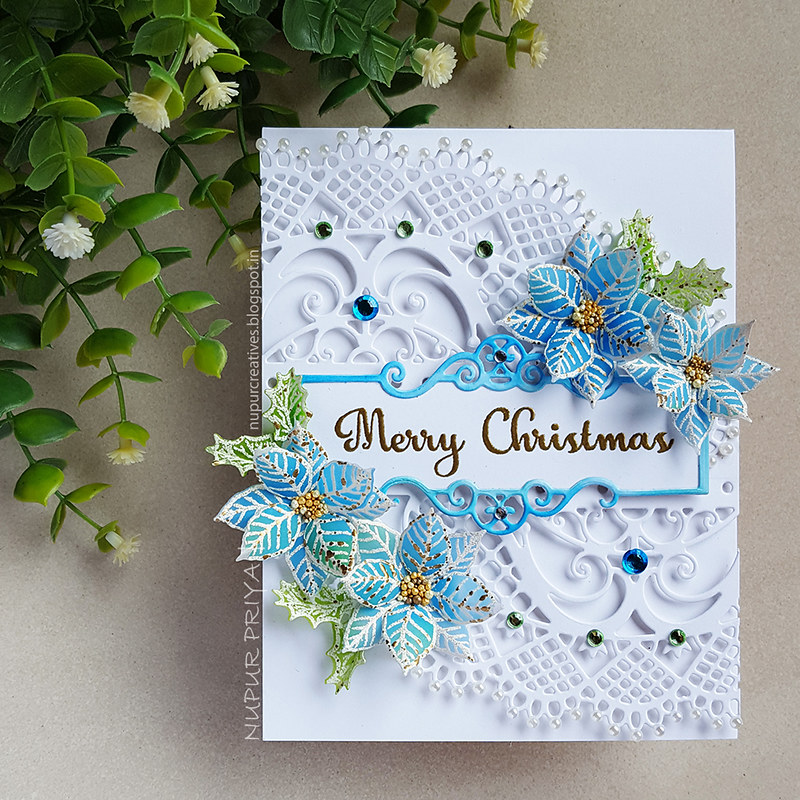
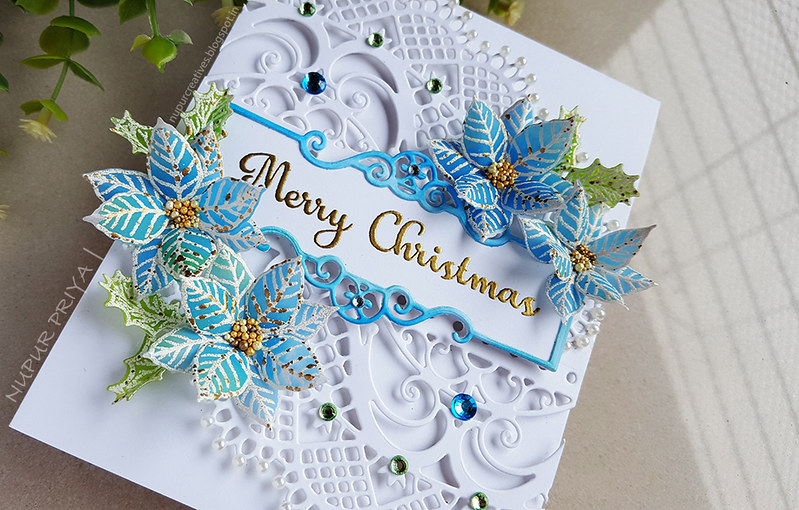
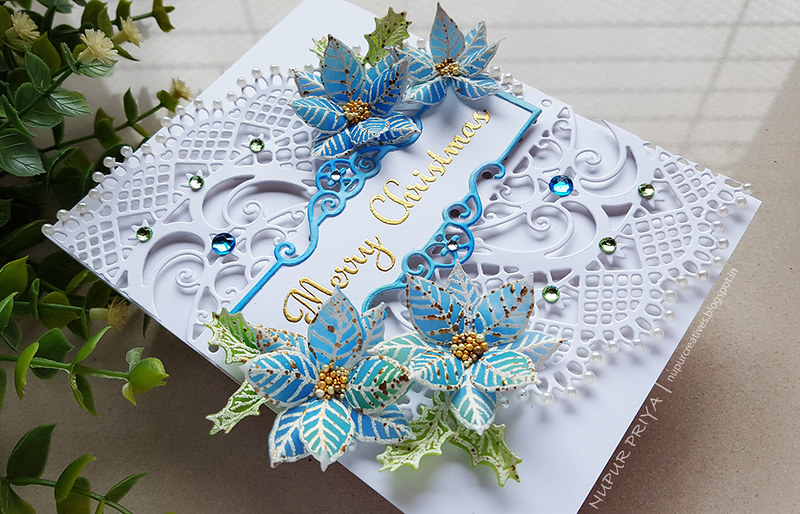
Blue Poinsettia Card

Hello Friends and welcome
I am sharing a Christmas card today
This has non-traditional color scheme : Blue and white with a hint of gold and green
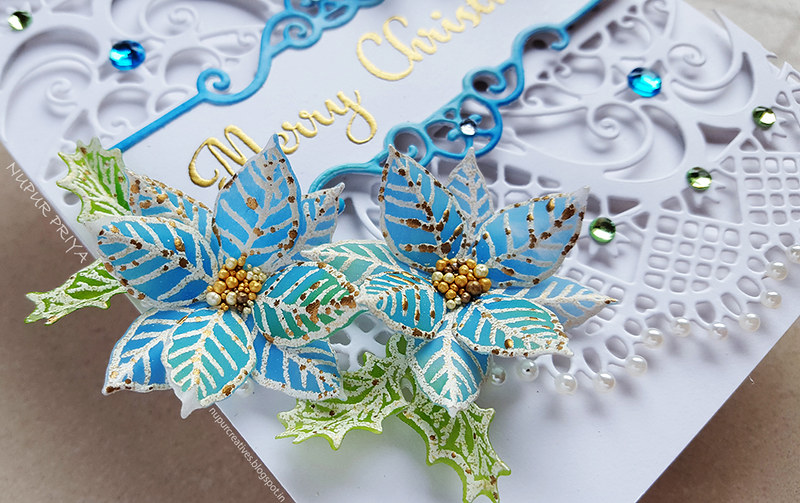
Don't you just love the look of vellum flowers
Full supply list and instructions are below at the end
Blue Poinsettia Card_Nupur Priya_1

Blue Poinsettia Card_Nupur Priya_1

Blue Poinsettia Card_Nupur Priya_2

Blue Poinsettia Card_Nupur Priya_3

Blue Poinsettia Card_Nupur Priya_4

Blue Poinsettia Card_Nupur Priya_5


Heartfelt Creations Products:

HCPC-3881 Christmas Poinsettia & Holly Cling Stamp Set
HCPC-3882 Candlelit Poinsettia Cling Stamp Set
HCD1-7203 Ornamental Tags Die
HCD1-7245 Adorn It Pocket Accents Die
HCD1-7249 Christmas Poinsettia & Holly Die
HCPP3-452 12 x 12 Cardstock Pack of 25 - White
18002 Rajni Chawla's Vellum Flowerite
352854 Metal Tip for Adhesive Bottles
159723 Designer Dries Clear Adhesive
D120601 Darice Adhesive Foam Strips
209277 Embossing Enamel - Aged Ivory
359760 Embossing Powder - Gold
DMCT4185 Groove Golf Tool Set
HCDA2-450 Stack and Store Daubers-Pack of 30
RAHT Heat It Craft Tool
ANC851 Rock N' Roll Prills - I'm A-Maized

Other Products:
Mowed Lawn Distress ink, Salty Ocean Distress Oxide ink, Versamark ink, pearls and rhinestones.


Instruction:
Die cut 2 pieces of white cardstock using the die from Adorn It Pocket Accents Die and cut both at 4 1/4" from the right. Rotate 1 piece so that it is upside down and adhere it to the other piece so that the sizeof the final piece is 4 1/4" x 5 1/2". Adhere this piece on a 4 1/4" x 5 1/2" white card base as shown using Darice Adhesive Foam Strips.


Stamp the sentiment from theCandlelit Poinsettia Cling Stamp Set on a piece of white cardstock using versamark ink and heat emboss using Gold Embossing Powder and Heat It Craft Tool. Die cut this piece of cardstock using the second largest die from Ornamental Tags Die. Die cut another piece of white cardstock using the dies from the same set. Cut away the sentiment portion of the die cut leaving only the border intact. Ink it with Salty Ocean Distress ink and adhere it on the previous white die cut with the sentiment. Adhere the final piece of the card front as shown using Darice Adhesive Foam Strips.

Stamp the leaves and flowers from Christmas Poinsettia & Holly Cling Stamp Set several times on a sheet of Vellum using Versamark ink. Heat emboss them using Aged Ivory Embossing Enamel and Heat It Craft Tool. Color them with Mowed Lawn Distress ink and Salty Ocean Distress Oxide ink. Die cut them using matching dies from Christmas Poinsettia & Holly Die. Shape them using Groove Golf Tool Set and add a little I'm A-Maized Prills to the Poinsettia's center. Arrange and adhere them as shown on the card front.  Add few rhinestones and pearls to the die cut to add finishing touch.


Hope you like it...

Thank you for visiting today... :)
Nupur
Disclosure : Compensated affiliate links used when possible  at NO additional cost to you.. Thank you! 

Wednesday, 17 July 2019

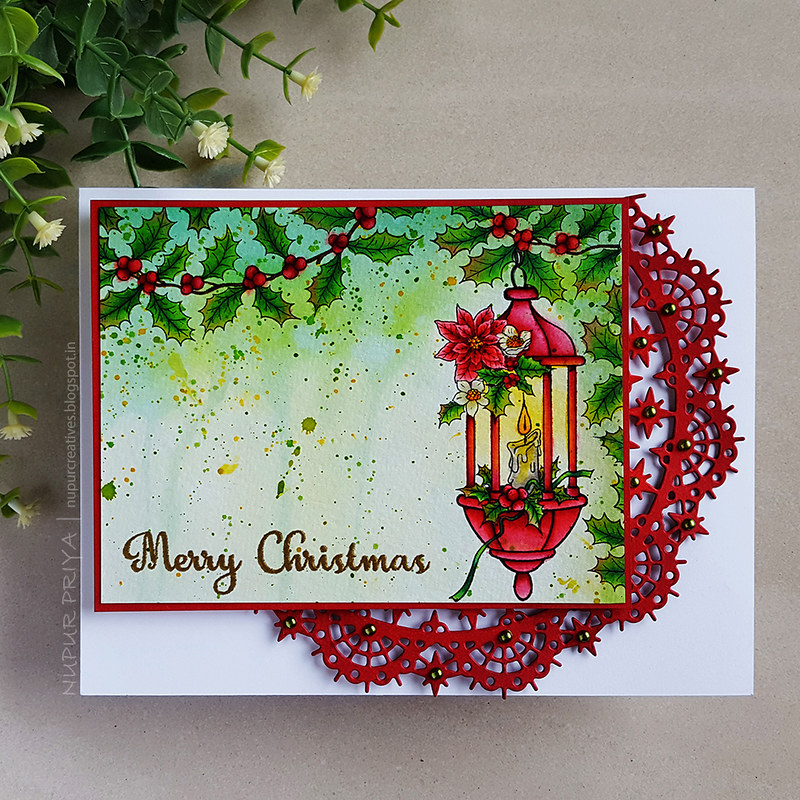
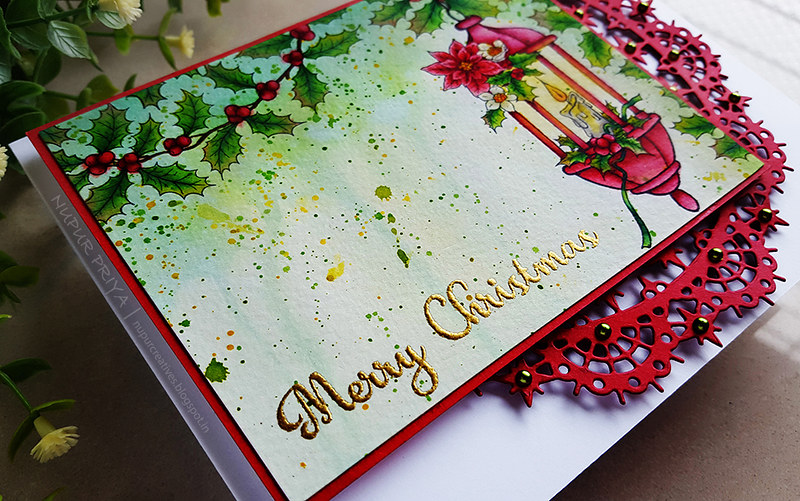
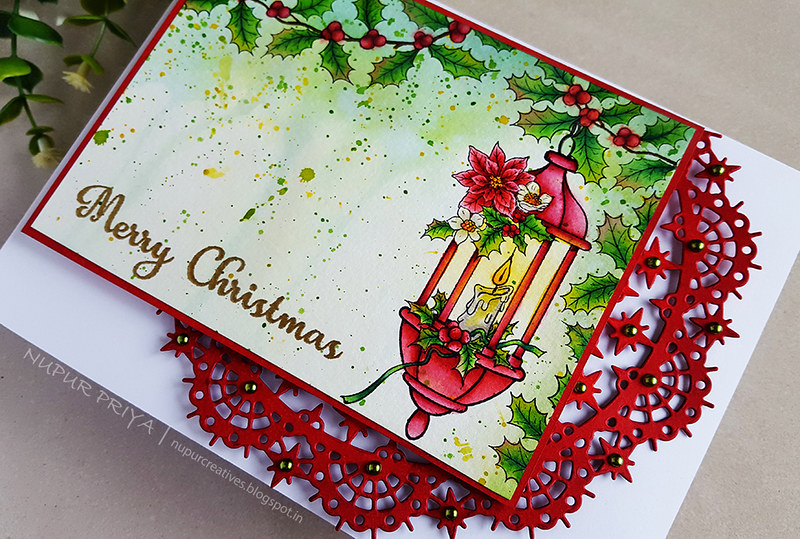
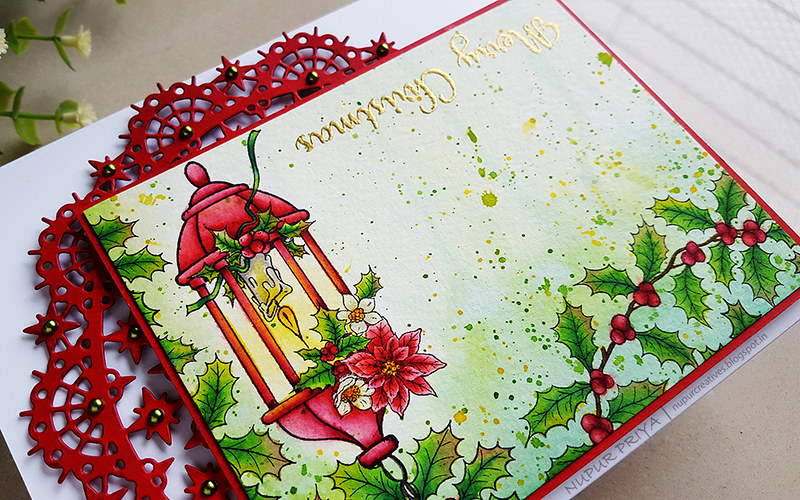
Underpainting Watercolored Christmas Card

Hello and Welcome...
I am sharing my 2nd card made with the latest release by Heartfelt Creations...
I loved painting for this card. I wanted the painted piece to be the focal point so I didn't add any flowers or embellishments apart from a doily die cut and few green pearls.
Read till the end for the supply list and instruction for this card.

Underpainting Watercolored Christmas Card_1_Nupur Creatives

Underpainting Watercolored Christmas Card_2_Nupur Creatives

Underpainting Watercolored Christmas Card_3_Nupur Creatives

Underpainting Watercolored Christmas Card_4_Nupur Creatives

Underpainting Watercolored Christmas Card_5_Nupur Creatives


Heartfelt Creations Products:
HCPC-3882 Candlelit Poinsettia Cling Stamp Set
HCPC-3883 Glow of Christmas Cling Stamp Set
HCD1-7252 Starry Night Decorative Die
HCPP3-452 12 x 12 Cardstock Pack of 25 - White
RACP468 Ranger Archival Ink Pad - Jet Black
359760 Embossing Powder - Gold
RAHT Heat It Craft Tool
352854 Metal Tip for Adhesive Bottles
159723 Designer Dries Clear Adhesive
D120601 Darice Adhesive Foam Strips
HCDA2-450 Stack and Store Daubers-Pack of 30
359848 Spellbinders Tool N' One
411231 5pc. Acrylic Block Set

Other Products:
Aged Mahogany, Candied Apple, Worn Lipstick, Mustard Seed, Mowed Lawn, Pine Needles, Carved Pumpkin and Hickory Smoke Distress inks, Versamark ink, watercolor cardstock, paint Brushes and green pearls.


Instructions:
Stamp the images from Glow of Christmas Cling Stamp Set on a piece of watercolor cardstock using Jet Black Archival Ink Pad and color it using Aged Mahogany, Candied Apple, Worn Lipstick, Mustard Seed, Mowed Lawn, Pine Needles, Carved Pumpkin and Hickory Smoke Distress inks. Trim down the watercolored panel to 5" x 3 7/8". Stamp the sentiment from Candlelit Poinsettia Cling Stamp Set on the lower left corner of the watercolored panel using Versamark ink and heat emboss it using RAHT Heat It Craft Tool and Gold Embossing Powder.

Take a slightly larger piece of white cardstock and ink it with 
Aged Mahogany and Candied Apple Distress inks. Adhere the watercolor panel on it. Die cut a piece of white cardstock using the die from Starry Night Decorative Die and ink it with Aged Mahogany and Candied Apple Distress inks. Adhere this piece behind the watercolored panel as shown using Darice Adhesive Foam Strips. Adhere the resulting piece on a 6 3/4" x 5" top folding white card base using  Darice Adhesive Foam Strips. Add some green pearls to the die cut to add finishing touch.


Hope you like it...

Thank you for visiting today... :)
Nupur
Disclosure : Compensated affiliate links used when possible  at NO additional cost to you.. Thank you! 

Wednesday, 3 April 2019

DT at Scrapy Land Challenges

Hello friends,
Today I have a good news to share with you all
I am honored and happy to announce that I am joining Scrapy Land Challenges Design Team
I hope to inspire you all with my creations to join in the challenges and be in the running to win some prizes...
For those who don't know Scrapy Land  carries over 55 brands of dies, so chances are you have a few of the brands in your stash!  You can see all the brands carried under the Products category. And to join in the challenge all you have to do is create anything be it mixed media, card, altered art, basically anything and link it back to Scrapy Land Challenges. You just have to make sure that you have used a die cut from any of the brands that Scrapy Land sells. There will be 2 winners for every challenge and each winner will receive a generous $10 gift certificate to Scrapy Land.

Isn't that easy-peasy!!!
So what are you waiting for start creating and linking back to the Scrapy Land Challenges.

So here is what I created for Challenge #111

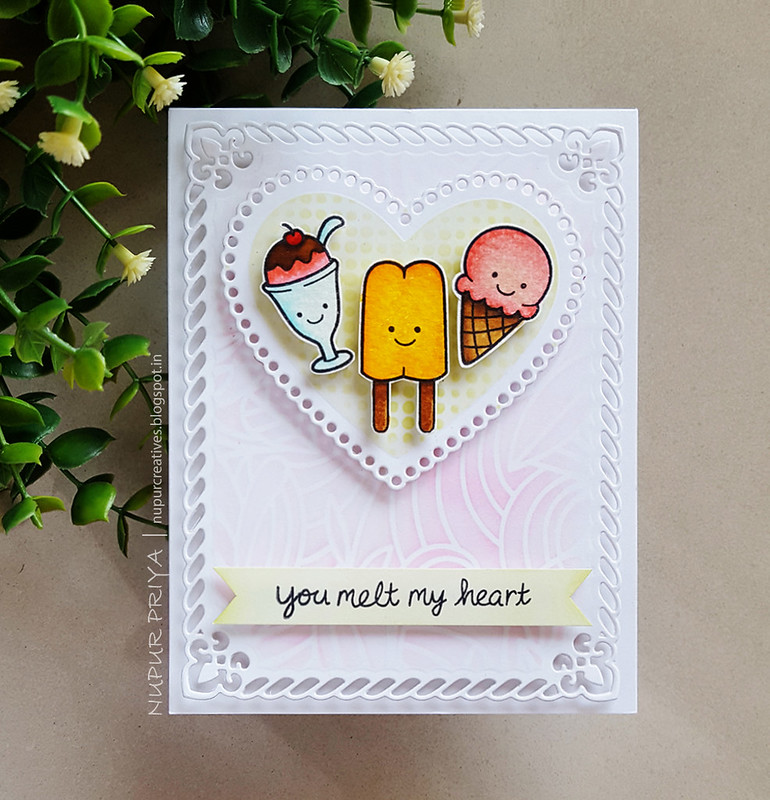
You Melt My Heart 1

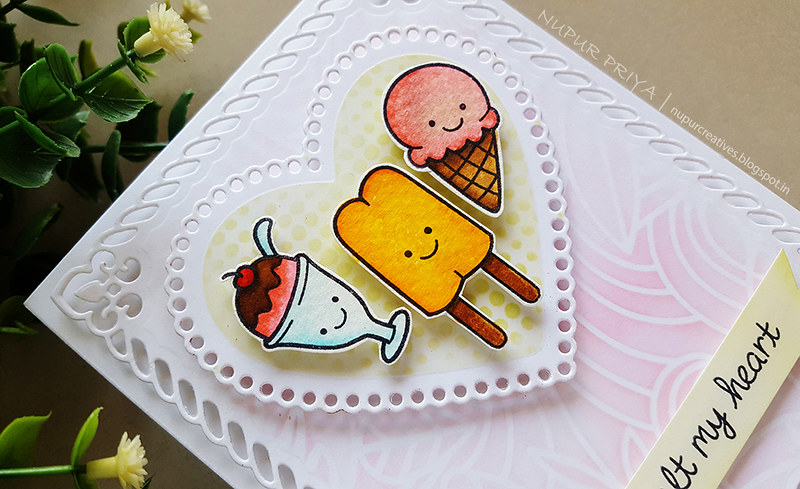
You Melt My Heart 2

Supplies:
Spellbinders A2 Valiant Honor
Spellbinders Lace Hearts
Lawn Fawn Here's the Scoop
Tim Holtz Dot Fade Stencil
Mudra Swirly Leaf Stencil
Zig Clean Color Brush Pens
Worn Lipstick Distress Ink
Twisted Citron Distress Ink
Black Archival Ink

Canson Watercolor Cardstock 

Instructions:
I started by stamping the images from Lawn Fawn Here's the Scoop stamp set on a piece of Canson Watercolor Cardstock with Black Archival Ink and then coloring it in with my Zig Clean Color Brush Pens. I don't have the matching dies so I fussy cut all the images. I have stamped the sentiment from the same set of stamp set, cut the cardstock into a banner and inked it lightly with Twisted Citron Distress Ink

Then I die cut white cardstock using Spellbinders A2 Valiant Honor and Spellbinders Lace Hearts dies. You can find similar dies here and here. I inked the Valiant Honor die cut using Mudra Swirly Leaf Stencil and Worn Lipstick Distress Ink. The Lace Hearts die cut was inked using  Tim Holtz Dot Fade Stencil and Twisted Citron Distress Ink. Then I layered adhered all the die cuts and images as shown using foam tape.


Hope you like it... visit Scrapy Land Challenges to see what the other design team members have created and get your creative juices flowing... Hope to see you there!

Thank you for visiting today... :)

Nupur

Linking to LAWN FAWNATICS CHALLENGE 50 – FUN WITH FOOD!


Disclosure : Compensated affiliate links used when possible  at NO additional cost to you.. Thank you! 

Wednesday, 7 November 2018

Cluster background stamping

Hello Friends and welcome to Heartfelt Wednesday.

Today I have a clean and simple card to share with you all.

I have used the cluster stamping technique to create the background for this card.
This is a great technique to get more use out of your sentiment stamps and it also creates an interesting background without drawing the attention from the focal image.
Read till the end for the full supply list and the instructions for this card.
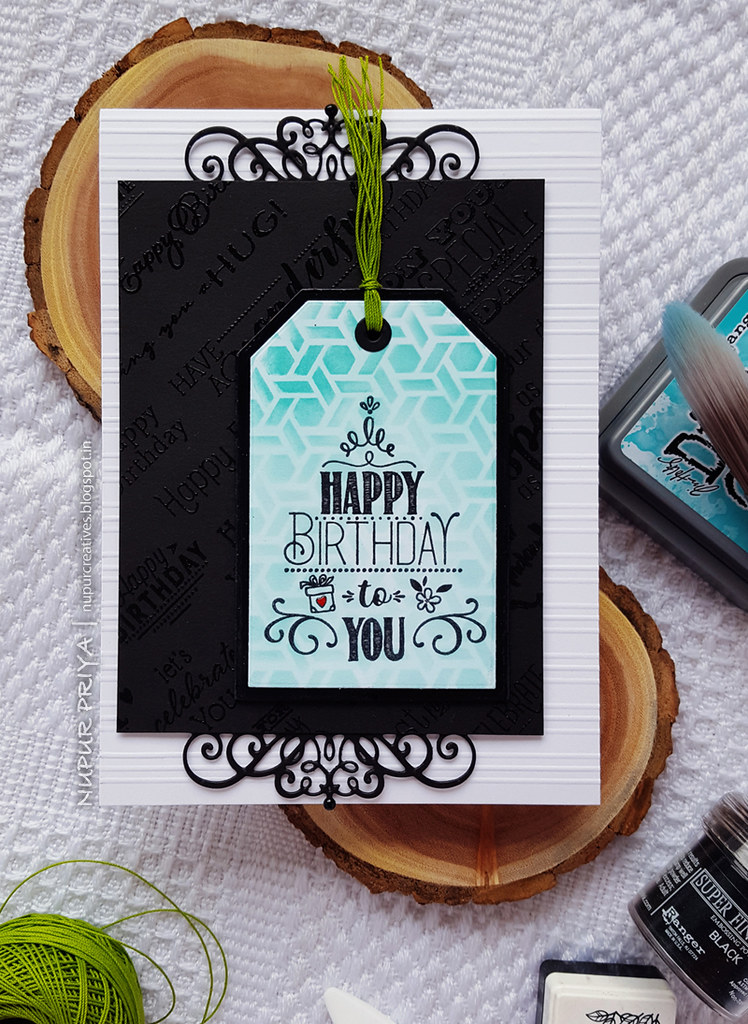
20180703_155739

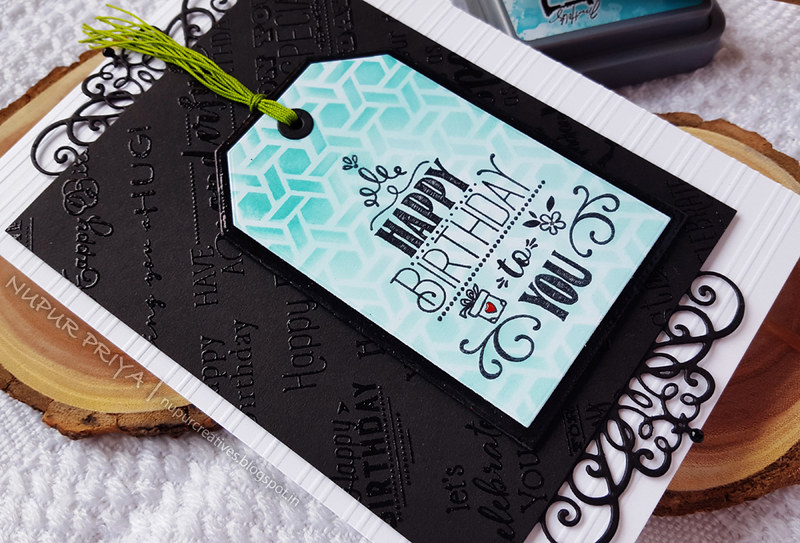
20180703_155744

Heartfelt Creations Products:
HCPC-3843 Special Birthday Sentiments Cling Stamp Set

HCPC-3844 For My Friend Sentiments Cling Stamp Set
HCPC-3845 Just For You Sentiments Cling Stamp Set
HCPC-3846 Thank You Sentiments Cling Stamp Set
HCPC-3847 Celebrate Love Sentiments Cling Stamp Set
HCPC-3848 Cheerful Note Sentiments Cling Stamp Set
HCD1-7201 Ticket and Tags Die
HCD1-7203 Ornamental Tags Die
HCPP3-452 12 x 12 Cardstock Pack of 25 - White

RACP468 Ranger Archival Ink Pad - Jet Black
359848 Spellbinders Tool N' One
RAHT Heat It Craft Tool
D120601 Darice Adhesive Foam Strips
3D1844 3-D Crystal Lacquer

NU650 Nuvo Crystal Drops - Ebony Black

Other Products:
Black Versafine Ink or Versamark InkSalty Ocean Distress Oxide ink, Ranger Black embossing powder, iCraft Stencil, Clarity Stencil brushes, MISTI, MS Scoreboard, Red marker, Black cardstock and Green Twine.


Instructions:
Take a 5" x 7" White cardbase and score the front horizontally to create textured background as shown.


Take birthday sentiments stamps from Special Birthday Sentiments Cling Stamp Set,  For My Friend Sentiments Cling Stamp Set, Just For You Sentiments Cling Stamp Set, Thank You Sentiments Cling Stamp Set, Celebrate Love Sentiments Cling Stamp Set and Cheerful Note Sentiments Cling Stamp Set and arrange them diagonally on the MISTI door. Stamp it with Black Versafine Ink or Versamark Ink on a piece of black cardstock and heat emboss it using Ranger Black embossing powder and Heat It Craft Tool. Trim this piece to 4 1/4" x 5 1/2". Die cut 2 pieces of black cardstock using the die from Ornamental Tags Die and adhere it at the top and bottom of the stamped piece we just created so that the total height reaches 7". Adhere it on the scored card front as shown using Darice Adhesive Foam Strips..


Stamp the sentiment from Special Birthday Sentiments Cling Stamp Set on a piece of white cardstock and die cut it using the tag dies from Ticket and Tags Die. Ink it with Salty Ocean Distress Oxide ink using  Clarity Stencil brushes. Die cuat a piece of black cardstock using the larger tag die from the same set and create the tag using all the pieces. Thread few pieces of green twine through the tag hole and adhere it to the card front using Darice Adhesive Foam Strips. Color in the tiny heart on the tag using red marker and cover it with 3-D Crystal Lacquer. Add drops of Ebony Black Nuvo Crystal Drops on the die cut to add finishing touch.


Hope you like it...

Thank you for visiting today... :)
Nupur
Disclosure : Compensated affiliate links used when possible  at NO additional cost to you.. Thank you!