Hello friends & welcome to another Heartfelt Wednesday inspiration post...
Today we have a brand new special release today which is a must have if you make handmade flowers... Heartfelt Creations has launched Leafy Accents Stamp, Die and Mold today ... They are quick and easy to use, these leafy accents stamp, die, and shaping mold are wonderful tools to create dimensional leaves when time is running short, tired hands need a break or a design calls for a significant number of leaves!
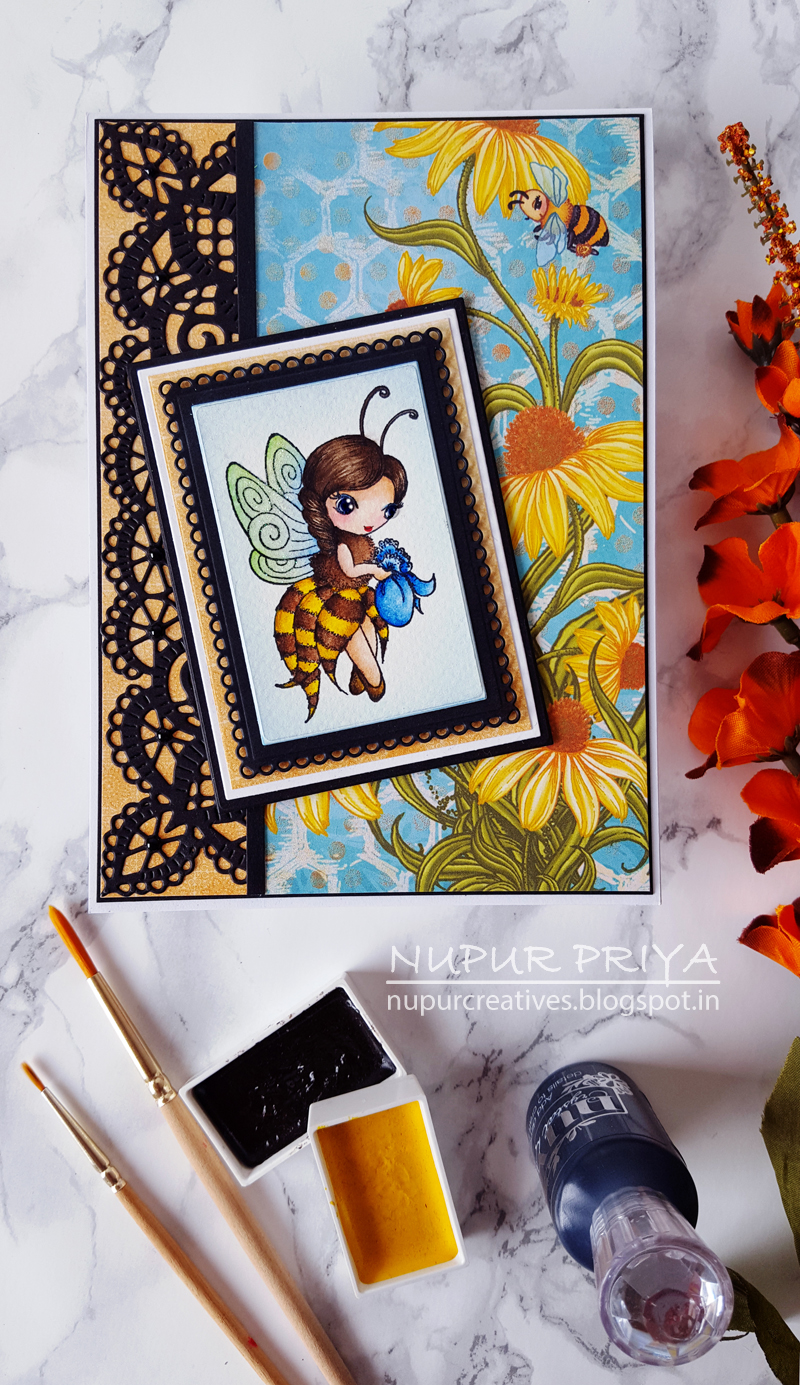
I loved using this set for the floral arrangement on my card... cuts the creating time significantly and look at the leaf details!!! Simply gorgeous... I have a 1 year old hyper-active baby who demands all my time and attention and that leaves me with very little crafty time. Leafy Accents Stamp, Die and Mold set is God sent for me... I can safely say I will be using these leaves for most of my floral projects now...
Special Savings: The Leafy Accents Stamp, Die and Mold Bundle has a 10% discount, only available until June 30th or while supplies last! Get yours today to ensure that you don't miss out on this special savings!
Now moving on to my card for today.
( Read till the end for the supply list & instructions on how to make this card. )

Heartfelt Creations Products:
HCPC 3644 Birds & Blooms Cling Stamp Set
HCPC-3819 Small Sweet Peony Cling Stamp Set
HCPC-3831 Sweet as Honey Cling Stamp Set
HCPC 3835 Leafy Accents Cling Stamp SetHCD1-757 Leafy Branch Die
HCD1-7173 Small Sweet Peony Die
HCD2-7191 Intricate Swirl Frames Die
HCD2-7192 Eyelet Lace Frames Die
HCD1-7193 Leafy Accents Die
HCFB1-464 3D Floral Basics Shaping Mold
HCFB1-467 3D Leafy Accents Shaping Mold
HCST1-401 Deluxe Flower Shaping Kit
HCPP3-452 12 x 12 Cardstock Pack of 25 - White
RACP468 Ranger Archival Ink Pad - Jet Black
RACP451 Ranger Archival Ink Pad - Coffee
Today we have a brand new special release today which is a must have if you make handmade flowers... Heartfelt Creations has launched Leafy Accents Stamp, Die and Mold today ... They are quick and easy to use, these leafy accents stamp, die, and shaping mold are wonderful tools to create dimensional leaves when time is running short, tired hands need a break or a design calls for a significant number of leaves!
I loved using this set for the floral arrangement on my card... cuts the creating time significantly and look at the leaf details!!! Simply gorgeous... I have a 1 year old hyper-active baby who demands all my time and attention and that leaves me with very little crafty time. Leafy Accents Stamp, Die and Mold set is God sent for me... I can safely say I will be using these leaves for most of my floral projects now...
Special Savings: The Leafy Accents Stamp, Die and Mold Bundle has a 10% discount, only available until June 30th or while supplies last! Get yours today to ensure that you don't miss out on this special savings!
Now moving on to my card for today.
( Read till the end for the supply list & instructions on how to make this card. )
HCPC 3644 Birds & Blooms Cling Stamp Set
HCPC-3819 Small Sweet Peony Cling Stamp Set
HCPC-3831 Sweet as Honey Cling Stamp Set
HCPC 3835 Leafy Accents Cling Stamp SetHCD1-757 Leafy Branch Die
HCD1-7173 Small Sweet Peony Die
HCD2-7191 Intricate Swirl Frames Die
HCD2-7192 Eyelet Lace Frames Die
HCD1-7193 Leafy Accents Die
HCFB1-464 3D Floral Basics Shaping Mold
HCFB1-467 3D Leafy Accents Shaping Mold
HCST1-401 Deluxe Flower Shaping Kit
HCPP3-452 12 x 12 Cardstock Pack of 25 - White
RACP468 Ranger Archival Ink Pad - Jet Black
RACP451 Ranger Archival Ink Pad - Coffee
NU650 Nuvo Crystal Drops - Ebony Black
NU667 Nuvo Crystal Drops - Red Berry
HCDA2-450 Stack and Store Daubers-Pack of 30
173842 Scor-Pal Measuring & Scoring Board
D110305 Stamp Mat Pad
359848 Spellbinders Tool N' One
31510 Funnel Tray
411231 5pc. Acrylic Block Set
532423-KIT Sizzix Vagabond 2 With Solo Wafer-Thin Die Adapter
159723 Designer Dries Clear Adhesive
352854 Metal Tip for Adhesive Bottles
D120601 Darice Adhesive Foam Strips
Other Products:
Morning Dew Nuvo Crystal Drops and Pearls.
Instructions:
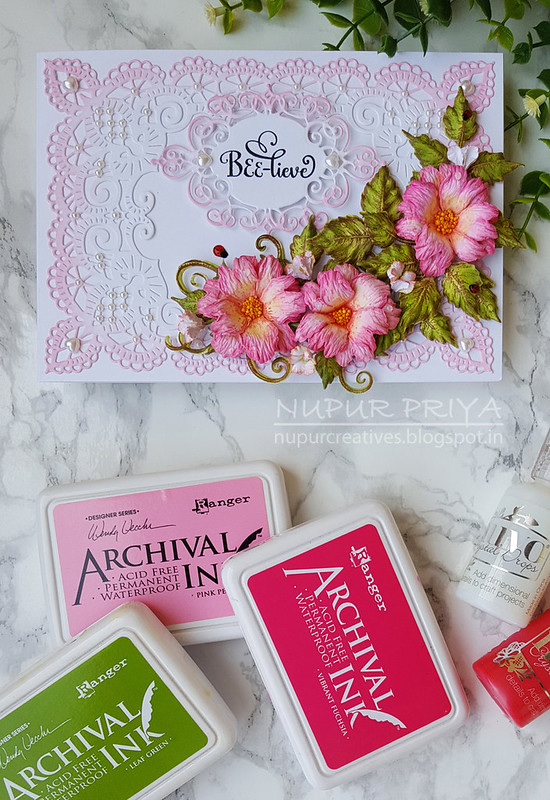
Die cut a piece of white cardstock using the largest die from Eyelet Lace Frames Die set. Ink the edges using Pink Peony Archival Ink and Stack and Store Daubers. Adhere it to a 5" x 7" white cardbase. Stamp the sentiment from Sweet as Honey Cling Stamp Set on a piece of white cardstock using Black Archival Ink and die cut this piece using the die from Intricate Swirl Frames Die. Adhere it on the card front as shown using Darice Adhesive Foam Strips.
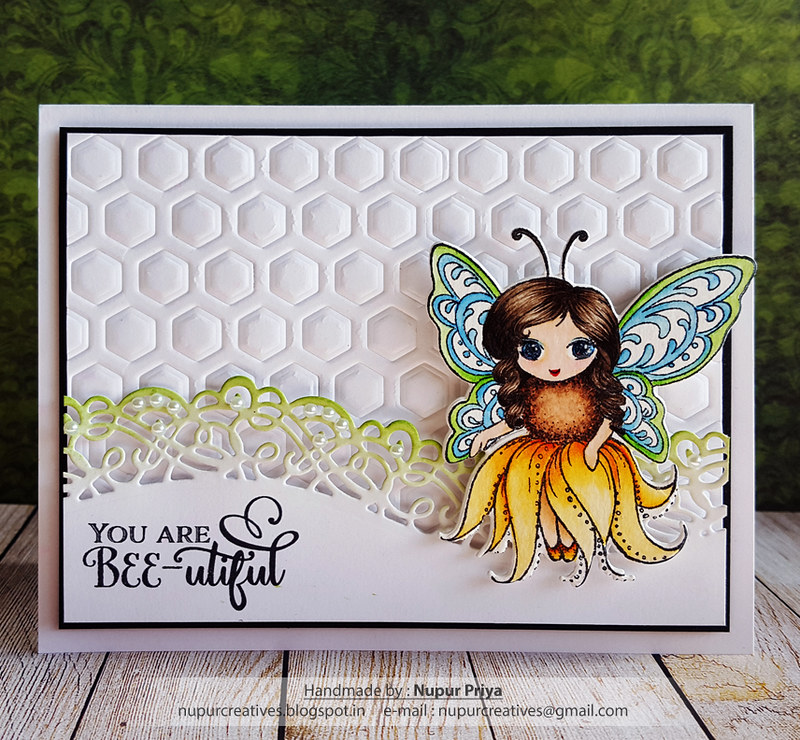
Stamp the leaves from Leafy Accents Cling Stamp Set on a piece of white cardstock using Coffee Archival Ink and die cut them using matching dies from Leafy Accents Die. Ink them using Leaf Green Archival Ink and Stack and Store Daubers. Shape them using 3D Leafy Accents Shaping Mold.
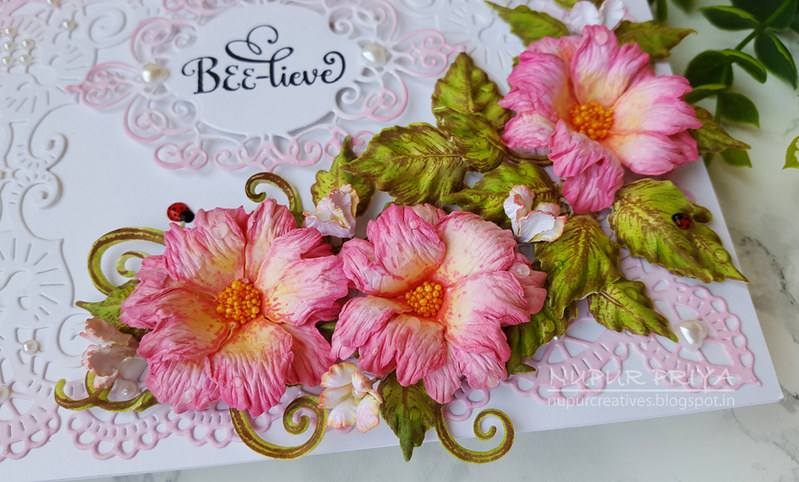
Stamp the Peonies from Small Sweet Peony Cling Stamp Set on a piece of white cardstock using Vibrant Fuchsia Archival Ink and die cut the using matching dies from Small Sweet Peony Die. Ink the flowers using Vibrant Fuchsia and Buttercup Archival Inks and Stack and Store Daubers. Shape them using Floral Basics Shaping Mold and Deluxe Flower Shaping Kit. Add a little Go ManGo Prills from Bright Ideas set to the flower centers.
Stamp the flowers from Birds & Blooms Cling Stamp Set on a piece of white cardstock using Buttercup Archival Ink and die cut the using matching dies from Leafy Branch Die. Shape them using Deluxe Flower Shaping Kit. Add a pollen form Small Pastel Pearl Stamens to the flower centers and ink the edges lightly using Vibrant Fuchsia Archival Ink and Stack and Store Daubers.
Arrange and adhere the flowers and leaves on the card as shown. Make some ladybugs using Ebony Black & Red Berry Nuvo Crystal Drops and glue them to the flower arrangement. Add some drops of Morning Dew Nuvo Crystal Drops on the flower arrangement & some pearls on the die cuts to add finishing touch.
NU667 Nuvo Crystal Drops - Red Berry
HCDA2-450 Stack and Store Daubers-Pack of 30
173842 Scor-Pal Measuring & Scoring Board
D110305 Stamp Mat Pad
359848 Spellbinders Tool N' One
31510 Funnel Tray
411231 5pc. Acrylic Block Set
532423-KIT Sizzix Vagabond 2 With Solo Wafer-Thin Die Adapter
159723 Designer Dries Clear Adhesive
352854 Metal Tip for Adhesive Bottles
D120601 Darice Adhesive Foam Strips
Other Products:
Morning Dew Nuvo Crystal Drops and Pearls.
Instructions:
Die cut a piece of white cardstock using the largest die from Eyelet Lace Frames Die set. Ink the edges using Pink Peony Archival Ink and Stack and Store Daubers. Adhere it to a 5" x 7" white cardbase. Stamp the sentiment from Sweet as Honey Cling Stamp Set on a piece of white cardstock using Black Archival Ink and die cut this piece using the die from Intricate Swirl Frames Die. Adhere it on the card front as shown using Darice Adhesive Foam Strips.
Stamp the leaves from Leafy Accents Cling Stamp Set on a piece of white cardstock using Coffee Archival Ink and die cut them using matching dies from Leafy Accents Die. Ink them using Leaf Green Archival Ink and Stack and Store Daubers. Shape them using 3D Leafy Accents Shaping Mold.
Stamp the Peonies from Small Sweet Peony Cling Stamp Set on a piece of white cardstock using Vibrant Fuchsia Archival Ink and die cut the using matching dies from Small Sweet Peony Die. Ink the flowers using Vibrant Fuchsia and Buttercup Archival Inks and Stack and Store Daubers. Shape them using Floral Basics Shaping Mold and Deluxe Flower Shaping Kit. Add a little Go ManGo Prills from Bright Ideas set to the flower centers.
Stamp the flowers from Birds & Blooms Cling Stamp Set on a piece of white cardstock using Buttercup Archival Ink and die cut the using matching dies from Leafy Branch Die. Shape them using Deluxe Flower Shaping Kit. Add a pollen form Small Pastel Pearl Stamens to the flower centers and ink the edges lightly using Vibrant Fuchsia Archival Ink and Stack and Store Daubers.
Arrange and adhere the flowers and leaves on the card as shown. Make some ladybugs using Ebony Black & Red Berry Nuvo Crystal Drops and glue them to the flower arrangement. Add some drops of Morning Dew Nuvo Crystal Drops on the flower arrangement & some pearls on the die cuts to add finishing touch.
Hope you like it...
Thank you for visiting today... :)