Friday, 1 March 2019

Pansy Photo Fridge Magnet

Hello and welcome to Heartfelt inspiration post...

As some of you might know that Heartfelt Creations DT call was going on... and that also means that the current team will also undergo the voting process before continuing with the next term... and so I need your help so that I can continue for another year... Today is the last day for voting

So if you like my work then please click on the link below and vote for me along with 4 more designers. Thank you all for the support :)
Design Team Voting

Moving on to my project for today...
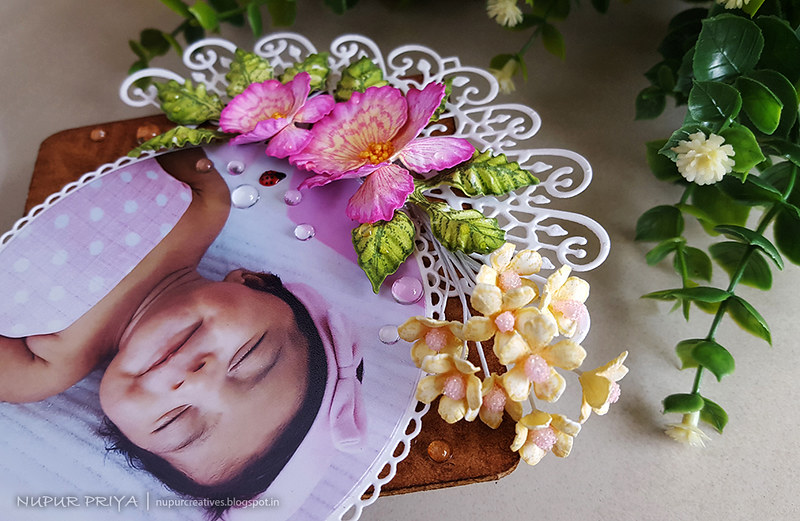
I have made a fridge magnet using the Pansy from latest Burst of spring release by Heartfelt Creations and I think this is also the first time I am posting the photograph of my daughter on my blog...I took this photograph when she was just 1 month old .... I still can't believe she will turn 2 year old in less than 2 months!!!
This is my favorite photograph of my little princess...I clicked 50-60 photographs in this photo session but I loveeee this one... something about her smile while sleeping melts my heart and calms me everytime I look at it.... I have it as my wallpaper on my PC and a BIIIIIG canvas in my living room and now I made this fridge magnet too....
Enough of my rambling... I won't bore you more with my love for this pic... hehehe
Scroll down for more close-ups, full supply list and insrtuctions...
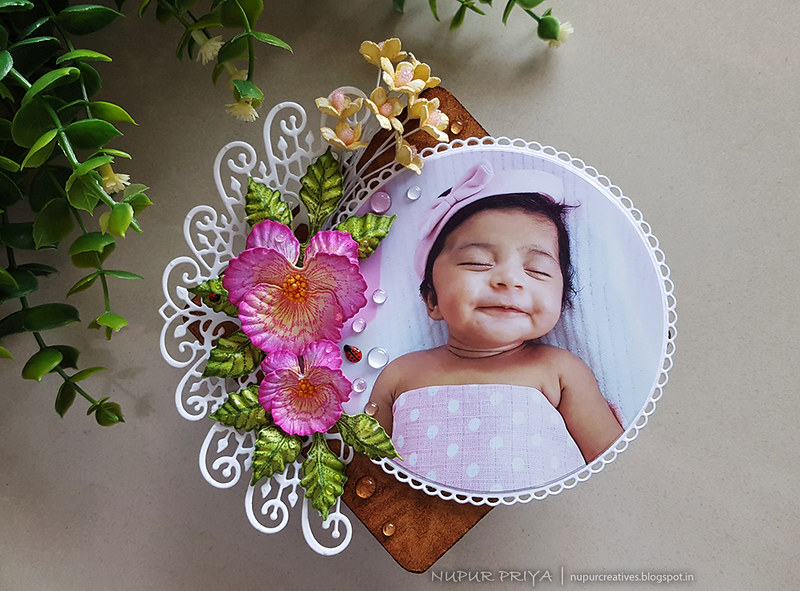
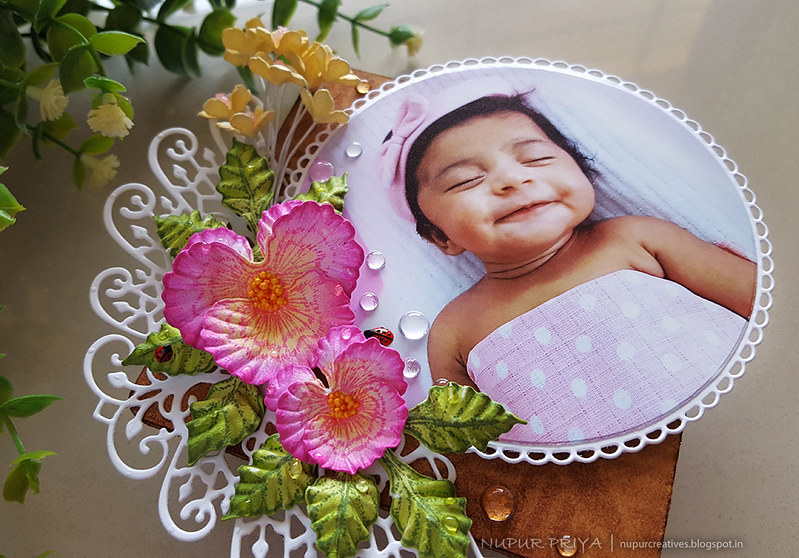
Pansy Photo Fridge Magnet by Nupur Priya_1

Pansy Photo Fridge Magnet by Nupur Priya_2

Pansy Photo Fridge Magnet by Nupur Priya_3

Heartfelt Creations Products:
HCPC-3855 Floral Fashionista Cling Stamp Set
HCPC-3862 Cheery Pansy Cling Stamp Set 
HCD1-7144 Decorative Medallion Die
HCD1-754 Eyelet Circle and Basics Small Dies
HCD1-7155 Circle Basics Large Dies
HCD1-7215 Floral Fashionista Die
HCD1-7222 Cheery Pansy Die
HCPP3-452 12 x 12 Cardstock Pack of 25 - White
RACP451 Ranger Archival Ink Pad - Coffee
RACP614 Ranger Archival Ink Pad - Magenta Hue
RACP632 Ranger Archival Ink Pad - Buttercup
RACP482 Ranger Archival Ink Pad - Olive
RACP436 Ranger Archival Ink Pad - Leaf Green
NU650 Nuvo Crystal Drops - Ebony Black
NU667 Nuvo Crystal Drops - Red Berry
ANC852 Bright Ideas Prills - Go ManGo
HCS1-457-3 Pastel Bead Stamens-Medium
352854 Metal Tip for Adhesive Bottles
159723 Designer Dries Clear Adhesive
D120601 Darice Adhesive Foam Strips
486490 Bottle Cap Inc Vintage Magnets .5 Inch
HCFB1-473 3D Pansy Shaping Mold
HCST1-401 Deluxe Flower Shaping Kit
HCDA2-450 Stack and Store Daubers-Pack of 30
359848 Spellbinders Tool N' One
411231 5pc. Acrylic Block Set

Other Products:
4" x 4" MDF coaster, Dew drops crystal, Mudra Warli Pattern Stencil, Photograph and Morning Dew Nuvo Crystal Drops.

Instructions:
Ink the MDF coaster lightly with Coffee Ranger Archival Ink Pad and then use the Mudra Warli Pattern stencil and ink the coaster again with the same ink to create a subtle pattern on the coaster.

Die cut a piece of white cardstock using the die from Decorative Medallion Die and adhere it to one of the corners of the coaster as shown. Die cut the photograph using the largest die from Circle Basics Large Dies and adhere it to the white die cut made using the eyelet die from Eyelet Circle and Basics Small Dies. Adhere pieces of Darice Adhesive Foam Stripsto the back of this piece and adhere another piece of white die cut made using the same die we used to die cut the photograph. Adhere the final piece to the coaster as shown using Designer Dries Clear Adhesive.

Stamp the pansy image from the Cheery Pansy Cling Stamp Set on a piece of white cardstock with Magenta Hue Archival Ink Pad and color it with the same ink on the edges and Buttercup  Archival Ink in the center using Stack and Store Daubers. Stamp the leaves from the same set with Olive Archival Ink Pad and color with Leaf Green Archival Ink . Die cut them using the matching dies from Cheery Pansy Die. Shape them using 3D Pansy Shaping Mold and Deluxe Flower Shaping Kit. Add a little Go ManGo Prills to the Pansy centers.

Stamp the smallest size flowers from Floral Fashionista Cling Stamp Set on a piece of white cardstock with Buttercup  Archival Ink Pad and color it with the same ink using  Stack and Store Daubers. Shape the flowers using  Deluxe Flower Shaping Kit. Add a pastel pink stamen from Pastel Bead Stamens to the flower centers and form them into a bunch.

Arrange and adhere all the flowers and leaves on the coaster as shown. Add few drops of Morning Dew Nuvo Crystal Drops to the flowers and leaves. Glue few ladybugs made using Ebony Black and Red Berry Nuvo Crystal Drops on the floral arrangement. Add few dew drops crystals around the floral arrangement to add finishing touch. Glue the Bottle Cap Inc Vintage Magnets on the back of the coaster to convert it to a fridge magnet.


Hope you like it...

Thank you for visiting today... :)
Nupur
Disclosure : Compensated affiliate links used when possible  at NO additional cost to you.. Thank you! 

Wednesday, 20 February 2019

No Line Coloring + Voting Help

Hello and welcome to Heartfelt Wednesday 

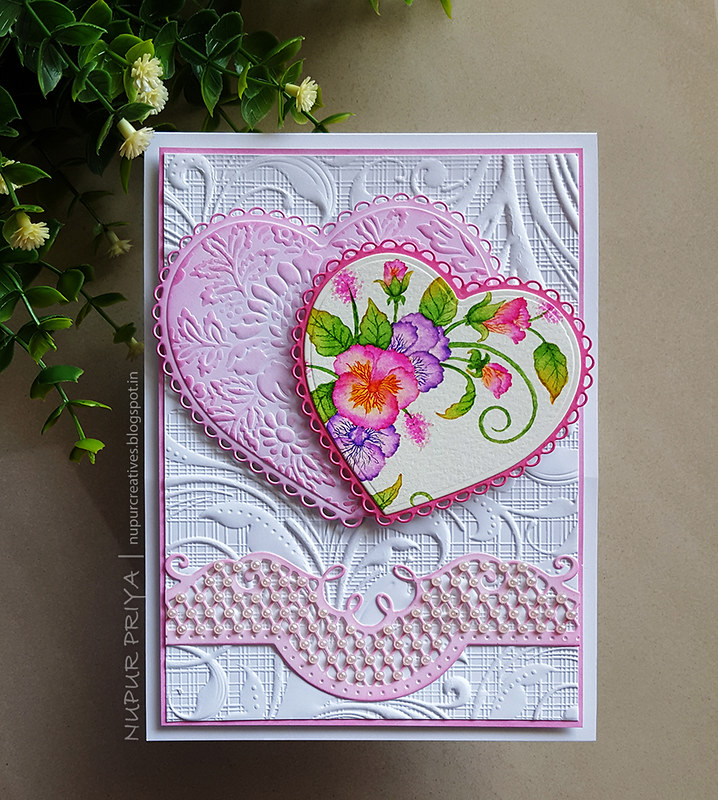
February is the month of love and so today I am here to share a love theme card with you all...
I love the traditional pinks and reds when it comes to love cards so the card is pretty pink with white.
But before we move on to the card I have a small request...
As some of you might know that Heartfelt Creations DT call is going on... and that also means that the current team will also undergo the voting process before continuing with the next term... and so I need your help so that I can continue for another year... So if you like my work then please click on the link below and vote for me along with 4 more designers. Thank you all for the support :)
Design Team Voting

And if you want to join the DT then there is still time to apply for the Heartfelt Creations DT Call
(the deadline is 27th Feb 2019)

Coming back to my card for today...read till the end for the full supply list and instructions for this card

No Line coloring Pansy Hearts Card_Nupur Creatives_1

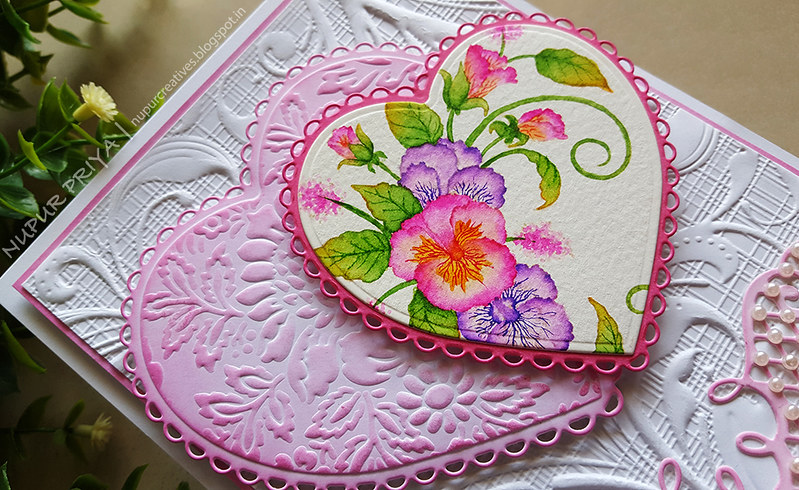
No Line coloring Pansy Hearts Card_Nupur Creatives_2

Heartfelt Creations Products:
HCPC-3864 Delicate Pansy Spray Cling Stamp Set
HCD1-7162 Eyelet Hearts Die
HCD1-7212 Petite Pocket Accents Die
Zig Clean Color Real Brush Markers
HCDA2-450 Stack and Store Daubers-Pack of 30
359848 Spellbinders Tool N' One
411231 5pc. Acrylic Block Set
HCPP3-452 12 x 12 Cardstock Pack of 25 - White
D120601 Darice Adhesive Foam Strips

Other Products:

Antique Linen Distress ink, Picked Raspberry Distress Oxide ink, Spellbinders Tan Embossing Mat, Crafter's Companion Regency Swirls 3D Embossing Folder, Cuttlebug  Anna Griffin  Juliet Damask Embossing Folder, watercolor cardstock and pearls.

Instructions:

Emboss a piece of 4 1/2" x 6 1/2" piece of white cardstock using Crafter's Companion Regency Swirls 3D Embossing Folder and glue it to a slightly bigger piece of white cardstock inked lightly with Picked Raspberry Distress Oxide ink. Adhere it to a white cardbase using Darice Adhesive Foam Strips.

Stamp the image from Delicate Pansy Spray Cling Stamp Set on a piece of watercolor cardstock using Antique Linen Distress ink and color it using Zig Clean Color Real Brush Markers. Die cut it using the heart die from Eyelet Hearts Die.


Die cut 2 pieces of white cardstock using the 2 largest eyelet heart die from Eyelet Hearts Die. Ink the smaller one with Picked Raspberry Distress Oxide ink with heavy pressure to get a darker shade. Adhere the colored image from previous step on this die cut.


Open the Cuttlebug Anna Griffin Juliet Damask Embossing Folder and put the bigger eyelet heart die cut face down on one side of the embossing folder without taking it out of the die and put the Spellbinders Tan Embossing Mat on top then run it through the die cutting machine to emboss the design on the die cut. Now ink the die cut with Picked Raspberry Distress Oxide ink lightly. Adhere both the heart pieces to the card front as shown using Darice Adhesive Foam Strips.


Die cut a piece of white cardstock using the die from Petite Pocket Accents Die. Ink it lightly with Picked Raspberry Distress Oxide ink, trim it down to 4 1/2" and glue it to the card front as shown. Add few pearls to the die cut to add finishing touch.


Hope you like it...

Thank you for visiting today... :)
Nupur
Disclosure : Compensated affiliate links used when possible  at NO additional cost to you.. Thank you! 

Wednesday, 13 February 2019

Mother's Day Card with Petite Pansy

Hello Friends and welcome to Heartfelt Wednesday...
Today is 2nd Wednesday of the month so guess what...
Yes it is a new release day...

Burst of Spring Collection !

Celebrate the highly anticipated arrival of the upcoming spring season with the new Burst of Spring Collection from Heartfelt Creations! A favorite among flower enthusiasts, the delicate pansy flower is often one of the first florets to be added to the freshly worked soil as the glorious garden season arrives. The soft, velvety petals of these cheerful blossoms always invite a quick caress while being transplanted near the front of the garden bed, where they are sure to be admired by all! Awaken your senses dulled from the winter season with an enchanting and deeply hued decorative paper collection filled with sweet and amiable pansy flowers, along with whimsical fluttering butterflies! Beautiful blues, happy yellows and deep purples set the tone for charming pansy clusters and bouquets encompassed in finely illustrated details from lace like accents to intricate brocades! A wonderful compilation of beautifully detailed cling stamp sets and coordinating dies bring an assortment of sprightly pansy floral sprays, perky arrangements, as well as elegant pansy frames, perfect for adding a cheerful springtime feel to all of your handmade greeting cards, layouts and altered art pieces. The coordinating pansy flower stamp, die, and flower shaping mold come together to create several differing sized pansy flowers ideal for creating your very own dimensional pansy bouquets as realistic as those found in the flower bed! So, join together with us in craft rooms everywhere…before the frost is out of the ground and gardening season arrives…as we anticipate and create our very own version of the appearance of spring with the Burst of Spring Collection!

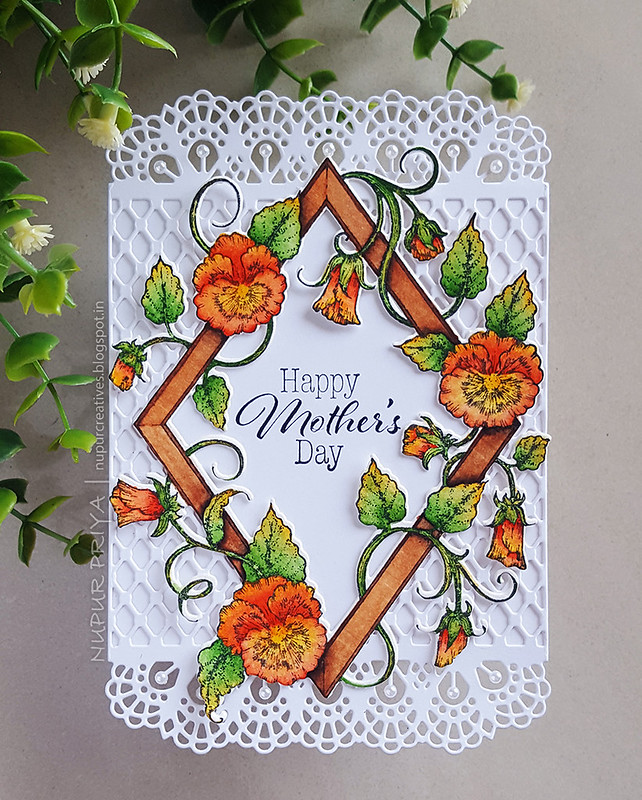
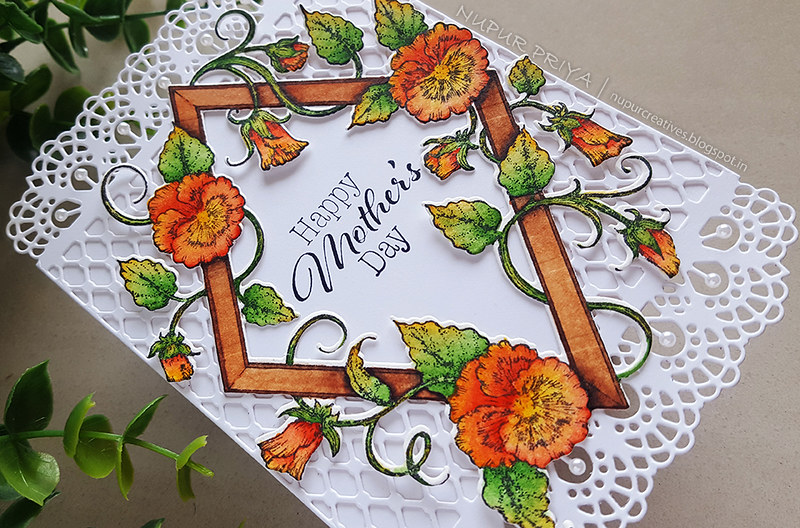
I am sharing a simple yet beautiful Mother's Day card made with Petite Pansy Frame Cling Stamp Set and  Diamonds & Lace Die.

Read till the end for the complete list of supplies and instructions for this card.
Mother's Day Card_1

Mother's Day Card_2

Heartfelt Creations Products:

HCPC-3846 Thank You Sentiments Cling Stamp Set
HCPC-3865 Petite Pansy Frame Cling Stamp Set
HCD1-7225 Petite Pansy Frame Die
HCD1-7229 Diamonds & Lace Die
HCPP3-452 12 x 12 Cardstock Pack of 25 - White
RACP468 Ranger Archival Ink Pad - Jet Black
159723 Designer Dries Clear Adhesive
352854 Metal Tip for Adhesive Bottles

Other Products:

Gansai Tambi watercolors, paint brush, watercolor cardstock  and pearls

Instructions:

Stamp the image from Petite Pansy Frame Cling Stamp Set on a piece of watercolor cardstock using Jet Black Archival Ink and color it using Gansai Tambi watercolors. Die cut this colored image using the Petite Pansy Frame Die. 

Die cut a piece of white cardstock using the largest die from Diamonds & Lace Die. Cut out the center so that it does not show from the gap inside the colored image from last step. Adhere the colored image on the die cut.


Take a 4 1/4" x ____" side folding card base and stamp the sentiment from Thank You Sentiments Cling Stamp Set using Jet Black Archival Ink in the center. Adhere the diecut from previous step above the card base as shown. Add few pearls t the die cut to add finishing touch.


Hope you like it...

Thank you for visiting today... :)
Nupur
Disclosure : Compensated affiliate links used when possible  at NO additional cost to you.. Thank you! 

Sunday, 10 February 2019

As Special As You Are

Hello and welcome to Heartfelt inspiration...


Before we move ahead with today's card I have some exciting news for you all...

Have you ever wanted to join the Heartfelt Creations Design Team ???
If your answer is yes then now is the time... click on the link below to apply

Heartfelt Creations DT Call
(the deadline is 27th Feb 2019)

Now moving on to my card...
Some of you might know that I have a almost 2 year old toddler who keeps me on my toes... so what do I do when I have to make a quick card???
Of course Heartfelt dies and stamps come to my rescue... 
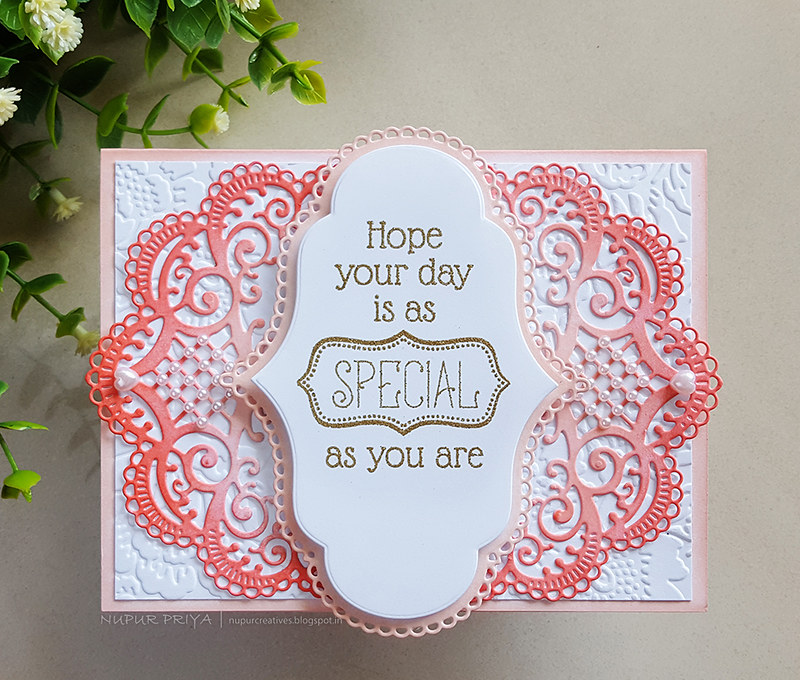
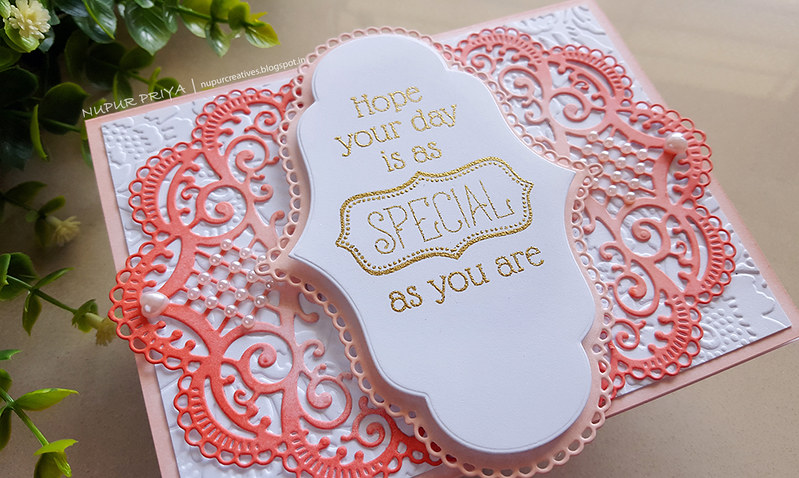
The beautiful dies make it so easy to create a pretty and embellished card and the stamps cover almost all the sentiments you can need for birthdays, Anniversaries, Sympathy, Thank you and much more... I have used Special Birthday Sentiments Cling Stamp Set for this particular card.
I added a embossed background and heat embossed my sentiment.
Lastly I have just inked the die cuts and added few pearls to finish it and add an extra layer of sophistication.
This card looks beautiful in white too ( I always try a few arrangements prior to coloring and I liked it in pure white too...I think it would look fantastic for a wedding or anniversary card with the proper sentiment)
Read till the end for the full supply list and instructions for this card
Your Special Day Card_Nupur Creatives_1

Your Special Day Card_Nupur Creatives_2

Heartfelt Creations Products:
HCPC-3843 Special Birthday Sentiments Cling Stamp Set
HCD1-7146 Festive Holiday Die
HCD1-7202 Album Tags and Accents Die
HCPP3-452 12 x 12 Cardstock Pack of 25 - White
352854 Metal Tip for Adhesive Bottles
159723 Designer Dries Clear Adhesive
D120601 Darice Adhesive Foam Strips
HCDA2-450 Stack and Store Daubers-Pack of 30
RAHT Heat It Craft Tool
173842 Scor-Pal Measuring & Scoring Board
359848 Spellbinders Tool N' One
411231 5pc. Acrylic Block Set

Other Products:

Abandoned Coral and Tattered Rose Distress inks, Versamark ink, Wow Metallic Gold Sparkle Embossing Powder, Cuttlebug Anna Griffin Embossing Folder Poppy and pearls

Instructions:

Ink the border of 4 1/4" x 5 1/2" white cardbase lightly with Tattered rose Distress Ink. Emboss a 4" x 5 1/4" piece of white cardstock using Poppy Anna Griffin Embossing Folder and adhere it to the card base.

Die cut 2 pieces of white cardstock using the die from  Festive Holiday Die. Ink them with Abandoned Coral and Tattered Rose Distress inks and adhere them to the card base as shown. Stamp the sentiment from Special Birthday Sentiments Cling Stamp Set with Versamark ink on white cardstock and heat emboss it using Wow Metallic Gold Sparkle Embossing Powder and Heat It Craft Tool. Die cut it using the die from Album Tags and Accents Die. Die cut another piece of white cardstock using the layering eyelet die. Adhere both using Darice Adhesive Foam Strips in the card center. Finish off the card by adding few pearls on the die cuts.

Hope you like it...

Thank you for visiting today... :)
Nupur
Disclosure : Compensated affiliate links used when possible  at NO additional cost to you.. Thank you! 

Thursday, 31 January 2019

Tulip Time with Diamond Dies

Hello and welcome to Heartfelt inspiration...
It's a special launch week and we have some gorgeous dies for you guys...
Heartfelt Creations has been coming out with special mini release since last year and manages to surprise us each time with yet another amazing collection....
This time it is Diamond Dies... This collection has 4 sets of dies:
Diamond Basics Die
Eyelet Diamond Die
Lacy Diamond Die
Diamonds & Lace Die

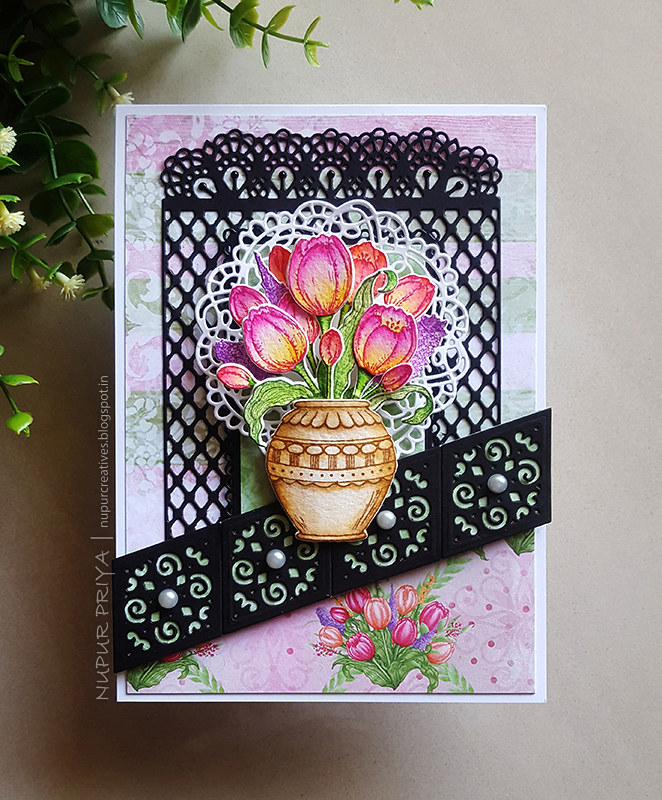
I have used Diamonds & Lace Die  for today's card along with some of the older dies and Tulip Time collection. I have tried to show you how you can use the small accent pieces in a different way to create a border.


Read till the end for complete list of supplies and instruction for this card.

Tulip Time with Diampond Dies 1

Tulip Time with Diampond Dies 2

Heartfelt Creations Products:
HCPC-3859 Tulip Bouquet Cling Stamp Set
HCPC-3860 Tulip Vase & Fillers Cling Stamp Set
HCD1-7179 Butterfly Kisses Decorative Die
HCD2-7189 Eyelet Rectangle & Basics Die
HCD1-7219 Tulip Bouquet Die
HCD1-7220 Tulip Vase & Fillers Die
HCD1-7229 Diamonds & Lace Die
 HCDP1-298 Tulip Time Paper Collection
HCPP3-452 12 x 12 Cardstock Pack of 25 - White
HCPP1-438-1 Paper Pack of 10 - Black
NU650 Nuvo Crystal Drops - Ebony Black
Zig Clean Color Real Brush Markers
352854 Metal Tip for Adhesive Bottles
159723 Designer Dries Clear Adhesive
D120601 Darice Adhesive Foam Strips
RACP482 Ranger Archival Ink Pad - Olive
RACP524 Ranger Archival Ink Pad - Vibrant Fuchsia
RACP451 Ranger Archival Ink Pad - Coffee
RACP494 Ranger Archival Ink Pad - Majestic Violet

Other Products: Watercolor Cardstock and Pearls.

Instructions:  Cut a piece of 4 3/4" x 6 3/4" piece of pattern paper from Tulip Time Paper Collection and adhere it to a  5" x 7" white cardbase. Cut another piece of 5 3/4" x 2 1/2" pattern paper from the same paper collection and cut the top at an angle so that the height of left side is 1" and the right side is 2 1/2". Adhere this piece to the bottom of the card.

Die cut a piece of black cardstock using the largest die fromDiamonds & Lace Die  and adhere it to the 
card font as shown. Die cut a piece of black cardstock using the eyelet die from Eyelet Rectangle & Basics Die and adhere it to center of the previous die cut using Darice Adhesive Foam Strips. Mat it with a piece of pattern paper from Tulip Time Paper Collection. Die cut a piece of white cardstock using the doily die from Butterfly Kisses Decorative Die and adhere it to the Eyelet Rectangle layer using Darice Adhesive Foam Strips.

Die cut 4 pieces of black cardstock using the dies from Diamonds & Lace Die  and adhere them on a strip of pattern paper as shown to create a border. Trim the extra pattern paper and adhere this border on the card front as shown using Darice Adhesive Foam Strips.

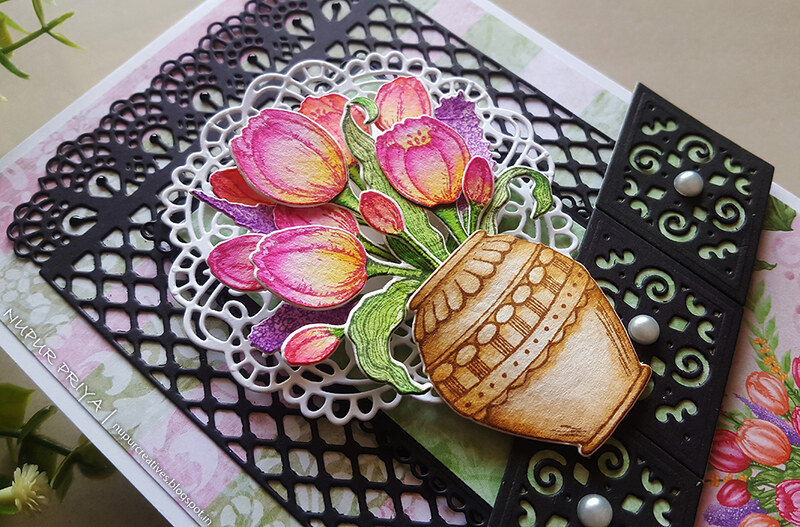
Stamp the vase from Tulip Vase & Fillers Cling Stamp Set on a piece of watercolor cardstock using Coffee Archival Ink  Stamp the flowers from the same stamp set on watercolor cardstock using Vibrant FuchsiaMajestic Violet and Olive Archival Inks. Die cut these using matching dies from Tulip Vase & Fillers Die. Stamp the flower bunch image from Tulip Bouquet Cling Stamp Set  on watercolor cardstock using Vibrant Fuchsia and Olive Archival Inks. Die cut these using matching die from Tulip Bouquet Die. Color all the images using Zig Clean Color Real Brush Markers. Curve the Vase slightly to give a rounded shape.

Arrange and adhere all the flowers, leaves and vase as shown. Add few pearls and Ebony Black Nuvo Crystal Drops to the die cuts to add finishing touch.


Hope you like it...

Thank you for visiting today... :)
Nupur
Disclosure : Compensated affiliate links used when possible  at NO additional cost to you.. Thank you!