Hello friends & welcome to Heartfelt Wednesday...
Today we have a surprise release for you all...
Frame a Card Dies !!!
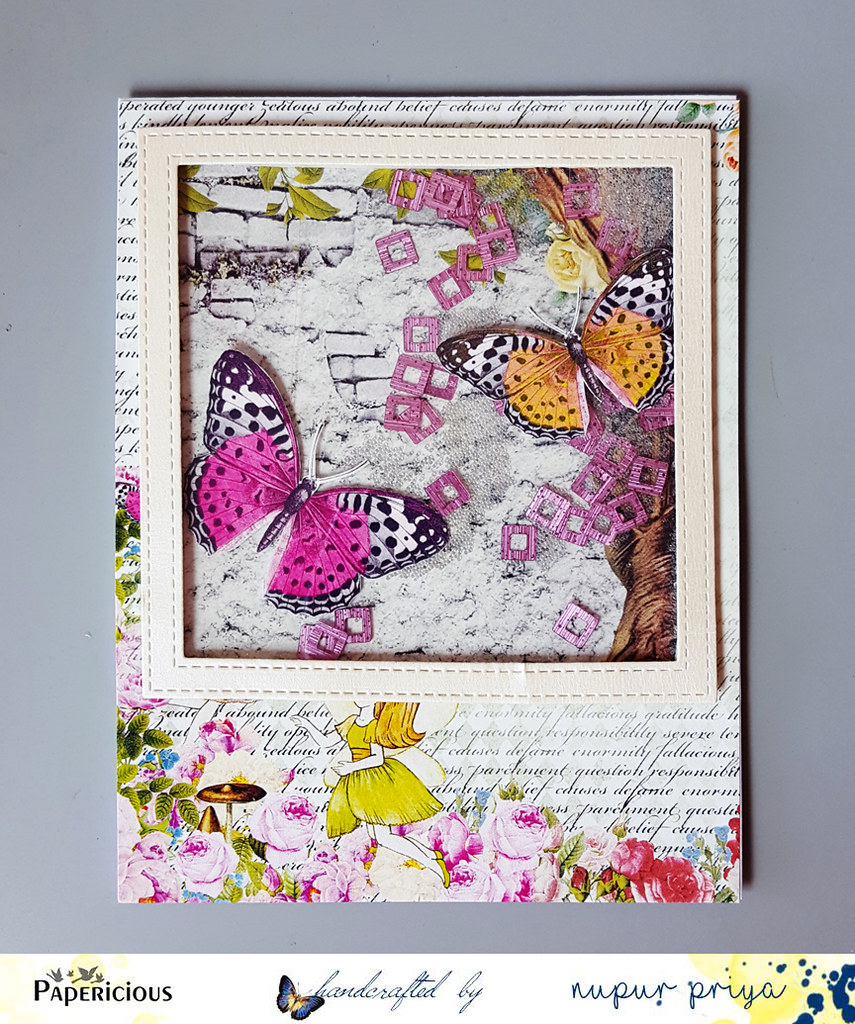
This release has 4 beautiful die sets & I have made a card with these dies
Read till the end for the supply list & instructions for this project...
Heartfelt Creations Products:
HCPC-3824 Fluttering Butterfly Cling Stamp Set
HCD1-7161 Sweetheart Borders Die
HCD1-7178 Fluttering Butterfly Die
HCD1-7179 Butterfly Kisses Decorative Die
HCD2-7189 Eyelet Rectangle & Basics Die
HCD2-7191 Intricate Swirl Frames Die
HCD2-7192 Eyelet Lace Frames Die
HCDP1-289 Butterfly Dreams Paper Collection
359843 Embossing Tinsel - Bridal
RAHT Heat It Craft Tool
HCDA2-450 Stack and Store Daubers-Pack of 30
173842 Scor-Pal Measuring & Scoring Board
D110305 Stamp Mat Pad
359848 Spellbinders Tool N' One
31510 Funnel Tray
411231 5pc. Acrylic Block Set
532423-KIT Sizzix Vagabond 2 With Solo Wafer-Thin Die Adapter
352854 Metal Tip for Adhesive Bottles
159723 Designer Dries Clear Adhesive
D120601 Darice Adhesive Foam Strips
HCPP3-452 12 x 12 Cardstock Pack of 25 - White
242174 Vellum Paper
Other Products:
Worn Lipstick and Cracked Pistachio Distress Oxide ink, Versamark Ink, Cuttlebug Anna Griffin Acanthus Embossing Folder and pearls .
Instructions :
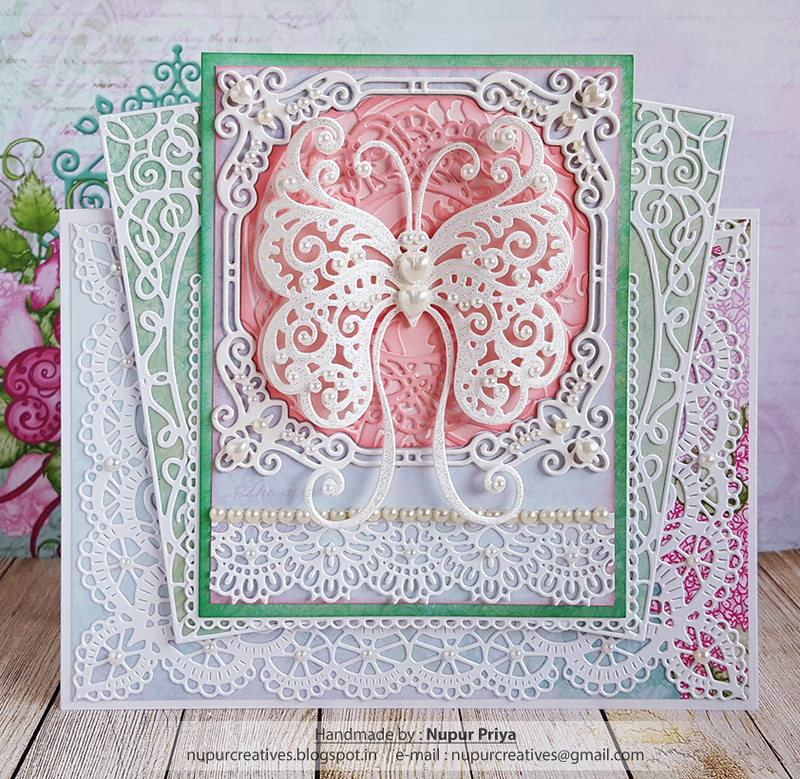
Cut a piece of 4 3/4" x 6 3/4" patterned paper from Butterfly Dreams Paper Collection and adhere it on a 5" x 7" white cardbase. Die cut a piece of white cardstock using Eyelet Lace Frames Die and adhere it on the card base.
Take a piece of 4 1/4" x 5 3/4" patterned paper from same paper collection and adhere it on a same sized piece of white cardstock. Ink the edges using Cracked Pistachio Distress Oxide ink. Now take a piece of 4" x 5 1/2" contrasting patterned paper from same paper collection, ink the edges with Worn Lipstick Distress Oxide ink and mat it on the previous piece.
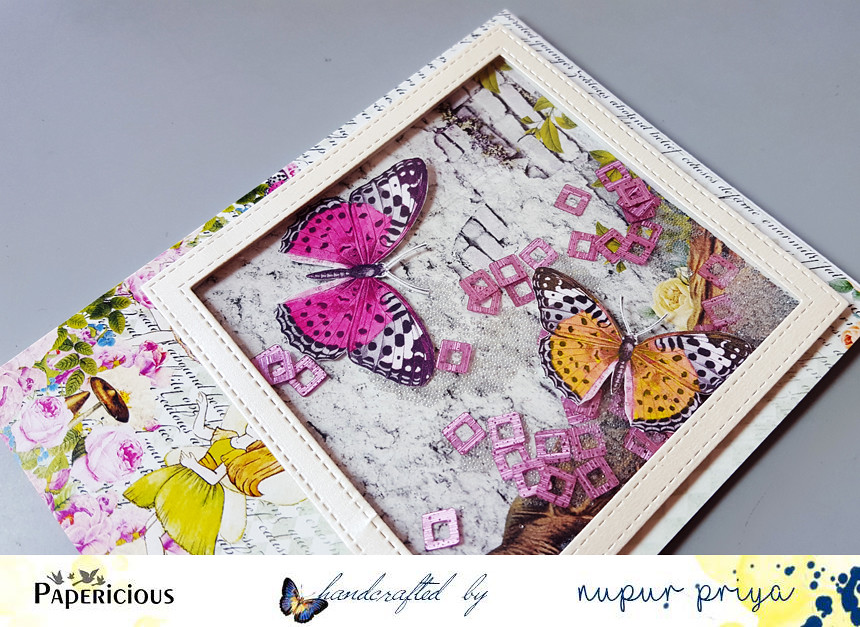
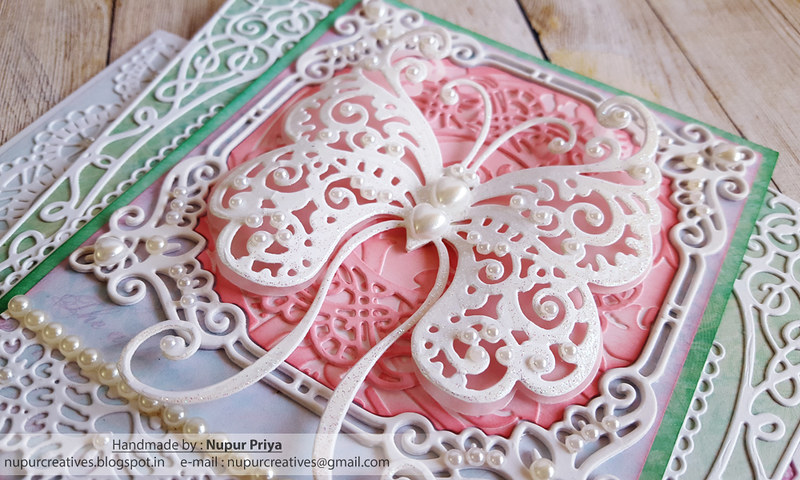
Die cut 4 pieces of white cardstock using Butterfly Kisses Decorative Die and adhere them together to make a thicker piece. Take the inner piece from one of the die cuts and emboss it using Cuttlebug Anna Griffin Acanthus Embossing Folder. Die cut a piece of white cardstock using the decorative circle die from Butterfly Kisses Decorative Die. Ink both of them using Worn Lipstick Distress Oxide ink. Die cut a border from white cardstock using Sweetheart Borders Die. Adhere all the die cuts as shown. Stamp the butterfly from Fluttering Butterfly Cling Stamp Set using versamark ink on a piece of white cardstock and heat emboss using Heat It Craft Tool and Bridal Embossing Tinsel. Die cut the stamped image using Fluttering Butterfly Die. Die cut a piece of Vellum Paper using only the outline die of the same butterfly. Curl the wings of both the butterflies and adhere them in the center. Adhere the resulting butterfly in the center of the die cut as shown. Die cut a piece of white cardstock using Eyelet Rectangle & Basics Die and adhere it behind this panel as shown.
Die cut a piece of white cardstock using Intricate Swirl Frames Die and adhere it on a piece of pattern paper. Adhere this on a piece of white cardstock and then trim off the extra paper around the edges of the die cut. cut the die cut in half and then adhere both the pieces as shown behind the previous panel. Adhere the resulting panel to the card base. Decorate the die cuts with pearls to add finishing touches.
Today we have a surprise release for you all...
Frame a Card Dies !!!
This release has 4 beautiful die sets & I have made a card with these dies
Read till the end for the supply list & instructions for this project...
Heartfelt Creations Products:
HCPC-3824 Fluttering Butterfly Cling Stamp Set
HCD1-7161 Sweetheart Borders Die
HCD1-7178 Fluttering Butterfly Die
HCD1-7179 Butterfly Kisses Decorative Die
HCD2-7189 Eyelet Rectangle & Basics Die
HCD2-7191 Intricate Swirl Frames Die
HCD2-7192 Eyelet Lace Frames Die
HCDP1-289 Butterfly Dreams Paper Collection
359843 Embossing Tinsel - Bridal
RAHT Heat It Craft Tool
HCDA2-450 Stack and Store Daubers-Pack of 30
173842 Scor-Pal Measuring & Scoring Board
D110305 Stamp Mat Pad
359848 Spellbinders Tool N' One
31510 Funnel Tray
411231 5pc. Acrylic Block Set
532423-KIT Sizzix Vagabond 2 With Solo Wafer-Thin Die Adapter
352854 Metal Tip for Adhesive Bottles
159723 Designer Dries Clear Adhesive
D120601 Darice Adhesive Foam Strips
HCPP3-452 12 x 12 Cardstock Pack of 25 - White
242174 Vellum Paper
Other Products:
Worn Lipstick and Cracked Pistachio Distress Oxide ink, Versamark Ink, Cuttlebug Anna Griffin Acanthus Embossing Folder and pearls .
Instructions :
Cut a piece of 4 3/4" x 6 3/4" patterned paper from Butterfly Dreams Paper Collection and adhere it on a 5" x 7" white cardbase. Die cut a piece of white cardstock using Eyelet Lace Frames Die and adhere it on the card base.
Take a piece of 4 1/4" x 5 3/4" patterned paper from same paper collection and adhere it on a same sized piece of white cardstock. Ink the edges using Cracked Pistachio Distress Oxide ink. Now take a piece of 4" x 5 1/2" contrasting patterned paper from same paper collection, ink the edges with Worn Lipstick Distress Oxide ink and mat it on the previous piece.
Die cut 4 pieces of white cardstock using Butterfly Kisses Decorative Die and adhere them together to make a thicker piece. Take the inner piece from one of the die cuts and emboss it using Cuttlebug Anna Griffin Acanthus Embossing Folder. Die cut a piece of white cardstock using the decorative circle die from Butterfly Kisses Decorative Die. Ink both of them using Worn Lipstick Distress Oxide ink. Die cut a border from white cardstock using Sweetheart Borders Die. Adhere all the die cuts as shown. Stamp the butterfly from Fluttering Butterfly Cling Stamp Set using versamark ink on a piece of white cardstock and heat emboss using Heat It Craft Tool and Bridal Embossing Tinsel. Die cut the stamped image using Fluttering Butterfly Die. Die cut a piece of Vellum Paper using only the outline die of the same butterfly. Curl the wings of both the butterflies and adhere them in the center. Adhere the resulting butterfly in the center of the die cut as shown. Die cut a piece of white cardstock using Eyelet Rectangle & Basics Die and adhere it behind this panel as shown.
Die cut a piece of white cardstock using Intricate Swirl Frames Die and adhere it on a piece of pattern paper. Adhere this on a piece of white cardstock and then trim off the extra paper around the edges of the die cut. cut the die cut in half and then adhere both the pieces as shown behind the previous panel. Adhere the resulting panel to the card base. Decorate the die cuts with pearls to add finishing touches.
Hope you like this card...
Thank you for visiting today... :)

Disclosure : Compensated affiliate links used when possible at NO additional cost to you.. Thank you!
Disclosure : Compensated affiliate links used when possible at NO additional cost to you.. Thank you!