Wednesday, 10 October 2018

Buttons & Blooms Collection

Hello friends and welcome to  Heartfelt wednesday...
It is a new release week...Woohoooo 
And this month we have 

  BUTTONS AND BLOOMS COLLECTION

Beautiful floral fabric, delicate trimmings and charming buttons accompanied by delicate hand-stitch work, and precise patchwork become a most exquisite project in the hands of an experienced seamstress! While sewing may not be a talent gifted to everyone, you can now experience the same stunning results in your paper crafts with the Buttons and Blooms Collection from Heartfelt Creations! An inviting paper collection bound in delightfully vibrant hues of bright blues, happy yellows, pretty pinks and robust reds boast alluring patterns of dainty florals, fun filled polka dots and quilt like patterns which will beckon you to caress them as you would the beautiful bolts of material found in your favorite fabric store! “Applique” cards and scrapbook pages quickly and with ease using the striking yet functional premade card panels designed in varying sizes and patterns! Embellish your handmade creations with a variety of hand-stitched accents found in the gorgeous assembling of cling stamp sets and coordinating dies. Choose from delicately embroidered sentiments, stitched banners, charming patchwork pockets, decorative patches and rick rack trim, all lending that personal handmade touch to your crafty creations! Lastly, “hem” your projects with fetching blossoms that have been skillfully illustrated to give them the appearance of having been cut from patchwork fabric! Designed in three varying sizes, these pleasing posies are ideal for using as flat embellishments, or layered to create wonderful dimensional blooms! So, come along with us…grab your shears, patterned papers and patchwork die cuts and let’s head into the craft room! Bobbins, threads and sewing machines not required!

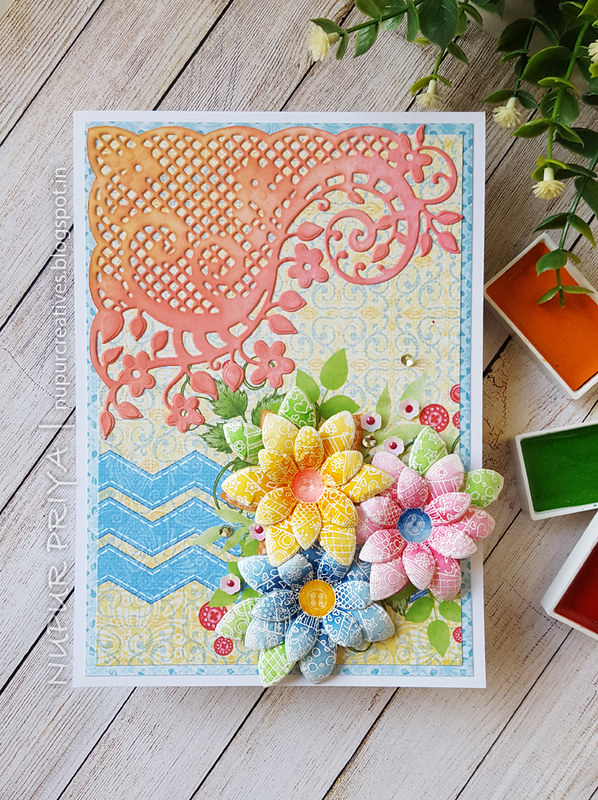
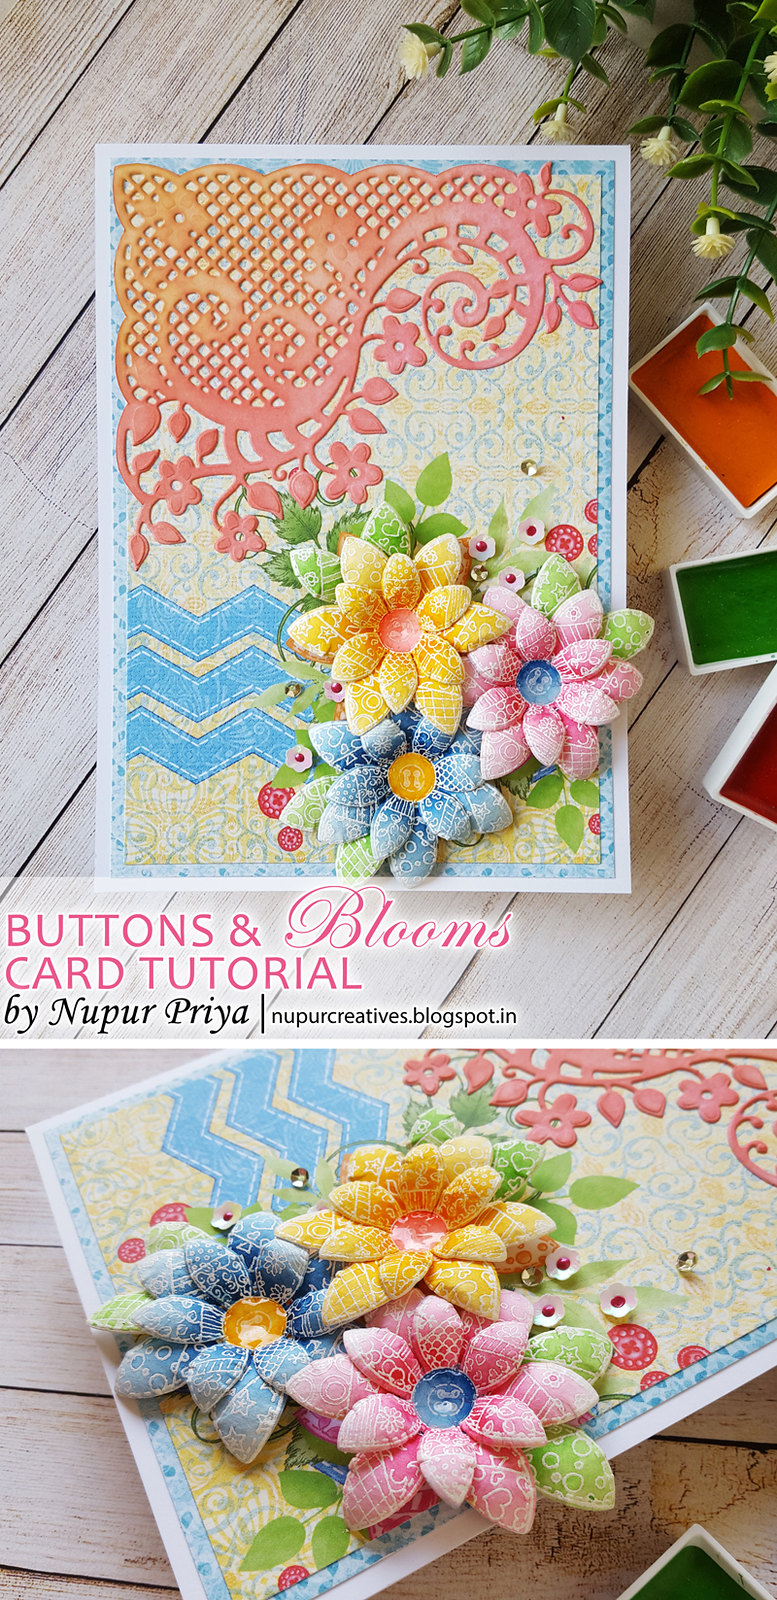
I have made a card using this collection for today's inspiration.
Keep reading for the list of supplies and full instructions for this card.
Buttons & Blooms Card Tutorial pinterest
Buttons & Blooms Card 1
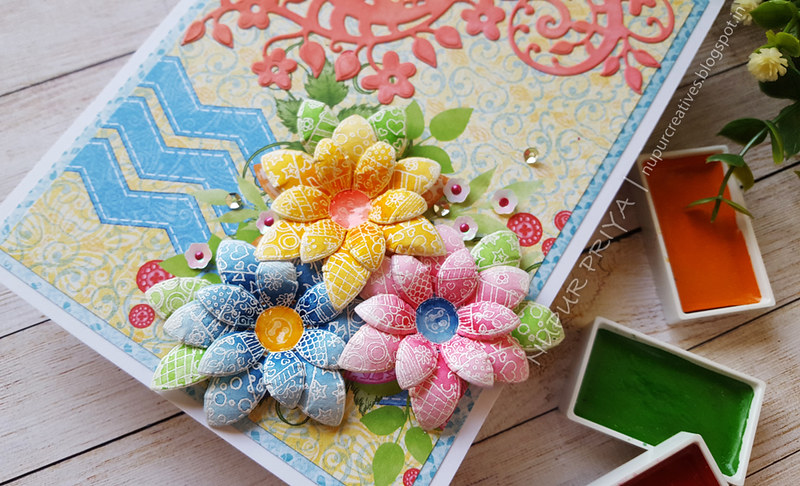
Buttons & Blooms Card 2
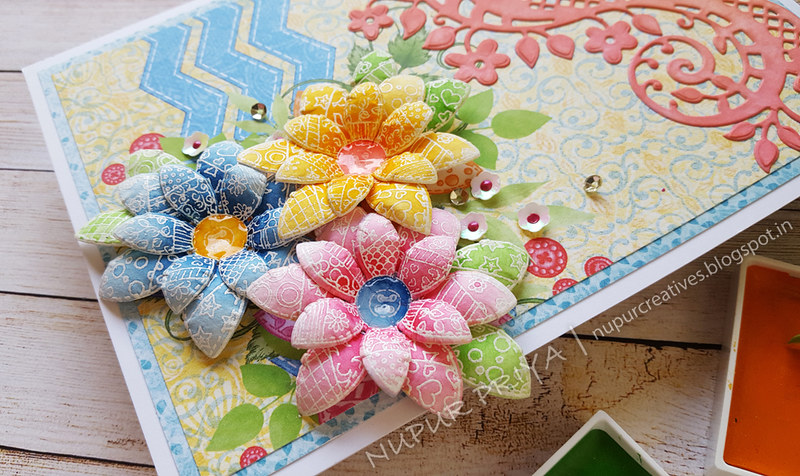
Buttons & Blooms Card 3

Heartfelt creations Products:
HCPC-3849 Buttons and Blooms Cling Stamp Set
HCD1-778 Fleur Borders and Pockets Die
HCD1-7205 Buttons and Blooms Die
 HCDP1-295 Buttons and Blooms Paper Collection
HCPP3-452 12 x 12 Cardstock Pack of 25 - White
Nuvo Crystal Drops - Rhubarb Crumble
RPEJ685 Embossing Powder - White
352854 Metal Tip for Adhesive Bottles
159723 Designer Dries Clear Adhesive
3D1844 3-D Crystal Lacquer
RAHT Heat It Craft Tool
HCST1-401 Deluxe Flower Shaping Kit
173842 Scor-Pal Measuring & Scoring Board
D110305 Stamp Mat Pad
411231 5pc. Acrylic Block Set
359848 Spellbinders Tool N' One
HCDA2-450 Stack and Store Daubers-Pack of 30


Other products:
Spiced Marmalade and Picked Raspberry Distress inks, Canson watercolor cardstockVersamark InkGansai Tambi WatercolorsKoi Watrbrush, White flower sequins and gold sequins

Instructions:
Stamp the flowers from Buttons and Blooms Cling Stamp Set using Versamark Ink on  watercolor cardstock and heat emboss them using Heat It Craft Tool and White Embossing Powder. Color them using Koi Watrbrush and blue, pink, orange, yellow and green colors from Gansai Tambi Watercolors. Die cut them using matching dies from Buttons and Blooms Die. Shape all the flowers using Deluxe Flower Shaping Kit. Use the green flower petals as leaves for the flower arrangement. Apply 3-D Crystal Lacquer to the flower centers. 

Cut two 4 3/4" x 6 3/4" and 4 1/2" x 6 1/2" pieces of pattern papers from Buttons and Blooms Paper Collection and adhere them on a 5" x 7" white cardbase. Die cut a piece of white cardstock using the die from Fleur Borders and Pockets Die. Ink it with Spiced Marmalade and Picked Raspberry Distress inks using Stack and Store Daubers. Adhere it to the top left corner of the card front. Arrange and adhere the flowers and leaves as shown on the bottom right corner of the card front. Glue some white flower sequins and gold sequins around the flower arrangement. Put tiny drops of Rhubarb Crumble Nuvo Crystal Dropsto the white flower sequins.


Hope you like it...

Thank you for visiting today... :)
Nupur
Disclosure : Compensated affiliate links used when possible  at NO additional cost to you.. Thank you! 

Wednesday, 3 October 2018

Faux Stained Glass Shaker Card

Faux Stained Glass Shaker Card pinterest
Hello friends and welcome to Heartfelt Creations inspiration post.

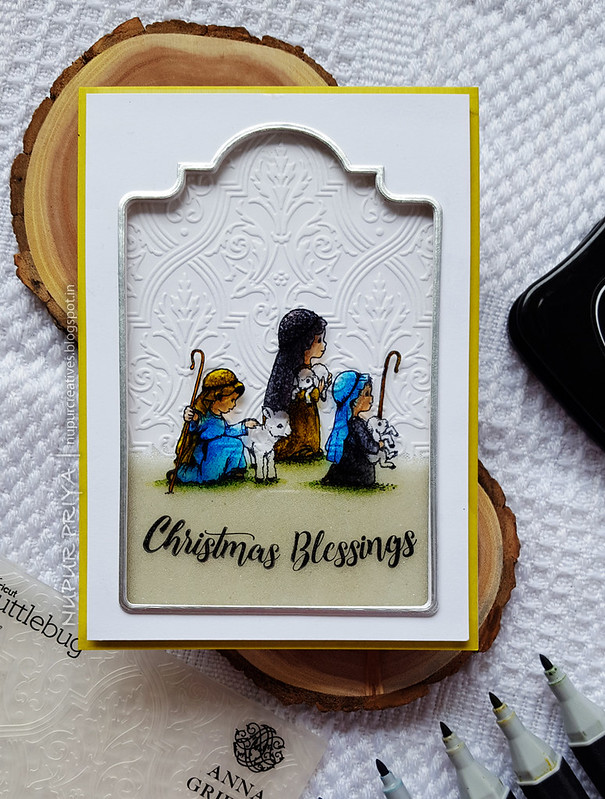
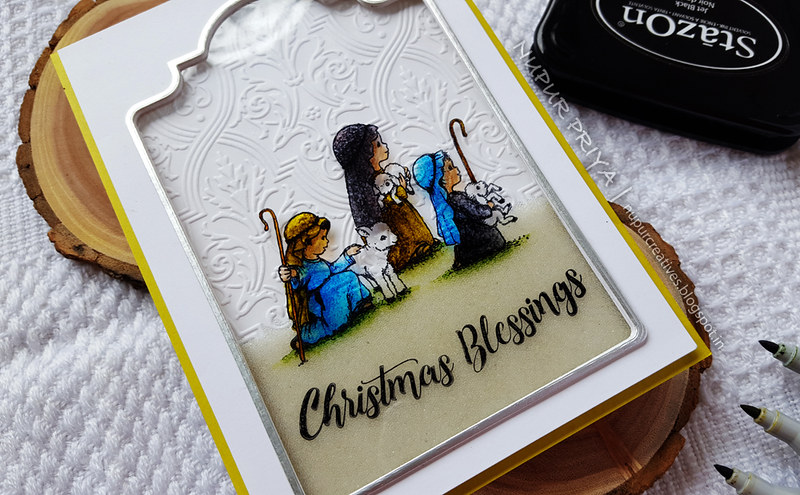
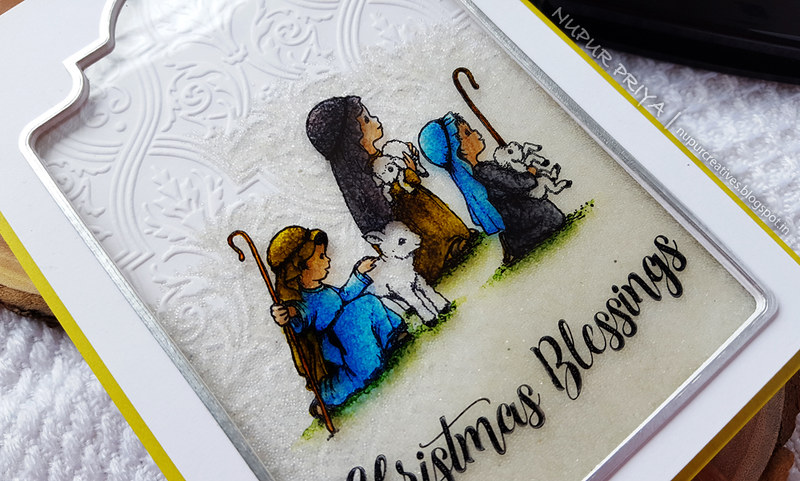
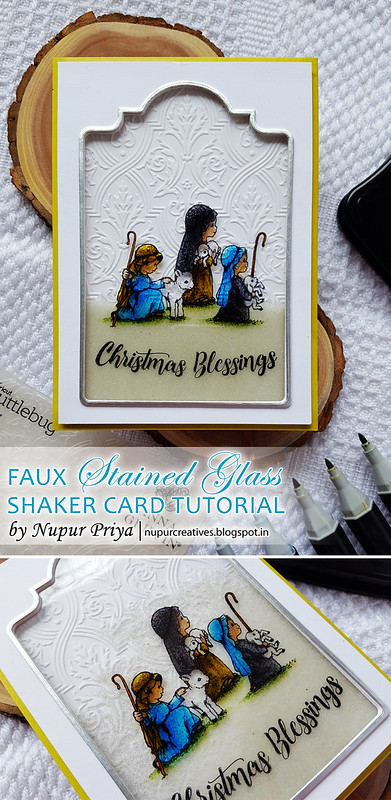
Today I have a Faux Stained Glass Shaker Card to share with you all...
The stained glass effect looks beautiful IRL...
And it is super easy and quick to create this card.
Read till the end for the full supply list and the instructions for this card.
Faux Stained Glass Shaker Card 1

Faux Stained Glass Shaker Card 2

Faux Stained Glass Shaker Card 3

Heartfelt Creations Products:
HCPC-3832 O Holy Night Cling Stamp Set
HCPC-3834 Noel Sentiments Cling Stamp Set
HCD1-7202 Album Tags and Accents Die
GBKK811B1 Clear Cardstock 8.5 x 11
HCPP3-452 12 x 12 Cardstock Pack of 25 - White
TSSZ31 StazOn Ink Pad - Jet Black
159723 Designer Dries Clear Adhesive
D120601 Darice Adhesive Foam Strips

Other Products:
Silver cardstock, blue, green, brown and grey alcohol markers, Transparent micro beads and Cuttlebug Pirouette embossing folder.

Instructions:
 Stamp the images from O Holy Night Cling Stamp Set and  Noel Sentiments Cling Stamp Set  an a piece of 6.5" x  4.5"   Clear Cardstock  using Jet Black StazOn Ink Pad. Color in the image from the back using various alcohol markers.

Take a 5" x 7" white card base and ink the edges with a green marker. Take a piece of 4 3/4" x 6 3/4"  white cardstock and cut the center using the tag die from Album Tags and Accents Die. Adhere the stamped and colored Clear Cardstock on the back of this opening. Die cut 2 pieces of white cardstock and a piece of silver cardstock using both the tag dies at once to create the frame for the opening. Adhere them together to create the raised frame for the focal image. Create a dam on the back of this piece using Darice Adhesive Foam Strips.

Take a piece of 6.5" x  4.5" white cardstock and emboss it using Cuttlebug Pirouette embossing folder. Adhere this to the card base. Pour a generous amount of transparent micro beads in the center and adhere the top panel with the image on this securing all the sides properly.


Hope you like it...

Thank you for visiting today... :)
Nupur
Disclosure : Compensated affiliate links used when possible  at NO additional cost to you.. Thank you! 

Friday, 14 September 2018

Pencil Colored Florals

Hello friends & welcome to Heartfelt  inspiration post
It is a new release week...Woohoooo 

And this month we have 

Oakberry Lane Collection

Come along as we head deep into the woodlands to explore the world of Oakberry Lane…the newest collection from Heartfelt Creations! Filled with delightful illustrations of lively, high spirited and lovable squirrels, this collection is one to capture your heart and creative imagination, and will appeal to both the young and the young at heart! Create irresistible outdoor themed scrapbook layouts preserving those precious moments experienced in the great outdoors, as well as charming handmade greeting cards ready to deliver well wishes and sentimental thoughts to friends and loved ones! Darling illustrations of squirrels at play on teeter totters and tire swings, gathering nuts, and bounding about in beautiful floral gardens with their tails held high, remind us that taking time to play, enjoying the company of others and banding together to make light work of the tasks at hand are important to a well balanced life! A stunning autumn themed color palette of acorn browns, woodland greens, sunset oranges, autumn leaf reds, along with deep plums and dark pinks, lay the foundation for decorative papers displaying delicate lace like patterns, vintage style barn wood patchwork backgrounds, as well as fascinating outdoor garden settings! Create your very own Oakberry Lane scenes with three cute and entertaining cling stamp sets and coordinating dies featuring a substantially sized acorn homestead, an assembling of lovable squirrels at play, and of course Oakberry Lane’s own signature wildflower blossom ready to be stamped, colored and assembled into a realistic 3D floral embellishment to accent all of your Oakberry Lane creations! So take a cue from our furry friends and make time to join in on the merriment! A creative adventure awaits you…we promise!

Oakberry Lane Collection I Want It All is on 10% discount till 15th September or till supplies last so hurry!!!

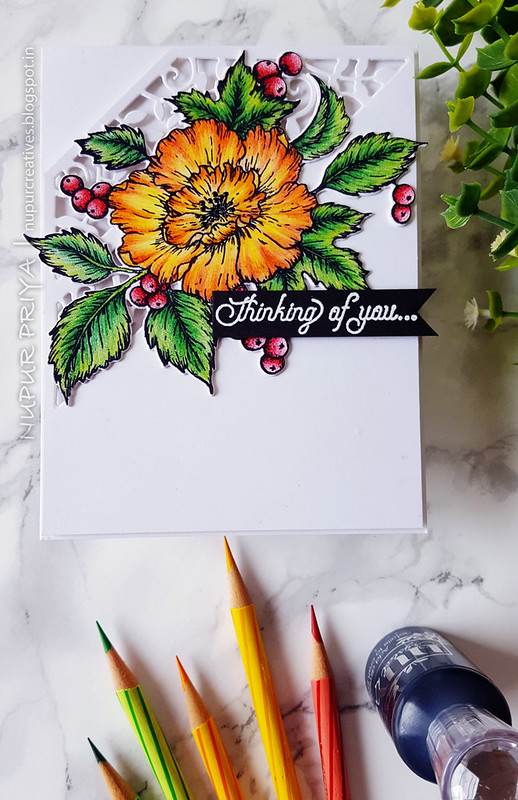
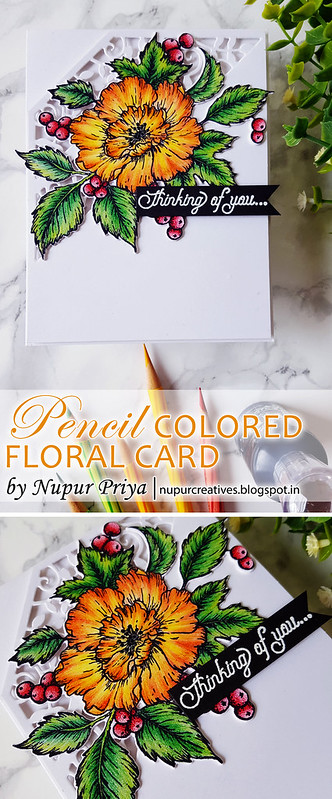
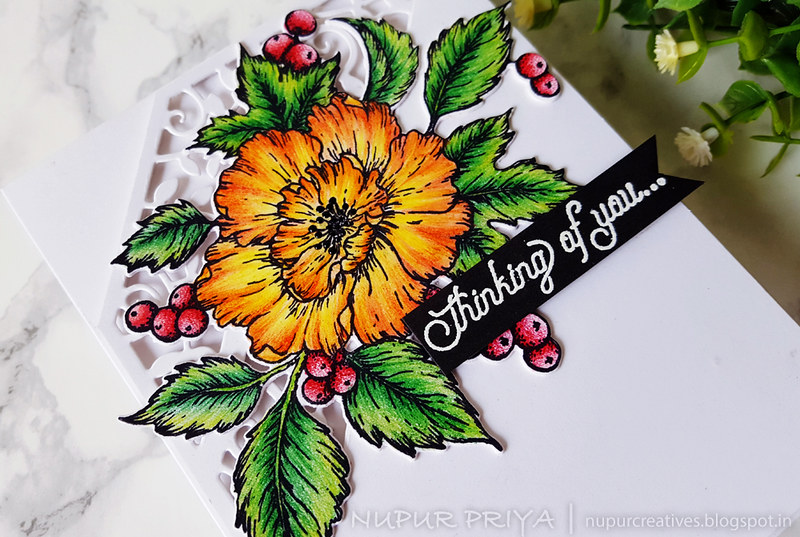
I have made a card with a gorgeous flower image from Oakberry Lane Antics Cling Stamp Set
I have also used Frame a Card Leafy Borders Die to create the background... Using it in a new way which is great to stretch the use of this die to get a different look...
Scroll down for the supply list & instructions on how to make this card....

But before we move on have you checked out the LIMITED EDITION section of Heartfelt Creations store??? They are retiring a lot of stamps, dies, papers and other products and the deals are very good... Dies are available for $14.99 instead of $29.99!

Journal Binder and Pages are also on 50% discount till 7/31/18 !
Don't fail to avail these awesome discount ....

Now moving on to my card...

Pencil Clored Florals_1
Pencil Clored Florals_pinterest
Pencil Clored Florals_2

Heartfelt Creations Products: 
HCPC-3840 Oakberry Cottage & Sentiments Cling Stamp Set

HCPC-3841 Oakberry Lane Antics Cling Stamp Set
HCD2-7190 Frame a Card Leafy Borders Die
HCD1-7199 Oakberry Lane Antics Die
RACP468 Ranger Archival Ink Pad - Jet Black
RPEJ685 Embossing Powder - White
HCPP1-438-1 Paper Pack of 10 - Black
HCPP3-452 12 x 12 Cardstock Pack of 25 - White
RAHT Heat It Craft Tool
D120601 Darice Adhesive Foam Strips
NU650 Nuvo Crystal Drops - Ebony Black
173842 Scor-Pal Measuring & Scoring Board
D110305 Stamp Mat Pad
359848 Spellbinders Tool N' One
411231 5pc. Acrylic Block Set

Other Products:
Versamark Ink, Pencil colors,

Instructions:
Take a piece of 4"x 5 1/4" white cardstock and die cut the top left corner using the 2 smallest dies from Frame a Card Leafy Borders Die. Use the inset dies only without the borders. Cut of the blank triangle above the die cut border. Adhere it to a 4 1/4" x 5 1/2" white cardbase using Darice Adhesive Foam Strips.

Stamp the image from Oakberry Lane Antics Cling Stamp Set using Black Archival Ink on a piece of white cardstock. Color it using pencil colors in shades of yellow, orange, red and green. Die cut it using matching die from Oakberry Lane Antics Die. Die cut one more piece of white cardstock using the same die. Glue them together to add strength to the die cut image. Glue it to the card front as shown. Add Ebony Black Nuvo Crystal Drops to the flower center.

Stamp the sentiment from Oakberry Cottage & Sentiments Cling Stamp Set using Versamark Ink on a piece of black cardstock and heat emboss it using White Embossing Powder and Heat It Craft Tool. Adhere it to the card front slightly overlapping the colored image using Darice Adhesive Foam Strips.

I have 2 more cards made with this same stamp but with a different technique which resulted in a very different look... so watch out for them in the coming weeks...

Hope you like this card...

Thank you for visiting today... :)
Nupur
Disclosure : Compensated affiliate links used when possible at NO additional cost to you.. Thank you! 

Sunday, 22 July 2018

Distress Ink Bleed Coloring

Hello friends & welcome to Heartfelt  inspiration post  Distress Ink Bleed Coloring_pinterest
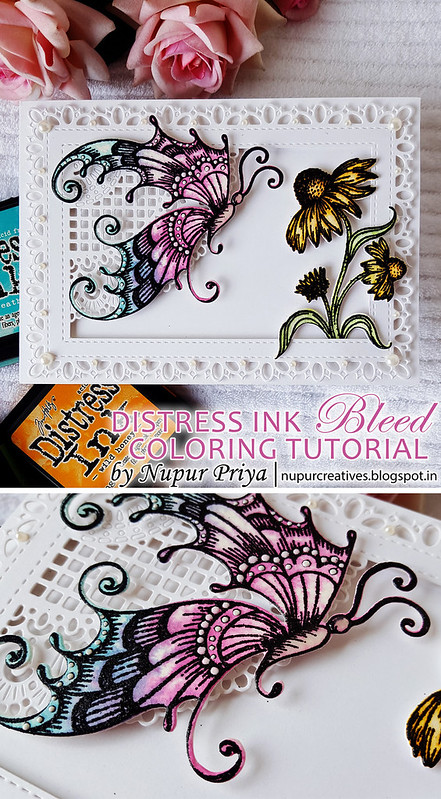
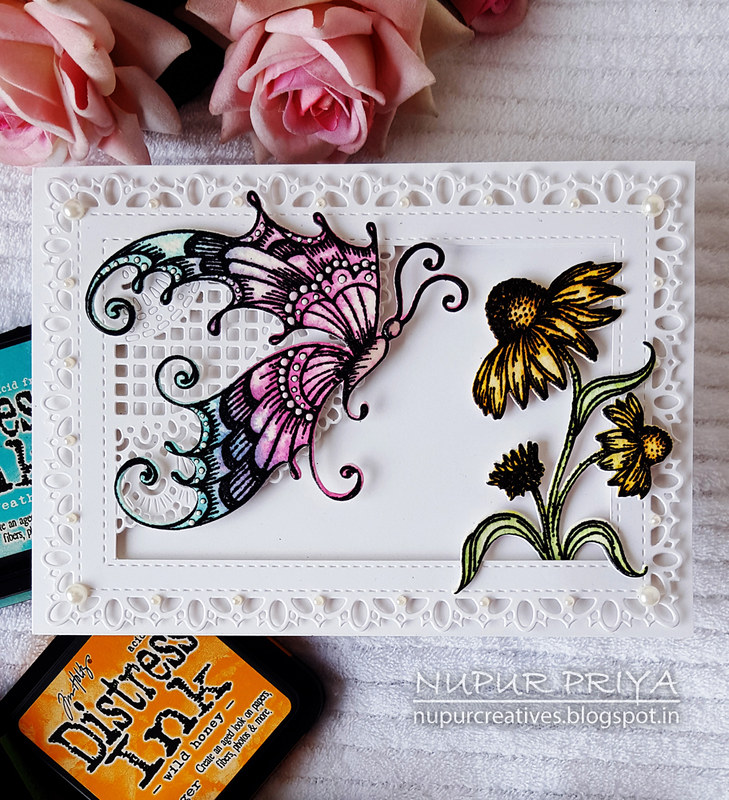
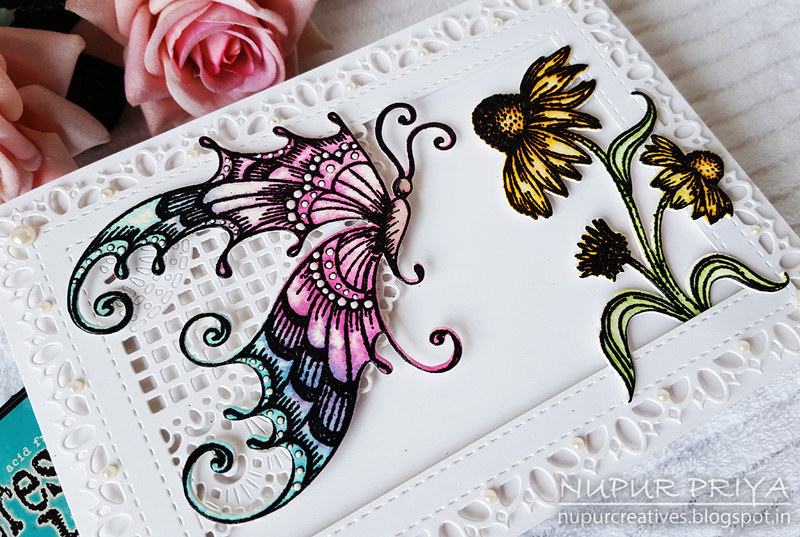
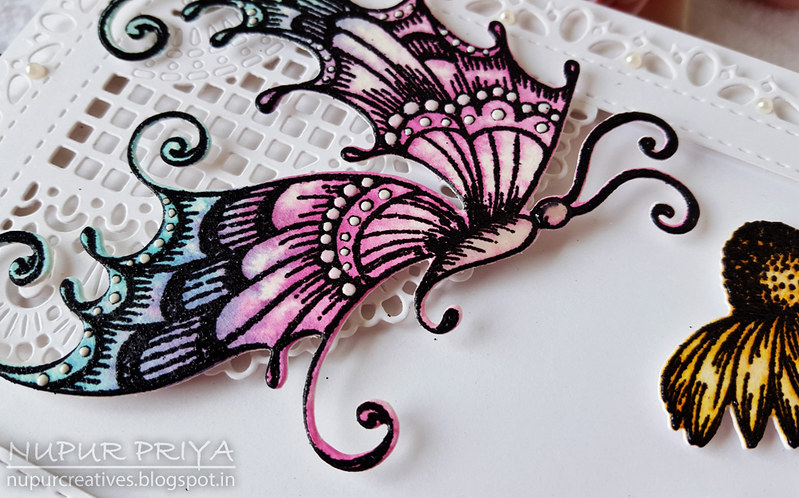
I have made a card with Distress ink bleed technique for today's inspiration... 
I love watercoloring but sometimes I don't have the time or I want a little different look for my images so I use this technique. Distress inks are water reactive inks and they do fun things when they react with water.
I love this technique because it is fun, quick and easy!
This technique is particularly easy if you use MISTI or any other stamp positioning tool but if you don't have one then you can use an acrylic block also but then it will be difficult to use rubber stamp for this technique. However if you are using a photopolymer / clear stamp then it can be done.

In short you stamp the image with any distress ink or you can also use few different colors like I have used Picked RaspberrySeedless Preserves and Peacock Feathers Distress Inks and stamp on watercolor cardstock. I have used my MISTI to stamp my images. Now spray it with water which will spread the ink creating beautiful patterns... If you think the results are lighter then simply repeat the above step again. The more water you spray the more the colors will move and the colors will be lighter and vice-versa. Now the image will be blurred so we have to stamp the image again to get a defined image. At this point you can either use black ink or the same colored inks used earlier depending on the end result that you want. You can also heat emboss it after stamping which also looks very beautiful. For this image I have used WOW Black Glint Embossing Powder so my image glitters and looks very pretty which is hard to capture in pictures.

Scroll down for the supply list & instructions on how to make this card....

But before we move on have you checked out the LIMITED EDITION section of Heartfelt Creations store??? They are retiring a lot of stamps, dies, papers and other products and the deals are very good... Dies are available for $14.99 instead of $29.99!
Journal Binder and Pages are also on 50% discount till 7/31/18 !
Don't fail to avail these awesome discount ....

Now moving on to my card...
Distress Ink Bleed Coloring_1

Distress Ink Bleed Coloring_2

Distress Ink Bleed Coloring_3


Heartfelt Creations Products: 

HCPC-3824 Fluttering Butterfly Cling Stamp Set
HCPC-3826 Blossoming Coneflower Cling Stamp Set
HCD1-7178 Fluttering Butterfly Die
HCD1-7180 Blossoming Coneflower Die
HCD2-7189 Eyelet Rectangle & Basics Die
HCD2-7190 Frame a Card Leafy Borders Die
HCD2-7191 Intricate Swirl Frames Die
HCPP3-452 12 x 12 Cardstock Pack of 25 - White
RACP468 Ranger Archival Ink Pad - Jet Black
NU651 Nuvo Crystal Drops - Gloss White
RAHT Heat It Craft Tool
173842 Scor-Pal Measuring & Scoring Board
532423-KIT Sizzix Vagabond 2 With Solo Wafer-Thin Die Adapter
352854 Metal Tip for Adhesive Bottles
159723 Designer Dries Clear Adhesive
3D1844 3-D Crystal Lacquer
D120601 Darice Adhesive Foam Strips

Other Products:

Picked RaspberrySeedless PreservesPeacock FeathersMowed LawnWild Honey and Vintage Photo Distress Inks, MISTIVersamark InkWOW Black Glint Embossing Powder, xacto knife, Canson watercolor cardstock and pearls.

Instructions:

Die cut a piece of white cardstock using Intricate Swirl Frames Die and Frame a Card Leafy Borders Die so that the corner doily die is flush with one of the inside corners of the frame die. Once the die is cut use a xacto knife to cut the fame using the doily die cut & the stitched border as a guide. Die cut a  white cardbase using Eyelet Rectangle & Basics Die and adhere the die cut frame on it using Darice Adhesive Foam Strips.

Stamp the butterfly image from Fluttering Butterfly Cling Stamp Set on a piece of watercolor cardstock using  
MISTIPicked RaspberrySeedless Preserves and Peacock Feathers Distress Inks and spray it with water to spread the ink. Let it dry or use Heat It Craft Tool to speed up the drying. Stamp again using Jet Black Archival Ink  and again with Versamark Ink. Heat emboss using WOW Black Glint Embossing Powder and Heat It Craft Tool. Die cut this butterfly using matching die from Fluttering Butterfly Die. Adhere it to the card front as shown using Darice Adhesive Foam Strips. Add drops of Gloss White Nuvo Crystal Drops to the butterfly wings and cover its body with 3-D Crystal Lacquer.


Repeat the previous steps to stamp the coneflower image from Blossoming Coneflower Cling Stamp Set but use 
Mowed LawnWild Honey and Vintage Photo Distress Inks this time. Die cut this image using matching die from Blossoming Coneflower Die. Adhere it to the card front as shown using Darice Adhesive Foam Strips. Add few pearls to add finishing touches to the card.


Hope you like it...
Thank you for visiting today... :)
Nupur